Pages

Sunday, December 30, 2012

Glorantha BIF part 2

When we left our first Basic Impetus Fantasy battle the two battle lines had clashed over a shallow hill near the centre of the battlefield.  Sun Dome Templars and Heortling Fyrd were about to try metal on mettle.


Meanwhile, at the other end of the battlefield, the zombies and skeletons raised by the Trolls' Zorak Zoran shamans clashed with the Lunar skirmishers.


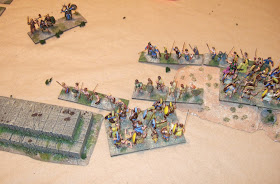
The second Sun Domer pike block clashes with the Heortlings beside the
mysterious stone plinth. 

And those Lunar skirmishers fight on!

A few moments later the main lines have clashed at the far end of the field.  The Lunar
skirmishers have routed as have two units of Zombies under the impact of the main
Lunar units.  Near the plinth, the second Sun Domer pike block has lost its rear ranks.

More of that Lunar-Troll clash.
Caught whilst relocating, Vega Goldbreath is menaced by Rhino Riders.  Vega would play little part in the battle
as it proved difficult to avoid the Rhinos for long enough to both rally and turn back to the fight.
Having defeated their opposing Heortlings, Solanthos Ironpike's pike block
moves off in search of further prey.
The Steel Sword Legion and Yarandros's Chargers take on the Dark Trolls.

The Troll hero intervenes and drives off the Lunar Heavy cavalry.  The giant Troll threatens the rear of the Steel
Sword Legion.


Jamie wanted this one documented - fighting fyrd to their front and Sylphs to their rear, his Sun Domers roll four
sixes from five dice rolled!
But sadly for Jamie the larger pike block is unable to  survive being charged in the rear
by the Rhinos whilst fighting fyrd to their front.  In the same turn the Steel Sword
Legion routs and the battle is won by the Heortling-Troll alliance.  
This was a most enjoyable battle with all four players convinced that their their command was about to break.  In the end it was nice that there was a clear result with both the Lunar/Sun Domer commands breaking in the same turn.

General opinion, from a group of fairly experienced HOTT players was that BIF was slower but gave an enjoyable game.  There were one or two things we weren't sure about:

  1. If a Hero has 100% of its narrow base engaged but an adjacent large unit has 90% of its wider base engaged, which is the main element in the combat?
  2. Does a large Pike unit charged from front and rear get to the +2 or +4 dice?
  3. A spear unit with Impetus 2 faced by enemy infantry is better off charging off the hill to gain the impetus bonus that standing in its uphill defensive position - not sure this feels right.

Saturday, December 29, 2012

Glorantha BIF

Yesterday saw our first game of Basic Impetus Fantasy.  Gus came up from Bingham and Andy and Richard joined Jamie and I in playing a Gloranthan pitched battle.  Gus played Heortlings (with a unit of Rhino Riders as allies).  Andy fought alongside Gus with a Troll army.  Opposing them were Richard with Lunars and Jamie with Sun Dome Templars.

The battlefield with Sun Domers (front left) and Lunars (far left) opposing
Trolls (far right) and Heortlings (near right).
The Sun Domers - front rank, skirmishers of the VIIth Square; nearest
camera, the Banner of Sun County (Hero), and then two blocks of pikes
(large units of heavy infantry - front ranks Templars, rear ranks militia).
The Lunars: Jasper Phalanx in the foregoound, then the Steel Sword Legion and
Yarandros's Chargers.  Some Tarshite hill-men in front (skirmishers).  Oh, yes, and
there's the Crater Makers (Wizards in BIF) on the hill behind. 
The Trolls: Trollkin skirmishers in the front rank, then a mass of undead followed by Troll Hero (with banner)
Dark Troll heavy infantry, and a giant cave troll (classed as a Monster in BIF).
The Heortlings from the left:  Weaponthanes, Fyrd ranked three units deep, Fyrd ranked two units deep and backed
by Sylphs (wind elementals treated as flying Light Cavalry in BIF), and the Rhino Riders (very heavy cavalry).
The Lunars advance and seize a gentle hill to their front.

The Sun Domers also advance.

The Banner of Sun County, carried by Vega Goldbreath.  It is supposed never to retreat but in this game....

Rhino Riders and Sylphs - the heaviest and the lightest cavalry. 

The Heortling Fyrd advance...
... and, disordered by their maneuvering, take some casualties from the
Sun Domer skirmishers.
The Heortlings reach the central hill first.
But the Sun Domers advance straight up into contact determined to push them off.
This is getting very picture-heavy.  More later!  Who will win?

Wednesday, December 26, 2012

Christmas painting progress

Here are some pics of the first results of this Christmas's intensive building and painting session.

I've been thinking of trying a bit of 1930s pulp adventure gaming and have recently downloaded the free basic version of .45 Adventure from Rattrap Productions.  This sort of ritual platform thingie will do for pulp games or in Glorantha.  It also fits nicely into one of the pay slip boxes I liberated from work.  The horrible colour is that of my textured exterior masonry paint which is covering the incised polystyrene blocks.  It'll look better when it's finished, honest. 

Half completed Broo displays half completed ritual platform.
Next up and also with Pulp potential are these figures from GZG's not really Buffy the Vampire Slayer range.  Not-Giles and Not-Spike stand in front of a rock outcrop.  The last is a partly completed repaint of the base of the Smeagol figure (long since broken thanks to a cat knocking him off a mantlepiece) that came with the deluxe DVD version of a Lord of the Rings film.  I still need to repaint the tree and the creepers.

This piece says "Good Smeagol" when you press a particular piece of rock.  I have the evil one as well and might do it on an alternative colour scheme.  


Here's a close up of the figures.


Next up we have the base extensions I did to convert HOTT Shooter bases into Basic Impetus skirmishers.  The rock pieces need some vegetation adding.  Unfortunately I'd forgotten my Sun Domers were on slightly thicker card bases.


And last, a couple of shots of a 6mm scale fantasy dwelling house courtesy of a Kinder Egg.  The ivy on the rear is made from painted tea leaves and disguises some frankly silly window shutters and a moulded-on copyright notice!


Tuesday, December 25, 2012

Season's Greetings

Happy Christmas to all of you!


Christmas Day here has involved the bare minimum of visiting friends and relatives so I’ve been able to spend leisurely hours throughout the day building and painting.  I’ve finished a couple of Ground Zero Games not-Buffy-the-Vampire-Slayer-really figures.  Made considerable progress on a Kinder-egg-sourced 6mm scale fantasy building, started on a mysterious abandoned ritual platform, and made two base extensions that will allow a HOTT Shooter element to stand in as a Basic Impetus Skirmisher unit.  Pictures of all tomorrow!


Sunday, December 23, 2012

STANAVFORLANT


Inspired by having a root through the Third Fleet box, I decided to have another game of the Second Fleet introductory scenario Standing Naval Force Atlantic which pitches the aforementioned multi-national force (known as STANAVFORLANT) and a US amphibious task group based around the USS Iwo Jima against a small but powerful Soviet force consisting of the Cruiser Frunze and the destroyer Ottuk.

The game begins with the Soviets off Jan Mayen island and planning on heading back to base but sinking a few NATO ships on the way.  STANAVFORLANT started off near Bodo whilst the Iwo jima group was off northern Norway.  

The game is fairly simple and just comes down to how much do you want to risk your ships to try and get the big enemy assets; Frunze for NATO and Iwo Jima for the Soviets.

Game turn 1 is a bit of a non-event in this scenario.  Strategic air activity comes first and the Soviets chose to use their Kilpyavr-based Tu-16 recce aircraft to detect NATO Task Group 2 whilst the Norwegian Air Force Orions at Andoya were used to detect the Frunze group (there being no other targets).  Frunze and Ottuk then headed for the North Cape which also happened to take them towards the inviting targets of the Iwo Jima group.  STANAVFORLANT sped after the Soviets on a converging course whilst Iwo Jima’s Task Group 2 moved south to concentrate with the other NATO force.

Game turn 2 saw the exchange of totally ineffective, long-range missile attacks by both sides.  First the Soviet ships tried to attack USS Hawes and Iwo Jima and then the two NATO groups missed very badly (rolling 1 and zero in attack against defence rolls of 9 and 8 respectively).

One game turn 3 (the night turn but it makes little difference this far north in the summer) the Soviets got the initiative for the third time and concentrated their missile attack on HMS Active on AA picket duty at the edge of the STANVFORLANT Task Force (the element at the bottom of a Second Fleet stack has to rely on its own close AA protection and the area AA of other elements in the stack).  Hit several times, Active was soon a burning wreck.  The Soviet force then ran to the north pursued by STANAVFORLANT who managed to damage the Ottuk with missile fire.  The hunted then turned hunter as Task Group 2 closed in and USS Hawes finished off Ottuk with more missiles.  This left Frunze alone and more vulnerable to missile fire than when she had Ottuk to share the defensive duties.  


On game turn 4 the NATO side at last got the initiative and launched an ineffective missile attack on Frunze before moving to position itself across the Soviet vessel’s likely route to Murmansk.  Task Group 2 also moved into a position off Pechenga.  Frunze tried a long-range missile attack to no effect and then moved past the NATO line.

On game turn 5 Frunze’s captain obviously had a change of heart.  He doubled back and took up a position in a fjord hex near Pechenga.  From here he could engage the NATO forces whilst the radar clutter from the fjord walls would interfere with in in-coming missile attacks.  Frunze’s attack damaged the Piet Hein (now on radar picket duty after the loss of Active).  STANAVFORLANT replied ineffectively before withdrawing from the fight and heading north.  Task Group 2 was undetected by the Soviets and decided to lay low rather than risk an unlucky missile sneaking through.  

The Soviets went first on the last turn and had no option but to move Frunze into Pechenga thus ending the game.

The Soviets scored one VP for sinking active and seven for getting Frunze into port.  Eight VP meant a marginal NATO victory.

It’s nearly two years since I last played one of the Fleet Games but it all came back to me pretty easily and I managed to get through the game (solo) in about an hour.  I really must get round to organising a proper game using one of the larger scenarios.
Third Fleet (sort of)

Some years ago I found some boardgames on a stall in the local flea-market.  I picked up a Third Fleet box for a few quid.  I say "Third Fleet box" because I've only just got round to properly assessing what it contains.

There are two of the three maps from Third Fleet, the North Pacific Map (East Siberia to the Aleutians):


And the Carribbean Map, which looks really interesting to play on:


I'm missing the Baltic Map.

I then started going through the counters for the first time.   It seems I have a real mix of counters from Sixth Fleet and Second Fleet (which I already have), some but not all of Third Fleet (I don't have the Americans!) and some of Fifth and Seventh Fleet (I have the Japanese, Taiwanese and South Koreans from Seventh Fleet and the Pakistanis from Fifth Fleet).


I didn't have the Third Fleet rules but I've managed to download these from the Net.  I have all of the Third Fleet charts and as Thirds Fleet is the final development of the rules system I think I might have a go at using some other Net resources to upgrade my Sixth Fleet counters to Third Fleet standards.


Thursday, December 20, 2012

Major Hector McLeod

I needed an extra Big Man for the next Sharp Practice game so I raided a box of Airfix Highlanders.


I don't have any painted Highlanders but I'm sure I can come up with a way to justify McLeod being given command of a small force in the next game.


As Plastic Soldier Review points out this figure has a belt across his right shoulder that's not only not doing anything; it also disappears into thin air when you look at him from behind!  I dealt with this by adding the belt in on his back using Liquid Green Stuff.


Tuesday, December 18, 2012

Speed-painted Rifles

These days I seem to be more and more concentrating on getting figures done to a basic standard I can be satisfied to use in games rather than painting each one as well as I possibly can.  It's quite a liberated state of mind and one that's taken me more than thirty years to achieve!

The latest off the workbench are these 95th Rifles (seen half-finished in the previous post).  I've made one of them into a sergeant and for added distinction given him a dark green band round his base.  I think I might do this for all of my Leaders (in Arc of Fire terms) and Big Men (for Sharp Practice).


In line with my policy of naming Big Men after  famous
biologists, this shall be Sergeant Haldane.

Sunday, December 9, 2012

On the Workbench - December miscellany part two

Besides the Burton Island for the big CWC game there's a load of various on the chocks.  I've mentioned before the importance of building your terrain pieces to fit the boxes you're going to store them in.  I've just discovered that my work's pay slips are delivered from the outsourced payroll company in nice, strong boxes.  Here we see one of them with, on top, a nice piece of thin MDF that will form the base of the model that will be stored therein.  I don't know what kind of building it'll be yet.  


Next, part-completed are a few speed-painted British Riflemen.  I'm doing these so I can field two units of eight, rather than one of twelve, for the next game of Sharp Practice.  They aren't by any means high quality paint jobs but they'll do for now (or will do when they're finished).


I got this broo as a present from Gus a year or two ago.  It was missing an arm and was in an odd, can-can sort of pose.  I've added a chaos-warped arm from a GW Gene-stealer (I understand) and based it on a penny for use in a future SOBH warband.  I had some brown paint spare and have used it to undercoat this figure as it'll probably be mostly brown.


Finally, here are some old figures that I'm panting up to try some different techniques with black or dark blue uniforms.  They may find themselves in some future Pulp Adventures games if I go down that route.


On the workbench - December miscellany

With the next couple of games being ones I can do from existing resources (I'm planning a HOTT game and a rerun of the last Sharp Practice game over Christmas) there's nothing really urgent to paint up.  So progress continues on the USS Burton Island:


Still in two minds as to how for construction should go before I start painting I've applied a bit of green to the lower deck where it's subsequently inaccessible.  Unfortunately, as I have since discovered, the deck should be a natural wood colour.  That'll teach me to rely on internet pictures of other people's models.


I've waterlined the model by cutting along a suitable line with a cutting disc in my hobby drill.  This left nasty burrs which had to be sanded off but can still be seen on the bottom of the hull (below).