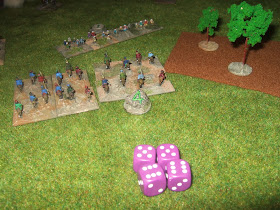
I tried out the most basic rules on the kitchen table and managed to play for about three hours without reaching a conclusion but I can see Maurice playing much quicker than that when I'm more experienced. Not least of the problems was that I started with the armies too far apart. In the pic below the "Russians" (who included some Polish figures) are on the right.
I had the Russian commander launch a strong attack on the left flank with four units of Cossacks. Like all units in this first game, they were treated as trained regulars for simplicity's sake.
Maurice takes some getting used to. Game turns are VERY short - you can expect to get through many more in a game than you might with a more conventional set. In each turn, however, a player only moves one unit or group of units. The four Cossack units above represented one group for most of the game though there were times when I treated only two of them as a group.
This means that you, as commander of your army, need to decide where you want to focus your attention. Any troops for which you don't spend resources (Action Cards) to move will just sit there and wait for you to give them appropriate orders. This may seem unrealistic but my impression so far is that it seems to work.
 |
| The "Russian" centre |
 |
| Turkish artillery bombards |
 |
| A Cossack unit takes maximum Disruption in one turn from the fire of Turkish infantry |
Alternatively each card also has a specific function. For example "Stirrups In" cards give a bonus to charging cavalry, whilst "Find the Way" helps you move through bad going without picking up additional Disruption markers. The rather splendid "That's Not on the Map!" lets you put down a previously unspotted area of marsh or rocky ground!
In the case below a units of Cossacks in massed formation have taken a Turkish infantry line in flank. The Cossacks have used "Stirrups In" to give them a bonus but the Turks have countered with a similar bonus from "Hold the Line!" Sadly this wasn't enough to overcome the -6 modifier for being flanked and the Turks were routed.
In the end I was forced by the clock to call it a day with both sides having lost one unit.
The plan next is to get Jamie involved in a game and then to try out the advanced rules, at which point I'll report back here.


Once you know the cards and are willing just to chuck most of them away to move things (rather than hoard them for the events), the game moves at a cracking pace.
ReplyDeleteAnd, yes, knowing when and how to focus your activities, and how to use the odd turn sequence to co-ordinate your troops is the key to the game.
Cheers, Alan.
ReplyDeleteAm I right in thinking the artillery pretty much has to be brigaded into one big grand battery to be worthwhile?
Pretty much, since in the basic game a Bombard action has to be applied to a group of guns. In the advanced rules there is an All Guns Bombard rule, which allows dispersed guns to fire. Dispersed guns are obviously harder to mover though.
ReplyDeleteYou'll also note that unless you have Artillery Train as an advantage, your Artillery sets up and basically stays where it is for the rest of the game.