Having written some notes on covering Bob Mackenzie's Command Decision scenarios to TacWWII, I thought I'd have a go at presenting something similar on adapting old Sharp Practice scenarios to version 2. My chief source of pre-version 2 scenarios is The Complete Fondler and I propose to work through a sample here.
Let's look at Chapter Thirteen - Fondler's Siege. The scenario begins with some of Richard Clarke's deathless prose in which we learn of the improvised plan to give a bloody nose to a raggedy army of British and French deserters holed up in a ruined castle. Oh and of course there are ladies to rescue!
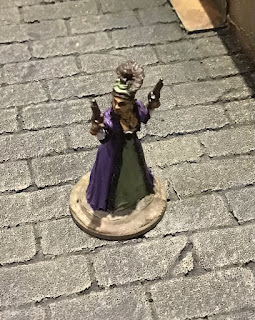 |
| A lady - perhaps not in need of rescue |
I wouldn't dare to challenge this stuff; with its ridiculous names and stereotyped characters (including the charming Major O'Stereotype himself), it is the very acme of Sharp Practice pre-game story-telling.
So we move on the the two sides' briefings. To some extent these recap information we've had from the introduction. Umpires will want to adjust these briefings in line with any changes they need to make to the scenario for logistical reasons (see below).
Force Sizes
Fondler's Siege has a British force consisting of ten 95th Rifles, thirty 60th Rifles, and twelve men of a rocket battery with four launchers. These numbers don't work for version 2 of Sharp Practice as version 1 didn't use the standard-sized Groups. We need the Rifles rank-and-file to be multiples of six and the artillery should have five gunners per piece.
Then there's the enemy - in this case assorted deserters from both French and British armies. Here we require about 170 rank-and-file figures; rather more than we've come to expect of a typical SP2 force!
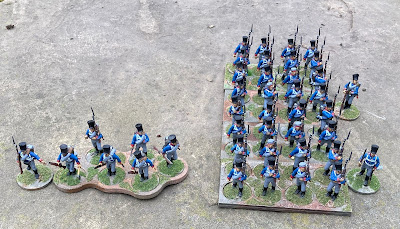 |
| A typical (smallish) SP2 force |
As a result, the advice must be to adjust the forces to meet the models you have available. But how to do that?
My suggestion would be to start off by maintaining the same ratio of force sizes. In this case, the deserters need to outnumber the British by about 3:1. In addition, though, we need to maintain the ability to split the forces as required by the story. In this case, the doughty Sergeant Paisley starts the action "off-camera" with a quarter of the riflemen rescuing distressed gentlewomen.
If we say that he needs a minimum of one Group of six rifles to accomplish this, the implication is that Fondler's force should have a minimum of 24 riflemen in total. Again maintaining approximate ratios of men, we'd then have one rocket team with five crew and their Leader Lt Cholmondley (of whom later).
Keeping the deserter forces in proportion we'd then need a more manageable 72 figures or thereabouts. All the more manageable when we consider that the nature of the force means you can mix and match figures from all over the place! If you think your player representing Fondler needs a few more toys to push around, you'll need to up the enemy in proportion.
Oh, and if you don't have any RHA rocket troops you could either have them firing from off-table or replace them with attached group of guerrillas.
Unit Stats
The Complete Fondler and SP1 both identify troops as Elite, Good, Regular or Poor. Obviously SP2 doesn't use that approach. In addition, SP1 allows troops to switch between line and skirmishing roles during the game. SP2 has them start on one role or the other and stay that way throughout.
We therefore must decide how to "stat up" the troop types and how to divide them into Line and Skirmish troops (or indeed Mass troops if our scenario includes natives or sailors).
The Rifles and British artillerymen are easy in our sample case - the stats for Rifles are in the rule book and we simply need to swap rockets for guns for the artillery.
But what about the deserters? I think I'd take a lowest-common-denominator approach. The British would have been "Regulars" and the French "Conscripts and Volunteers" before they left the colours. Let's go with the latter for the mixed deserter units. This reflects their reduced discipline. Both rated "First Fire" and could "Always" enter Formations so we'll let them keep those statuses. The French can only fire a Controlled Volley the first time they shoot and I can see a bunch deserters being somewhat flaky under fire so let's apply that rule to them.
Taking the worst value for "CrashingVolley", "Step Out", and "Drill" we end up with all threes. And finally I'd be inclined to remove the British Sharp Practice and the French Pas de Charge rules but perhaps give them Aggressive to reflect a degree of desperation? They know that capture probably means hanging.
In terms of unit types, I'd suggest the mutineers are mostly Line troops. Maybe you'd want to give them one unit of Skirmishers to represent the occasional more well-organised deserters. Oh, and Weedy Coves to represent those deserters who are drunk still applies in SP2.
Leaders
This is just a gut feeling that I can't really justify but I rather feel that SP1 assumed a slightly higher proportion of higher-grade Leaders (Big Men in SP1 terminology) than is common in SP2 games. You may want to consider being slightly less generous.
The SP1 descriptors work out as follows:
- Cock of the Walk = Status IV
- Jolly Good Chap = Status III
- Fine Fellah = Status II
- Young Buck = Status I
Clearly we need to include the major characters - Fondler and Paisley for the British and Hogshead and Noudelle for the deserters - without them a lot of the essence of the story is missing. Cholmondley to command the artillery makes sense. We could perhaps do without Frederick Williams but if you have the perfect figure to represent him it would be rude to leave him out.
The deserters have a few minor characters and I'd perhaps leave out one of the "Captains" given that we'll probably be scaling down the rank and file.
Leaders' character descriptions generally read across quite well from SP1 to SP2. The following equivalences might help:
- SP1's An accomplished swordsman = SP2's Flashing Blade
- SP1's An accomplished horseman = SP2's View Halloo
- SP1's Handsome Devil or Pretty Boy = SP2's Handsome Devil
- SP1's Linguist = SP2's Stunning Linguist
- SP1's Athlete or Countryman = SP2's Sporting Life
Where a character description isn't given above and you don't recognise it from SP2, like "an occasional horseman" or "a slasher with a sword", you can ignore it for rules purposes and just regard it as a bit of background colour.
Cards
SP1 used a different deck of cards (in fact two decks) and used them in a quite different way to SP2. As a general rule the Game Cards and Bonus Cards sections of an SP1 scenario can be ignored by SP2 players. However, note that our example scenario uses the Blank Card to determine when the deserter reinforcements arrive. This will still work with SP2; there's a blank card in the deck available from TFL. More on this below.
Deployment
When it comes to deploying units onto the table there are two significant differences between SP1 and SP2. Perhaps surprisingly, one of these is shooting range. In general, weapons shoot about one-third further in SP2 than they did in SP1. This means that the battlefield is effectively smaller - troops get into the action more quickly and there is less need, or scope, to play out the forces' approach marches.
Given this, the designers were able to do away with Blinds, which were templates moved on the table to represent units not yet spotted by the enemy. SP1 used a system of spotting rolls to see if a Blind should be removed and replaced by the troops it represented (if any). Although they did add some interesting fog of war, I've also known them give some game-breakingly silly results. Fortunately, I don't think ignoring them will seriously unbalance most scenarios.
As a general rule I'd suggest that you ignore the notional change in the size of the area covered by the scenario. Place your SP2 Deployment Points in the locations where the SP1 scenario suggests units enter the table. It should be easy enough to assess which of the entry zones represents a Primary Deployment Point. Often Secondary Deployment Points will just be "where-the-road-meets-the-edge-of-the-table" or the like.
If your scenario really does require some degree of hidden deployment or hidden movement there are a few ways you could allow for this:
- give a sneaking attacker a Moveable Deployment Point
- let the attacker dice to see how far forward his fixed Deployment Point can be deployed
- and (defenders in particular) remember that just because your Leader's card has come up, you don't have to put his troops onto the table straight away!
Game Duration
In the context of how long (in game turns) a scenario should last, I think we need to consider what proportion of the plot development each turn represents. Our sample scenario requires Fondler's men to capture the ruined castle, search it for clues, meet up with Sgt Paisley and the rescued ladies, and then hold off a deserter counter-attack. Does the number of game turns required to do this vary significantly between SP1 and SP2?
Having played a few games of both, I'm fairly comfortable with the idea that a turn represents about the same period of time in both editions. As a result the so-many-turns-of-the-Blank-Card approach mentioned above (and used in several of the Compleat Fondler scenarios) should be fine without modification.
Note also that the Task system (roll 1D6 for each action used in attempting a Task) is the same in both versions (unlike Infamy Infamy, which has a unit rolling 1D6 when a it spends its entire activation attempting a task). As such, Task values should port over fine from SP1 scenarios to SP2.
That's it for now, I think, unless any of my horde of readers have any questions about specific SP1 scenarios?


