Sunday, April 23, 2017

Action at the Convent Garden

I was keen to have another try at Sharp Practice 2 so I set up a solo game and managed to play it through on Sunday evening.  The setting was somewhere in Spain in about 1811.

A French column escorting a wagon-load of valuables belonging to King Joseph is stranded in the vicinity of the Convent of the Sacred Liver after their draft horses died of acute glanders.  Led by the devoutly Catholic Captain La Roche, the French have stayed out of the convent itself but taken over the sisters’ walled garden as a place to secure the wagon from prying eyes.

A cavalry patrol under Ensign Lefebvre has been sent to look for La Roche’s column and may arrive at any moment.

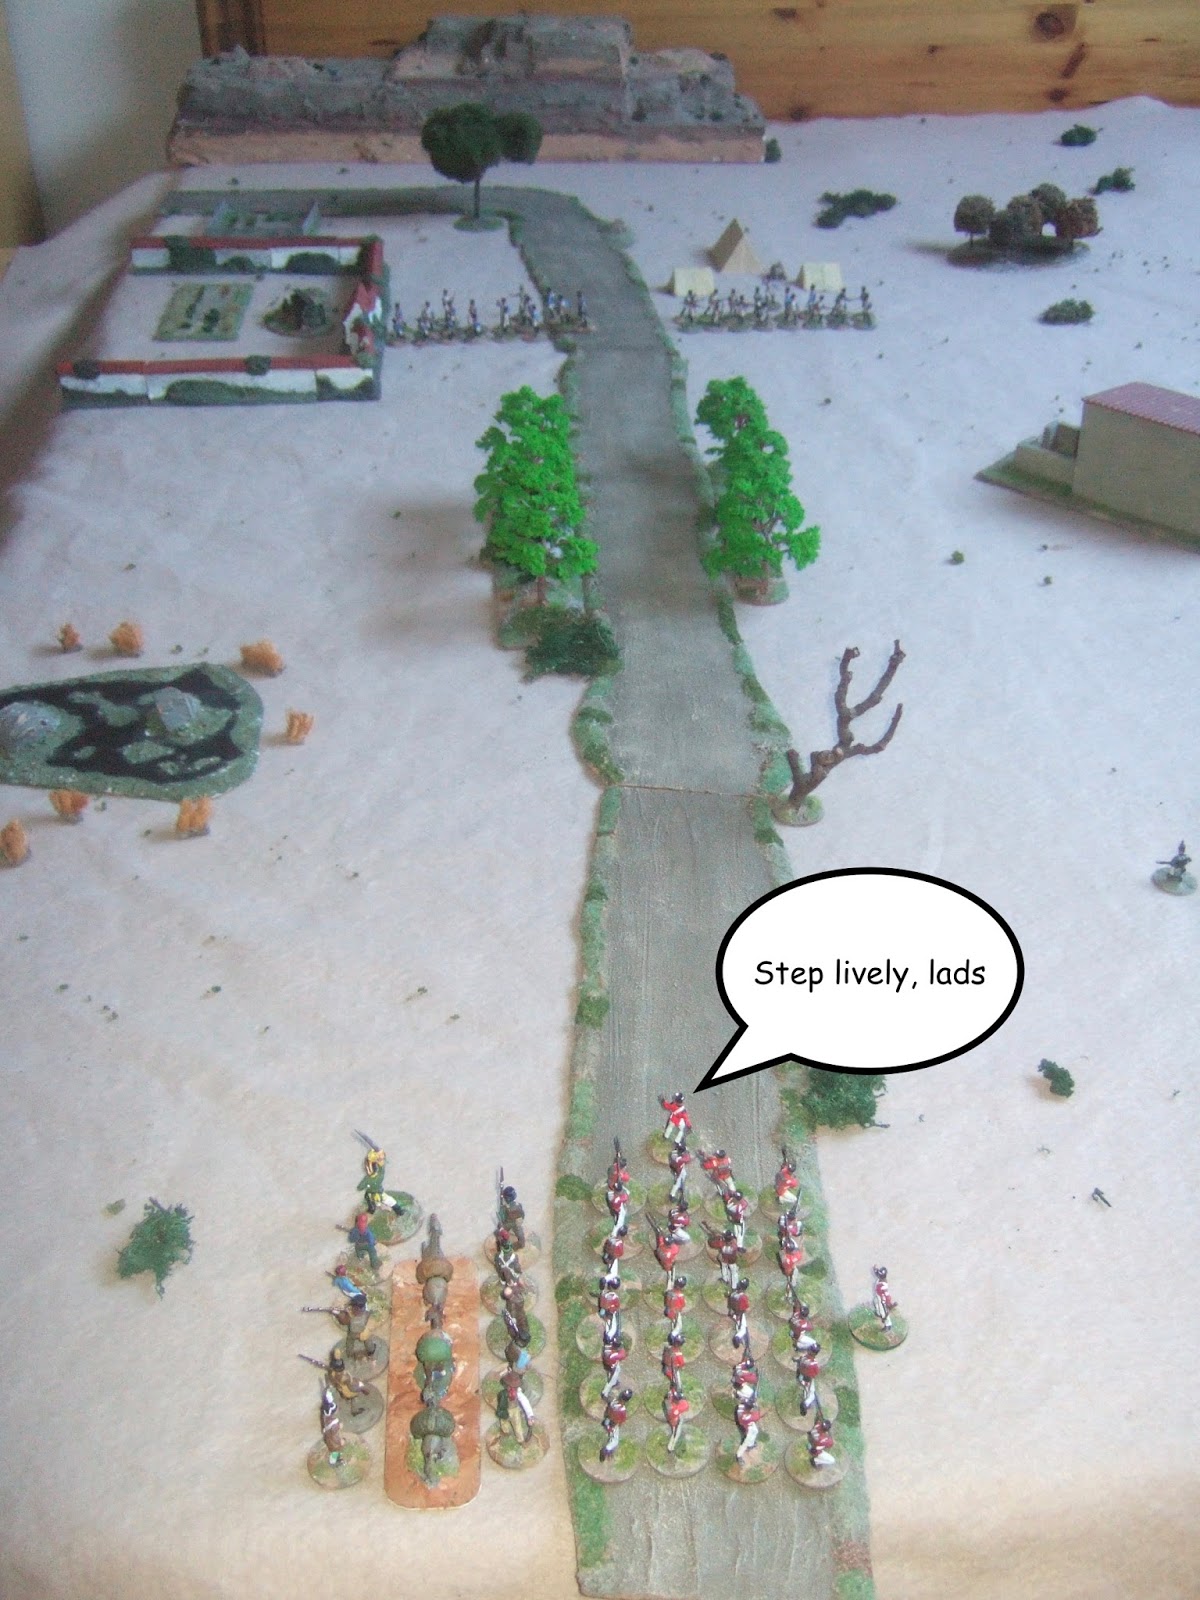
A British force under Captain William Stowe has been tracking the French for days.  Finally they have arrived within sight of the convent garden to see the smoke of French campfires....


The French have lined their stores up along the wall of the garden
making a firing platform for its defenders

Captain La Roche deploys his men immediately outside the walled garden while Lieutenant Fillon
deploys his from their tents.


Along the road marches the main British column led by the detestable Captain Stowe.
The column's mule train is guarded by hired Spanish thugs... sorry, freedom-fighters.
 
Lt Phillipe's voltigeurs line the garden wall

Stowe's men begin to advance.

Lieutenant Fowler's Rifles advance on the British right. Fowler is barged over by his men in their
enthusiasm to get forward and give Johnny Crappaud what for.
In the confusion of battle Fowler's lead group of Rifles end up far too close to the French line...
Meanwhile Captain Stowe begins to wonder if it is a good idea to march in column down the tree-lined road.
Will there be room to shake out into line at the end of the trees?
 
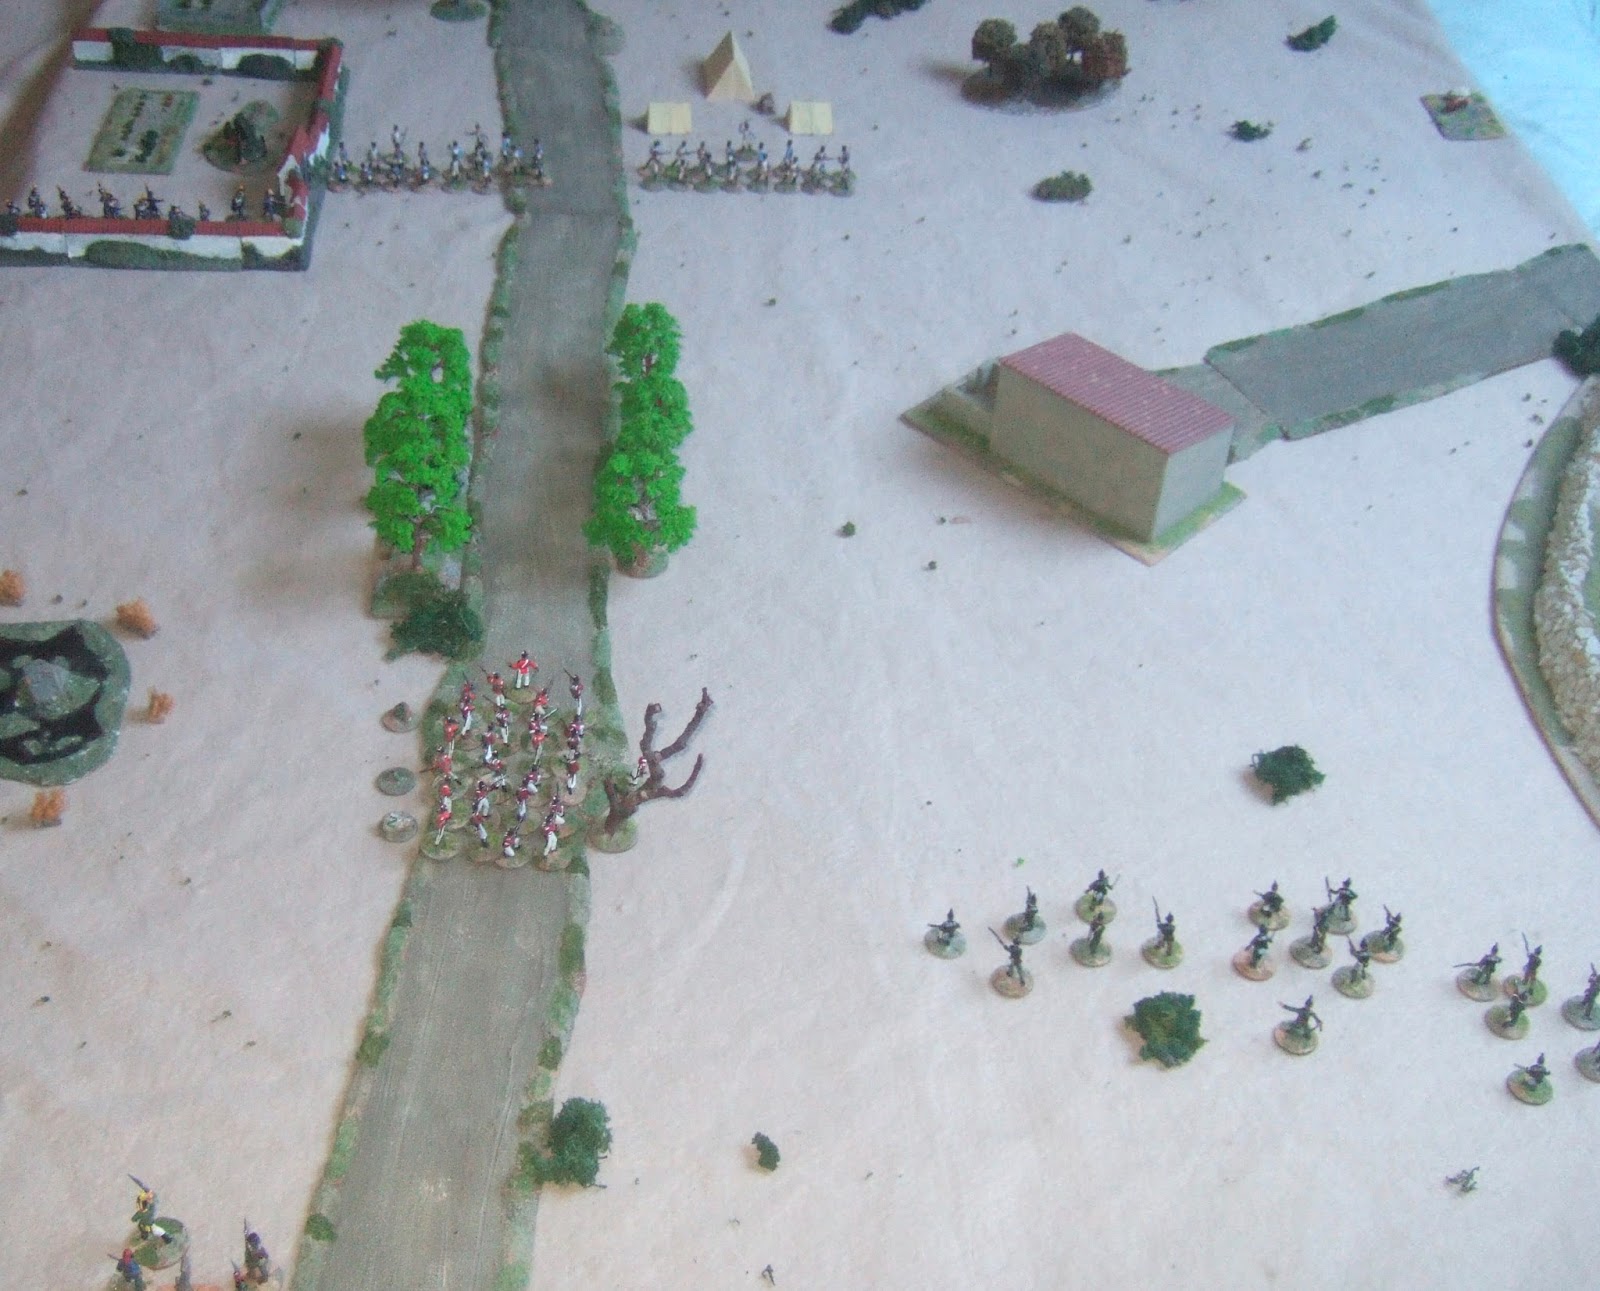
Stowe's column comes under long-range fire from Lieutenant Phillipe's voltigeurs who have now
mounted their improvised firing position in the walled garden.
 
The Voltigeurs cheer as their first shots hit home but then...

Supply difficulties - Phillipe realises he forgot to check his men's ammunition
this morning!  A frantic search initially fails to find the spare ammunition.
Stowe makes the fateful decision to split his column into three groups, left, right and centre to move past the trees.
Meanwhile the Rifles come under withering fire from La Roche's line.  Even with Sergeant O'Malley's group
firing at the French from beside the barn things don't look good.
One of Fowler's Rifle groups falls back. Like the staunch light company lads they are, Stowe's right hand group
opens ranks to let them through. 
Sensing his hour of triumph approaching, La Roche steps forward to exhort his men to yet finer deeds and
is immediately shot in the backside by one of his own!
  
And suddenly it is all over: on the right Sergeant O'Malley's men are withdrawing in good order.
The other Rifles groups flee in panic as does Sergeant Stripe's left flank group of redcoats.
Captain Stowe and Sergeant Stripe are both lightly wounded.
SP2 worked nicely for this solo game.  There were several random events including Fowler being barged over and La Roche being shot in the arse.  In addition, randomised movement gave a couple of unpredictable moments.  Fowler's riflemen, ordered to move forward to the left of the barn rolled 15 on their 3d6 movement and ended up dangerously close to the French line, whilst Lt Phillipe's men, ordered to climb down off the improvised firing step (deemed to be bad going) rolled snake eyes and so didn't move at all!

Sadly I made a complete pig's ear of the British deployment.  I should have put the Light Company men on the right flank and send the rifles up the tree-lined road where the trees and undergrowth would have made little difference to a skirmish formation.

Please excuse the uncompleted mule train (basing mixture still wet at the start of the game) and the untextured sabot bases.  I'm going to need to get more of the latter.

Friday, April 21, 2017

Prof van Langhendonck's Peacemaker


I said that I'd publish some of the stuff that was going on in the background of this year's Crisis Point event.  Here are the details of Leo and Arthur's mission on Day One.  Arthur was off-loading the gas bombs and mortar from the dhow before sailing off with a load of stolen rifles that Leo had retrieved from the old gold mine.


Prof van Langhendonck’s VM Gas Bombs
The Belgian chemist Henk van Langhendonck set out to create a gas that would bring about a humane end to the war.  It would render those gassed so terrified that they would be unable to fight or even to remain in their trenches.  Langhendonck envisaged using the gas on the German forces occupying Belgium thereby forcing them to flee the country.  VM stands for Vredemaker; Flemish for “peacemaker”. 


Unfortunately the first batch of gas was stolen from Prof Langhendonck’s laboratory before it could be properly tested.  Now in the hands of Arab gun runners who plan to sell it to the highest bidder in Andreivia, the gas may have unpredictable effects.


These trial gas bombs are designed to be fired from a specially modified 120mm trench mortar (the Arabs have that too) but with a little simple modification, they could easily be dropped from an aircraft.
Rules
When firing the gas bombs from the mortar use the following stats:


<20”
20”-80”
80”-144”
Dice
Target area radius
Within min range
5/-
6/-
1
3”


Roll 5+ or 6+ to be on target.  If off-target deviate by 1d6” inches.
If there are any figures in the target area roll 1d6 for the effect of the gas:


1d6
Gas effect
1
Lethal - all figures in the target area suffer an attack with “n” = 1d10
2
Non-lethal – all figures in target area take a Morale test at -1 to their roll. Panic and Hero rules apply.
3, 4
Non-lethal – all figures in target area take a Morale test at -1 to their roll.
5
Non-lethal – all figures in target area take a Morale test.
6
Unpredicted – roll for each unit in the target area on the Random Events Table


The gas disperses at the end of the turn.

Thursday, April 20, 2017

A Few Numidians

I continue to blame Simon Miller for my totally unnecessary impulse to build a collection of 28mm Ancients for Basic Impetus and To The Strongest!  The latest symptom of his insidious influence is this horde of Numidian light cavalry.


I'm largely ignorant as to the manufacturers; out of the figures came second hand from eBay.  A few of the horses are Plains Indians from Foundry; left-overs from creating Zebra Riders for Glorantha.


Next up I'm working on some Numidian infantry to go alongside these guys.  They're Victrix plastics and they're rather good!


Monday, April 10, 2017

Crisis Point 2017

I had hoped to blog continuously during Crisis Point using our new iPad but it turns out that Blogspot and the iPad browser are incompatible.  You need to download a specific app and I wasn't going to do that during the event.

However, I did manage to take a load of photographs and here are some of them:

Action started immediately on the Caucasus Front table
with Ian Shaw (left) valiantly defending the Andreivan
trenches against Andy Sangar and Kevin Tingle's Turks.

Setting up the Black Sea Coast table

Bloodbath at the National Museum - Will, Ron and Andy C
 played in Jamie's Pulp Alley game.
The Andreivian Police prevented the theft of an Andreivian
national treasure but did so without subtlety!


SMS Koblenz accidentally pushes aground an
Arab dhow.

A highlight of the afternoon of Day One was Jamie's
refusal to allow Woosterforce to pass down the road to
Tcherbevan until he had (a) checked their paperwork
and (b) spoken personally to Wooster himself. 


Turkish troops reach some of the frontline trenches;
their Andreivian defenders have fled!
Casualties mount up on the Andreivian baseline!
The Australian Light Horse dismount to defend the
Tuzkhur Valley...

... as unidentified Russians enter the area.

Leo's camel train comes under artillery fire killing
one of his pack camels

The Dhow is afloat again and makes off for the Dardanelles.
And look! There in the background is the missing German submarine SMS Haifisch
(one for the Rammstein fans there). 
By the end of Day One the Germans had landed a small force on the Black Sea coast.  it would have been a larger force but the Andreivian Air Force (in the form of a Fokker D.VII) arrived at the crucial moment and bombed SMS Koblenz.  The bomb struck and jammed the Koblenz's steering gear.  Unable to stop or steer out of the way, she ploughed through the string of towed barges taking the first wave (armed Kriegsmarine sailors) to the landing beaches.  The second barge was sunk. All aboard were lost!

However, the Germans did manage to tow off their stranded submarine and so completed one of their aims.

The Turks broke through a lightly-manned section of Andreivian trenches on the Caucasus Front and forced a general withdrawal.

In Eastern Andreivia, Woosterforce reached and occupied the town of Tuzkhur despite a distinct lack of cooperation from the Andreivian commander on the scene.

Two groups of Arab 'merchants' had completed some kind of deal but it was not yet clear what had been exchanged for what.

On day two there would be some adjustments.  There would be some fighting in the capital Tcherbevan as Russian Bolseviks tried to forcibly correct the doctrinal error of Andreivia's Left Social Revolutionary government.


We restructured the Black Sea Coast table to accommodate a fighting withdrawal by Ian's Andreivians and a hasty attack by Kevin's Turks.


Andy S and Arthur took charge of more Turks pursuing Woosterforce from the south.  The Eastern Andreivia table saw fierce fighting along the Tuzkhur Road.


The Bolsheviks advance past the grain warehouse in industrial Tcherbevan

A random event saw the ammunition carrier of the British MG team panic and flee.
That's him, top right above.  Doubtless he'll be shot at dawn. 
Woosterforce comes under artillery fire from the pursuing Turks. The also suffered mysterious gas attacks from an unknown attacker.

A gunnery duel between the Andreivian armoured train and SMS Koblenz
went on for much of the day.
In the end German troops took the train by close assault.


In all I was reasonably pleased with the event. We ended up with 11 players including myself whereas at a relatively late stage in the planning it had looked like we might have as many as 16. For this reason some of the events and forces I'd originally planned for, The Spanish university archaeologists for example, found themselves on the cutting room floor.

Arc of Fire stood up pretty well under the strain of handling larger-than-designed-for forces.  I was pleased with the variant card activation process.

I'll reveal more about the inner workings of the plot in future postings.

Monday, April 3, 2017

And I'll sail her up the west coast...

Last month's flea market boat...


...has become a useful little barge that might see some use in Andreivia at the weekend...


Very much a rushed job. The lower and upper hull were held together by screws so it was easier to take it apart and remove unwanted parts.  I started by removing the moulded plastic face and the sticker decoration from the superstructure and various unwanted fittings from the deck, oh and the wheels (!) from the lower hull.

The removal of the face left a hole in the bodywork. I was able to turn this into a virtue. I ground out the hole with a grinding attachment in my modelling drill to make the entrance hatch.  This was surrounded by sliding doors made from plastic card.


I added an extra set of doors to the rear of the superstructure and a piece of brass tube to form a chimney.

Finally, I painted the barge where it needed it.  I might give it a once over with some Army Painter soft tone to see what effect that has.