Showing posts with label Borsetshires. Show all posts

Monday, January 1, 2018

Christmas Games part three - Sharp Practice

December 27th saw the latest episode in our exploration of the fortunes of the light company of the Borsetshire Regiment during the Peninsular War.  This time the Light Company faced a major French assault.  This was the British player's briefing:

The comforting sounds of the familiar morning routine of the British army all around him, Major Horace Markham, a contemplative pipe in hand, peered into the pre-dawn murk. The frontier village was stout enough but it was not a location he would wish to defend against a larger French force. The sooner he could march the light company back to the safety of the rocky heights and beyond to Wellesley’s army, the happier he would be.

Markham’s mind wandered back to his hurried briefing the previous morning. Lt Colonel Pargeter had begun by apologising for sending him on a Captain’s errand.  Only a company was required but General Wellesley wanted to get Captain Elliott and his rocket detachment out from under his feet and Elliott was senior to Captain Archer of the Borsetshires’ light company.  As this was clearly a job for the lights, Markham must take command.

Seeing Markham’s confusion at this rambling introduction, Pargeter had hurried on. An exploring officer, an Irishman by the name of Hugh Cairns, was to be met at the village of Rebolosa and escorted back across the rocky hills, back into the bosom of the army. For reasons of military convenience, a detachment of rocket troops was to be attached to the force.

The rocketeers had proved excessively wearing during the march.  Knowing the country, Markham had insisted on their taking only pack mules and leaving their carts and wagons behind.  Even so the light company had been delayed by the inexperienced gunners and had only reached Rebolosa at nightfall.    

Ron took on the role of British commander:

British

Major Horace Markham, Level II leader (Red 1)
Corporal Brown, Level I leader (Red 2)
Two groups of 8 Light Company in line, muskets

Captain Archer, Level III leader (Red 3)
Two groups of 8 Light Company in line, muskets

Lieutenant Smythe, Level II leader (Red 4)
One group of 6 95th Rifles, rifles

Sergeant Goodison, Level I leader (Red 5)
One group of 6 95th Rifles, rifles

Captain Elliott, Level I leader (Red 6)
One group of 5 Royal Horse Artillery, rockets 

Jamie and Andy ran the French:

French 

Colonel Paul Remillard, Level III leader (Blue 1)
Sergeant Boutin, Level I leader (Blue 2)
Three groups of 8 Line Infantry, muskets

Captain Laroche, Level II leader (Blue 3)
Two groups of 8 Line Infantry, muskets

Lieutenant Didier Delabord, Level I leader (Blue 4)
One group of 8 Dragoons, carbines and sabres

Lieutenant Loisier, Level II leader (Blue 5)
One group of 6 Voltigeur Skirmishers, muskets

Sergeant Dalembert, Level I leader (Blue 6)
One group of 6 Voltigeur Skirmishers, muskets

Captain van Niekirk, Level II leader (Blue 7)
Two groups of 8 Nassau light infantry, muskets
One group of 8 Nassau grenadiers, muskets

Captain Etienne Chouxfleur, Level II leader (Blue 8)
One group of 8 Hussars, Scouting Cavalry, sabres

In the photo below the red star shows the  British exit point through the mountains.  The red oval surrounds the wagon that marked the British Deployment Point.  The French Deployment Point was on the edge of the table to the right of the blue square.


As the Borsetshires rushed to their posts, the first French infantry formed up in an open column near the road.


Some Voltigeurs arrived and advanced along the road...


Under the direction of Captain Elliott the Light Rocket Battery hastily deployed between the large house and the barn.  They launched a first rocket but it fell short and exploded harmlessly.


Meanwhile, Captain Archer had started to deploy half of the company to stop a French advance down Rebolosa's main street whilst Major Markham took the other half of the company to escort Cairns to the mountains.

Archer deploys into line.  Is Markham (in the background) preparing
to leave the rest of the company in the lurch?

Archer's men come under fire from the advancing French voltigeurs who are backed up by Delabord's Dragoons.


Meanwhile something of a traffic jam is developing on the French right....


As the French columns converged on Archer's small line, voltigeurs supporting on their flanks, the RHA fired again.  Once more the rocket fell short but this time it fell within shrapnel range of Sergeant Goodison's riflemen!


On the roadway, Archer's men were charged by Delabord's dragoons.  


Sadly for Delabord, his men had not quite reached the point of contact when the Borsetshires let loose an impressive volley of musketry.  At this point I made an error in applying the rules.  One group of the Borsetshires was routed but so was the group of Dragoons.  The result should have been different with the shock and casualties on the British side being shared equally between the fighting and supporting groups.


Either way, though, it had been a small victory for the British, although their Force Morale was falling faster than that of the French.

At this point Ron began to try and extract his forces from the tightening trap.  Although the Dragoons had been driven off on the right and seemed unlikely to bother him again, on the left French pressure was beginning to tell and the Hussars threatened a wide outflanking sweep.  The narrow main street of Rebolosa was soon thronging with confused British soldiers.


Menaced by Voltigeurs, the rocket troops withdrew.


It had taken Lt Chouxfleur an age to get his hussars through the wheat fields (not that they were bad going but suddenly Andy was unable to roll anything higher than a two on his movement dice).  

Faced with a choice of dashing for the higher ground and perhaps safety or standing and firing at the approaching horsemen, Lt Smythe of the Rifles made the wrong call.


The brief fusillade was ineffective and Smythe's men were badly mauled.  The lieutenant himself fell senseless and had to be dragged away by the few survivors. 


Although Major Markham, having escorted Cairns to the safety of the mountains, returned with one group of infantry, the collapse of the British position was already underway.  Force Morale was down to four, with the loss of one command card resulting.


As the British attempted to push through the village to safety, the first group of Voltigeurs entered Rebolosa...


... only to find themselves scattered by rampaging livestock!


The damage to French pride and cohesion was minor, however, and further casualties to Sergeant Goodison's rifles tipped the balance. British Force Morale reached zero and the retreat turned into a rout.
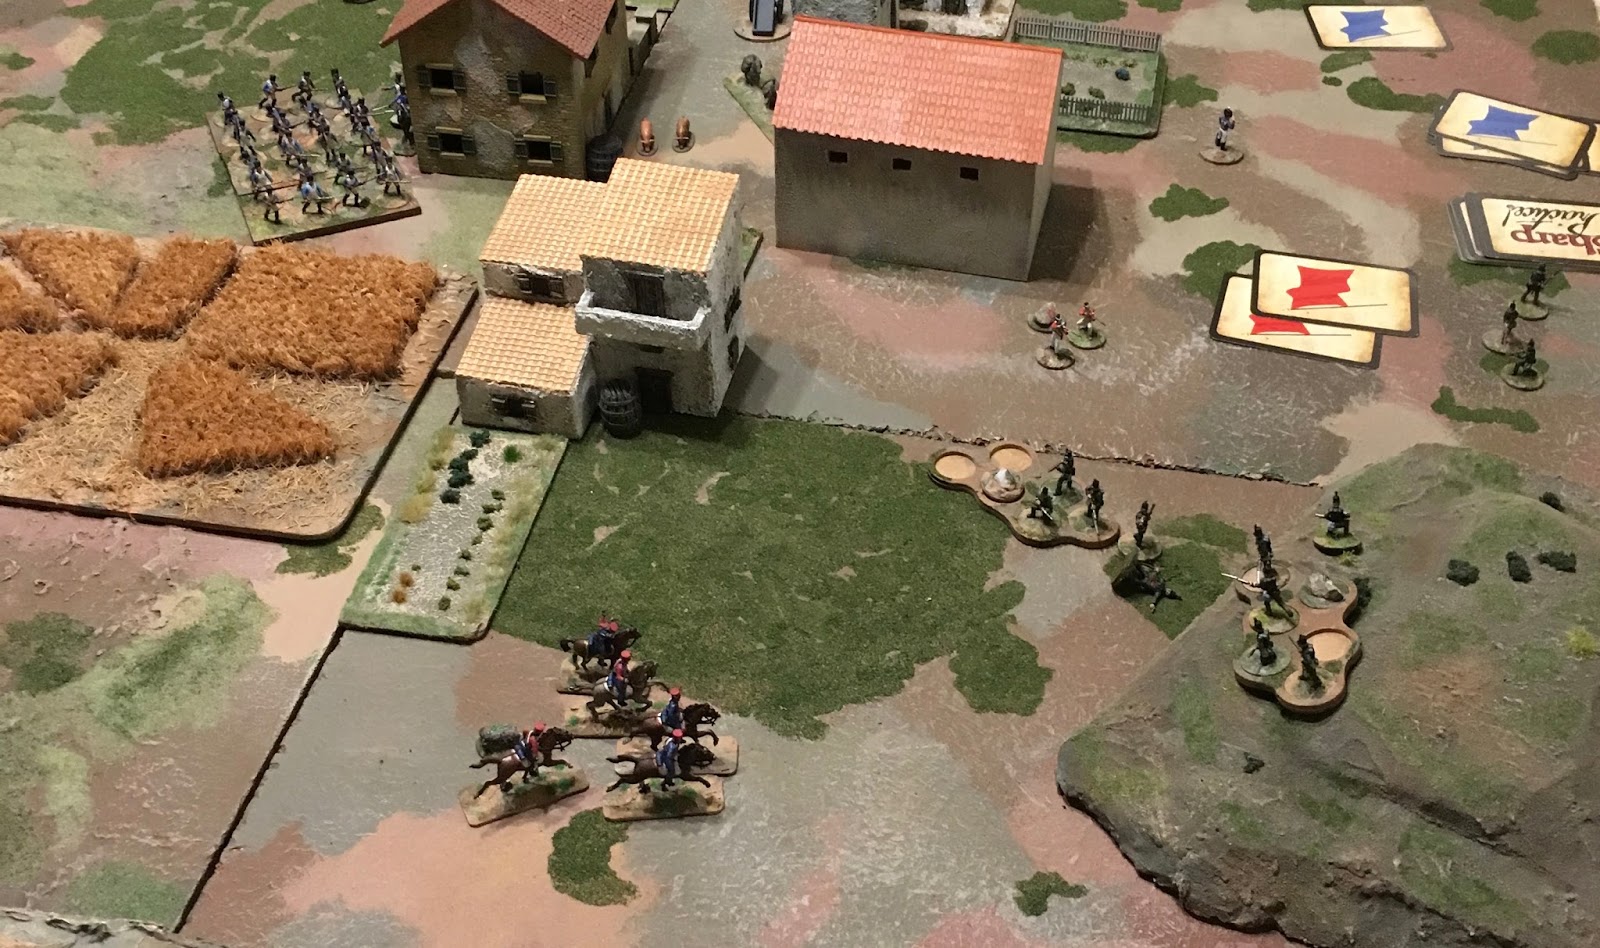

So the Borsetshires have taken a very bloody nose at Rebolosa.  Who will manage to escape the clutches of Johnny Frog?  Perhaps only the need for Lt Chouxfleur to rally his Hussars gives any cause for hope?


I think there's a case for the next scenario being a chase across the high moorland as the French continue the pursuit of Major Cairns.  I shall have to give this further thought.

Saturday, November 11, 2017

On the workbench - November

Almost finished on the workbench at present is my Warbases 28mm watchtower.  This is the second MDF building I've put together and it's proving an enjoyable little project.

I started off building the model straight out of the packet; straightforwardly done whilst I was watching a Rugby League World Cup match on the telly.  Then, when the glue had dried, I proceeded to thatch the roof with flattened worms of Milliput, scored with a craft knife.


As you can see, I've also added some filler to the walls to add a bit of texture.

The first coats of paint are now on and there's just a bit more dry brushing to do on the woodwork.


I'm now debating whether to put it on a base, perhaps on something of a mound.

In production for Andreivia (and perhaps for WW2) is this strong-point.  It's the old Airfix gun emplacement but it's lacking the original gun.  I'm considering using the old spring-loaded Britains gun in its place.  The problems with doing this are twofold. Firstly the gun's a bit big and secondly, it's probably at least fifty years old; should I be repainting what some might consider an antique?


Moving on to yet another period, for Sharp Practice I'm working on a couple of additional groups for the war in the Peninsula.  First up these HaT Royal Marines, who just need their bases completing...


... and then some more HaT Spanish Guerrillas (who may double as United Irishmen for the 1798)....

Monday, October 16, 2017

The Borsetshires at Vimeiro

Saturday saw the first game proper of my attempt to follow the Borsetshire Regiment through the Peninsular War.  I'm regarding the Obidos action as having been a rules teaching session.

Our action took place on 21st August 1808 near the Portuguese village of Vimeiro.  There, Sir Arthur Wellesley is holding a defensive position along a reverse-L-shaped line of hills.  He is under attack by the army of Marshal Jean-Andoche Junot. Junot has attempted to outflank Wellesley by sending troops to attack the left flank of the British position on the north-south ridge.

Wellesley reacts by moving his troops north to reinforce the north-south ridge.  Having an elevated position and the interior line he is able to respond quickly to Junot's move.  So for so historical. However....

One of Wellesley's ADCs, Major Hector McLeod, was sent to make certain that a key bridge north of the British position had been destroyed as per the general's instructions.

Situation at Vimeiro after Wellesley had shifted
his right flank forces to the north-south ridge.

Finding the bridge intact and no sign of the engineers sent to destroy it, McLeod hurried back to the British lines and commandeered the first troops he could find to defend the threatened sector. These just happened to be the light company of the Borsetshires and some soldiers of the 95th Rifles.

Meanwhile, Captain Etienne Choufleur of the 11eme Hussards had also discovered the unguarded bridge and dashed off to gather whatever troops he could find to force the bridge and win eternal glory!

Our table looked like this:


The north is at the far end so this photograph shows a bird's-eye view from above the French forces attacking Wellesley's left.  

The river was passable at the bridge, obviously, but I allowed for certain river sections to be fordable on a roll of 6 on an ordinary die.  The French ended up deploying near the curve of the river in the north but unluckily none of the three possible fording locations at that end of the battlefield proved to be practicable.  This led the French with no alternative but the march to the bridge.

The French had:
One group of hussars under Choufleur
One group of dragoons under Lt Delaborde
Five groups of line infantry under Lt Duval, and
Two groups of voltigeurs under Lt Maurice.

The also had a fixed secondary deployment point, an ammunition wagon and a musician, though none of these played a significant role in the action.


McLeod's scratch force happened to enter closer to the bridge.  He had:

Four groups of light infantry in line, and
Three groups of 95th Rifles skirmishers.  

He was assisted by the officers of the Light Company of whom Lieutenants Villiers and Rogerson played a significant role in the action (i.e. were represented as leaders in the game) and by Lt Smythe of the Rifles.

The head of the British column arrives.
The fighting began with an exchange of fire across a ford that the British had found immediately to the north of the bridge.


The results went significantly to the advantage of the French.  Although Sgt Leblanc of the Voltigeurs was slightly wounded, his men killed three of the Riflemen at the ford in the first volley!


The French now spent some time getting their forces into position to assault the bridge.  Lt Delabord's dragoons moved to a position on the extreme left of the French attack but they did so without any noticeable spring in their step.


With the French rather dawdling in their approach march, McLeod was able to form a line to defend the bridge.


With time running short, Major Choufleur determined that the only way to force the issue was to lead his hussars in a death-or-glory charge across the ford and onto the flank of the British line.

The attack as successful, though not brilliantly so.  The left of the British line fell back in confusion with the beastly Lt Rogerson falling wounded to the ground.  His men were disinclined to assist and left him to the mercy of the French. 


At this point time beat us.  Rolls on the relevant table had been such that very few points of Force Morale had been lost by either side so the action could well have gone on for another hour or so but family commitments didn't allow that.  

The order of card play in the next turn would probably have been crucial. If the British got a couple of command cards early, Smythe's Rifles in the tree-line would have used Sharp Practice to reload and then hoped to pour fire into the hussars before the latter could rally off the shock they had accumulated in the recent fisticuffs.

Given that Wellesley didn't have his flank turned at Vimeiro, we must assume that some deus ex machina intervened and that Choufleur was not ultimately successful in forcing the issue on this occasion.  He will return, however, to plague the Borsetshires in the future.  

The fate of Lt Rogerson remains to be discovered but few will mourn his absence from the Regimental mess this evening.

Thanks are due to Kevin, Phil, Andy and Arthur for their staunch efforts in fighting this action.

Tuesday, October 3, 2017

On the workbench - the signal tower continued

I spent a pleasant couple of hours this evening listening to music and progressing the building of my 20mm scale signal tower.

First up I cut to shape the plastic strips I'd previously identified to give a sloping surface to the top of the parapet walls.  As you can see I've also added a roof to the tower.  This is made foamcore with floorboards scribed in with a pen.


There's a rare earth magnet embedded in the underside of the roof.  It'll be useful when I come to install signal equipment in the tower.

Oh and I've cut some steps into the approach ramp.

And finally I've added the pantiles to the tops of the walls.  They are made out of some fine corrugated cardboard.


Monday, October 2, 2017

The Two Towers

I've made some progress on the signal tower this evening.  Glued together the main structure, added the entrance steps and generally glooped the base...


... funny, the word "glooped" doesn't seem to appear in my Mac's dictionary.


The second of our Two Towers appeared in the post today. It's the (long overdue but I wasn't expecting it so haven't missed it at all) souvenir gift from the 2016 Berkeley Hordes of the Things Tournament.


I know, weird isn't it?  It rather reminds me of the Unseen University in Ankh Morpork.  I believe it's sculpted by Dreamholme Studio and was kindly mailed to me by Steve Price.  There's also a second one for Jamie but "The Three Towers" doesn't have the same resonance somehow. Thanks Steve!


Looking at the doors I'd say it's just about 15mm scale.  It's crying out for a nice paint job.  I'm thinking of painting it in black and white like the medieval buildings in Chester or Herefordshire.

Saturday, September 2, 2017

Officers of the Borsetshires - Rolica

As I reported recently, we used the Sharp Practice rules to generate the characters of a selection of officers from the Borsetshire Regiment.  I intend to come back to these guys on an occasional basis as we follow the Regiment through the War in the Peninsula.  Having done this I thought it would be a good idea to record the result here in case the original paper copy gets lost.


We start with some of the battalion officers and then go on to the officers of the Light Company, who will be the main focus of our games.

Lt Col Pargeter is the commanding officer of the battalion. He comes from new money and has extravagant wealth. He is of average build and a good looking chap. Honourable and charming, he is a stunning linguist.  He's a Level IV leader.

The first of the battalion majors is Major Markham (a Level II leader). An honourable chap, he rose from the ranks to his current elevated position. Though fair of face he is a sickly cove. He is thoroughly disliked by officers and men alike (the men prefer to be led by a real gentleman).

The other major in the battalion is Major Tavington. Like the Colonel he comes from new money but is personally impoverished. Perhaps his mill-owner father disapproved of his career choice?  Tavington is of average stamp and fair of face. He is affable but is secretly a cad.  He's another Level II leader.

Sergeant Major Horsham is the Borsetshires' Quartermaster. Thoroughly disliked (but what efficient Sergeant Major isn't?), Horsham is a good looking chap but a sickly cove, having suffered greatly from an ague contracted during the campaign in the Low Countries. He's a Level II leader.

We now come to the officers of the Light Company. Captain Archer (of course) commands the company.  He's a Level III leader and a former gentleman ranker. Diminutive and of plain and unremarkable looks he is a thoroughly dislikable cad.

The light company's senior lieutenant is Lt Villiers (a Level II leader).  Coming from a military family he is very conscious of the honourable behaviour expected of a gentleman and an officer. Though fair of face he is a diminutive chap and very sensitive about his height. His short temper and wicked tongue lead others to regard him as a vile individual.  Despite this, the Colonel was happy with is performance at Rolica.

In that regard he is matched by the company's junior lieutenant. Beastly Lt Rogerson shares his brother lieutenant's military background but unlike the poverty-stricken Villiers, Rogerson's uncle is a General and he enjoys money and influence.  A giant of a man, Rogerson is fair of face. He's another Level II leader.

Sergeant Grundy (Level I leader) is a strapping fellow but hideously scarred. He's a vile individual who rules his men with a rod of iron.

The other light company sergeant is Sergeant Walter (also a Level I leader). Another strapping fellow and a handsome devil he is affable and popular with the men.

The company's three corporals are all Level I leaders.  Amos Able is a sickly cove, though a handsome devil. He's a vile individual despised by all.  Michael Norris is a strapping fellow, though plain and unremarkable of visage.  He manages to make himself thoroughly dislikable. And finally we have John Brown. He is something of a mystery, rumour having it that he is the illegitimate offspring of some noble house. This flashing blade taught fencing to gentlemen before joining the army.  He is fair of face and an affable fellow.  Brown did a solid job when the light company first encountered the French near Rolica.

So there we have it. With the exception of Colonel Pargeter, Sergeant Walter and the mysterious Corporal Brown, the current crop of leaders don't have a great deal to recommend them. I wonder if the Borsetshires are a happy regiment at this time?


Saturday, August 26, 2017

Near Obidos, Portugal, 15th August 1808

Andy, Chris, and Arthur came over today and we had great fun determining the names and characters of the officers of the Borsetshire Regiment and particular of the Regiment's Light Company.  All in all they seem to be a pretty unsavoury lot and I don't think it will be a happy mess, at least until some of the current crop are weeded out by the exigencies of warfare.

After that we played what will hopefully be the first of a series of games following the Borsetshires through the Peninsular War.

The action was based on the clash between Sir Arthur Wellesley's advanced guard and the French rearguard on the even of the battle of Rolica in August 1808.  Andy played a small (probably too small) swarm of French voltigeurs whilst Chris took on the role of Lt Villiers of the Borsetshires.  Arthur played the role of Sergeant Goodison, whose dozen men of the 95th Rifles were on the Borsetshires' flank.


Andy was tasked with holding off the British whilst gunners and drivers tried to empty a tightly
wedged wagon said to contain the General de Brigade's collection of stolen statuary.


First to arrive on the table was a small group of voltigeurs under Sergeant Jarier.  Almost immediately they were in trouble. It seemed their water discipline had been poor and it became apparent that, parched, they were lagging behind their expected pace under the hot Spanish sun.

Worse yet, three of the men thought they had spotted a Spanish señorita entering the building in the corner of the battlefield.  Keen to 'present their cards' they set off for the farmhouse leaving Sergeant Jarier with only three men.

Jarier set off after his men and caught them up as they crossed a small field...


... as Jarier began to remonstrate with his men, a fusillade of shots rang out as Sergeant Goodison's riflemen found their range. At once Jarier fell wounded and the three men decided that the farm house was probably a good place to hide too.

Meanwhile Lt Villiers' men of the Borsetshires' light company were approaching in open column.


By now the rest of the French force, two more groups of voltigeurs under Lt Delaborde had arrived in the centre.  There was some exchange of shots with Goodison's Rifles.


Keen to exhort his men to greater deeds, Goodison stepped forward and was shot in the buttocks for his trouble.  A random event came up, the Rifles had acted last so got a 'shooting random event' and Arthur rolled snakes eyes!


Meanwhile the Borsetshires marched up the flanks and Delaborde's men turned to face them.


The Borsetshire lads turned to form line, advanced and they sent a punishing volley into Delabord's men.


Caught in the crossfire from light bobs and rifles, the French stood no chance an they were soon in headlong retreat.  French force morale was down to two when we called it  day.

So Lt Villiers and Corporal Brown of the Borsetshires survived the Regiment's first action in the Peninsula.  Sir Arthur Wellesley will now march his army to Vimeiro, where the Borsetshires may again see action.

All enjoyed the game and we agreed we should play some more while the rules are fresh in our minds.