So I thought I'd set down some objectives and aspirations gaming-wise, for the coming twelve months. No I'm not going to call them resolutions.
So what games do I want to play?
Well, more Chain of Command is definitely top of the list. The Big CoC game of Operation Archery at Gauntlet was great fun.
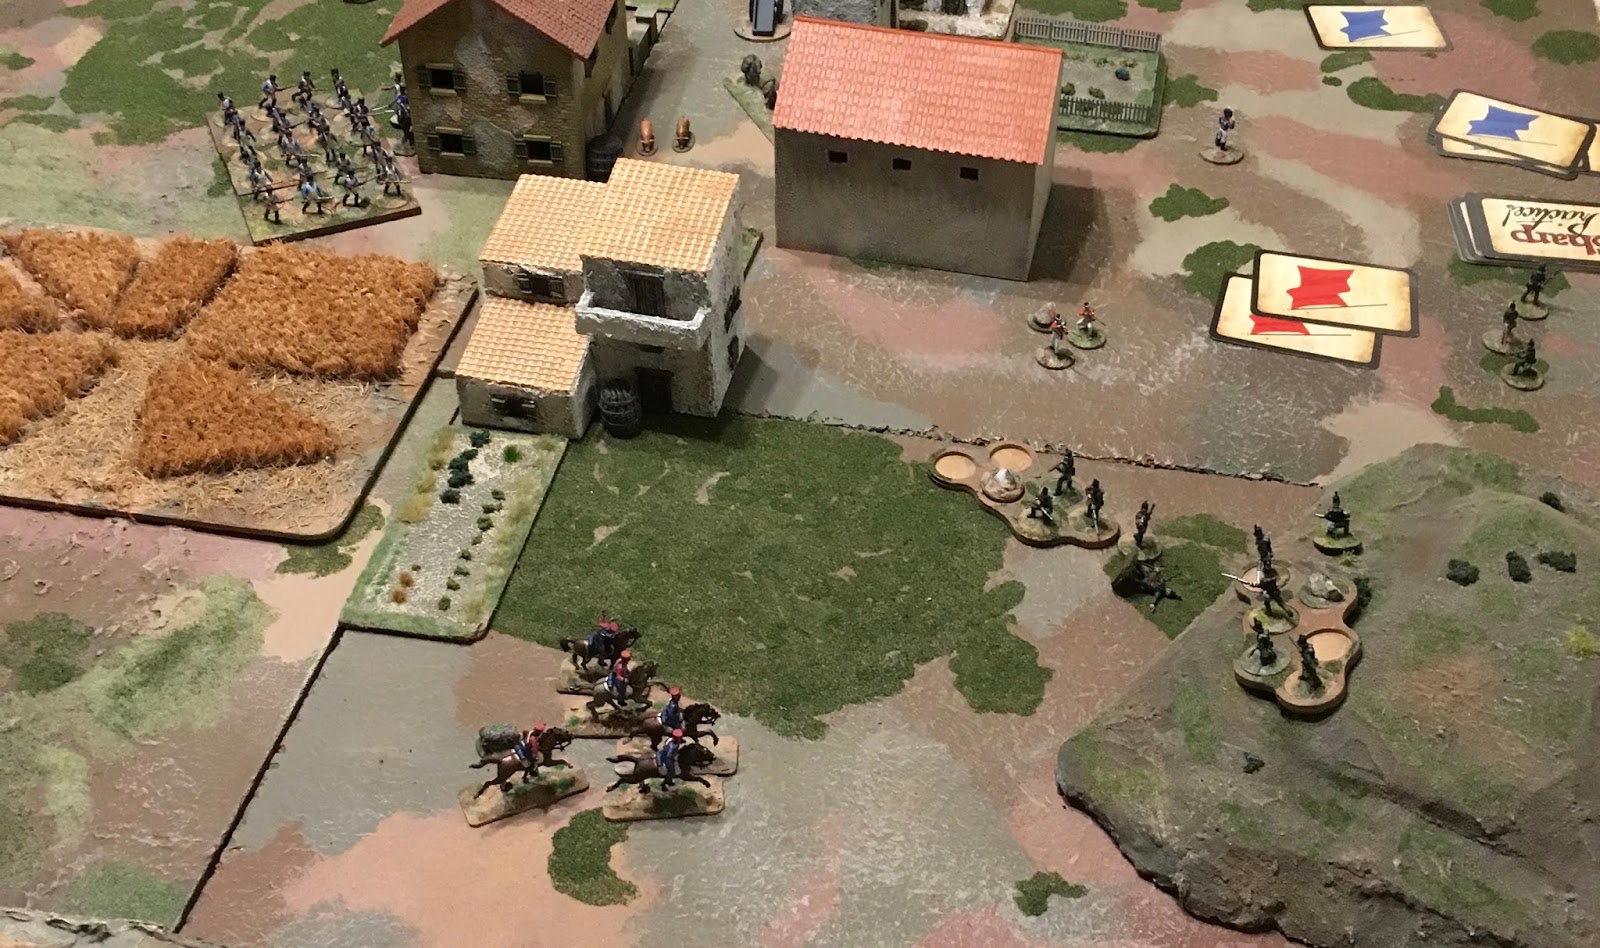
For yet more Too Fat Lardies excellence I definitely want to keep going with the Borsetshires in the Peninsula series of Sharp Practice games.
Jamie and I tried to get a game of Lion Rampant in before he went back to university but other family duties got in the way. We did, however, get enough done to remind me that it's a fun system and my Swiss and Burgundian forces deserve to spend more time on the table.
I'm also keen to get my 6mm scale 18th century collection into use. Maurice would be my first choice; it's a wonderfully clever piece of design that might readily be sub-titled Chandler's The Art of War in the Age of Marlborough - The Game. The only down-side of this plan is that my games tend to be multi-player affairs and Maurice is defiantly two-player in its approach.
Black Powder, then, is perhaps the option I shall be forced to opt. It's not a game that cries out to me to play but I think we could have a fun time giving it a go.
Something else I'd like to go back to, after many years away, is Victory Games' Fleet Series. I really enjoyed these hex-and-counter games in the late 80s and would love to get in a game one weekend.
And what events am I committed to?
First and most important is Crisis Point. 7th and 8th April at Dungworth Green Hall near Sheffield.
We're doing another 1918 Andreivia game this year. It looks like we're going to have enough players but more are always welcome. I don't particularly need to build much new stuff for this year's event but I'll certainly have a go at some more specifically Andreivian terrain.
Joy of Six is always a fun event. I've managed to persuade the rest of the Cold War Commanders to have a go at putting on the same game (a Warsaw Pact tank regiment attack on a NATO blocking position) over the same terrain at three different dates (probably something like 1956, 1968 and 1989). Need to build some suitable terrain for this.
I'll probably go to Gauntlet again this year. I don't think there's an SOTCW event planned but I rather fancy playing some Big CoC again.
And lastly for now, what projects to I want to progress?
Apart from the events above, I really want to finish the 28mm Punic Wars project I started last year.
I've mostly finished my Numidians and Carthaginian citizen levy. A Roman Legion is done but there's a whole box of Victrix Italian Ally legionaries to build and paint and some Roman and Gaullish cavalry to complete.
A Baccus Swedish army pack is sitting in its packaging just waiting to join my 6mm Great Northern War collection. The Maurice/Black Powder question will get no closer to being answered when they are done but done they must be.
Something that's been on the to do list for the past three years is my plan to build some terrain for the Big Rubble of Pavis. I have lots of bits and bobs of resin that are earmarked for the project but it's never come to the top of the priority pile. Maybe this year?
As a general rule for 2018 I'd hope to have the self control to focus my spending on terrain items rather than more figures, at least until the Italian legionaries and Swedes are done. We'll see though; the "Ooh, shiny!" effect can still be expected to exert it's evil power!
Sunday, January 14, 2018
Monday, January 1, 2018
Christmas Games part three - Sharp Practice
December 27th saw the latest episode in our exploration of the fortunes of the light company of the Borsetshire Regiment during the Peninsular War. This time the Light Company faced a major French assault. This was the British player's briefing:
The comforting sounds of the familiar morning routine of the British army all around him, Major Horace Markham, a contemplative pipe in hand, peered into the pre-dawn murk. The frontier village was stout enough but it was not a location he would wish to defend against a larger French force. The sooner he could march the light company back to the safety of the rocky heights and beyond to Wellesley’s army, the happier he would be.
Markham’s mind wandered back to his hurried briefing the previous morning. Lt Colonel Pargeter had begun by apologising for sending him on a Captain’s errand. Only a company was required but General Wellesley wanted to get Captain Elliott and his rocket detachment out from under his feet and Elliott was senior to Captain Archer of the Borsetshires’ light company. As this was clearly a job for the lights, Markham must take command.
Seeing Markham’s confusion at this rambling introduction, Pargeter had hurried on. An exploring officer, an Irishman by the name of Hugh Cairns, was to be met at the village of Rebolosa and escorted back across the rocky hills, back into the bosom of the army. For reasons of military convenience, a detachment of rocket troops was to be attached to the force.
The rocketeers had proved excessively wearing during the march. Knowing the country, Markham had insisted on their taking only pack mules and leaving their carts and wagons behind. Even so the light company had been delayed by the inexperienced gunners and had only reached Rebolosa at nightfall.
Ron took on the role of British commander:
British
Major Horace Markham, Level II leader (Red 1)
Corporal Brown, Level I leader (Red 2)
Two groups of 8 Light Company in line, muskets
Captain Archer, Level III leader (Red 3)
Two groups of 8 Light Company in line, muskets
Lieutenant Smythe, Level II leader (Red 4)
One group of 6 95th Rifles, rifles
Sergeant Goodison, Level I leader (Red 5)
One group of 6 95th Rifles, rifles
Captain Elliott, Level I leader (Red 6)
One group of 5 Royal Horse Artillery, rockets
Jamie and Andy ran the French:
French
Colonel Paul Remillard, Level III leader (Blue 1)
Sergeant Boutin, Level I leader (Blue 2)
Three groups of 8 Line Infantry, muskets
Captain Laroche, Level II leader (Blue 3)
Two groups of 8 Line Infantry, muskets
Lieutenant Didier Delabord, Level I leader (Blue 4)
One group of 8 Dragoons, carbines and sabres
Lieutenant Loisier, Level II leader (Blue 5)
One group of 6 Voltigeur Skirmishers, muskets
Sergeant Dalembert, Level I leader (Blue 6)
One group of 6 Voltigeur Skirmishers, muskets
Captain van Niekirk, Level II leader (Blue 7)
Two groups of 8 Nassau light infantry, muskets
One group of 8 Nassau grenadiers, muskets
Captain Etienne Chouxfleur, Level II leader (Blue 8)
One group of 8 Hussars, Scouting Cavalry, sabres
In the photo below the red star shows the British exit point through the mountains. The red oval surrounds the wagon that marked the British Deployment Point. The French Deployment Point was on the edge of the table to the right of the blue square.
As the Borsetshires rushed to their posts, the first French infantry formed up in an open column near the road.
Menaced by Voltigeurs, the rocket troops withdrew.
Although Major Markham, having escorted Cairns to the safety of the mountains, returned with one group of infantry, the collapse of the British position was already underway. Force Morale was down to four, with the loss of one command card resulting.
So the Borsetshires have taken a very bloody nose at Rebolosa. Who will manage to escape the clutches of Johnny Frog? Perhaps only the need for Lt Chouxfleur to rally his Hussars gives any cause for hope?
The comforting sounds of the familiar morning routine of the British army all around him, Major Horace Markham, a contemplative pipe in hand, peered into the pre-dawn murk. The frontier village was stout enough but it was not a location he would wish to defend against a larger French force. The sooner he could march the light company back to the safety of the rocky heights and beyond to Wellesley’s army, the happier he would be.
Markham’s mind wandered back to his hurried briefing the previous morning. Lt Colonel Pargeter had begun by apologising for sending him on a Captain’s errand. Only a company was required but General Wellesley wanted to get Captain Elliott and his rocket detachment out from under his feet and Elliott was senior to Captain Archer of the Borsetshires’ light company. As this was clearly a job for the lights, Markham must take command.
Seeing Markham’s confusion at this rambling introduction, Pargeter had hurried on. An exploring officer, an Irishman by the name of Hugh Cairns, was to be met at the village of Rebolosa and escorted back across the rocky hills, back into the bosom of the army. For reasons of military convenience, a detachment of rocket troops was to be attached to the force.
The rocketeers had proved excessively wearing during the march. Knowing the country, Markham had insisted on their taking only pack mules and leaving their carts and wagons behind. Even so the light company had been delayed by the inexperienced gunners and had only reached Rebolosa at nightfall.
Ron took on the role of British commander:
British
Major Horace Markham, Level II leader (Red 1)
Corporal Brown, Level I leader (Red 2)
Two groups of 8 Light Company in line, muskets
Captain Archer, Level III leader (Red 3)
Two groups of 8 Light Company in line, muskets
Lieutenant Smythe, Level II leader (Red 4)
One group of 6 95th Rifles, rifles
Sergeant Goodison, Level I leader (Red 5)
One group of 6 95th Rifles, rifles
Captain Elliott, Level I leader (Red 6)
One group of 5 Royal Horse Artillery, rockets
French
Colonel Paul Remillard, Level III leader (Blue 1)
Sergeant Boutin, Level I leader (Blue 2)
Three groups of 8 Line Infantry, muskets
Captain Laroche, Level II leader (Blue 3)
Two groups of 8 Line Infantry, muskets
Lieutenant Didier Delabord, Level I leader (Blue 4)
One group of 8 Dragoons, carbines and sabres
Lieutenant Loisier, Level II leader (Blue 5)
One group of 6 Voltigeur Skirmishers, muskets
Sergeant Dalembert, Level I leader (Blue 6)
One group of 6 Voltigeur Skirmishers, muskets
Captain van Niekirk, Level II leader (Blue 7)
Two groups of 8 Nassau light infantry, muskets
One group of 8 Nassau grenadiers, muskets
Captain Etienne Chouxfleur, Level II leader (Blue 8)
One group of 8 Hussars, Scouting Cavalry, sabres
In the photo below the red star shows the British exit point through the mountains. The red oval surrounds the wagon that marked the British Deployment Point. The French Deployment Point was on the edge of the table to the right of the blue square.
As the Borsetshires rushed to their posts, the first French infantry formed up in an open column near the road.
Some Voltigeurs arrived and advanced along the road...
Under the direction of Captain Elliott the Light Rocket Battery hastily deployed between the large house and the barn. They launched a first rocket but it fell short and exploded harmlessly.
Meanwhile, Captain Archer had started to deploy half of the company to stop a French advance down Rebolosa's main street whilst Major Markham took the other half of the company to escort Cairns to the mountains.
![]() |
| Archer deploys into line. Is Markham (in the background) preparing to leave the rest of the company in the lurch? |
Archer's men come under fire from the advancing French voltigeurs who are backed up by Delabord's Dragoons.
Meanwhile something of a traffic jam is developing on the French right....
As the French columns converged on Archer's small line, voltigeurs supporting on their flanks, the RHA fired again. Once more the rocket fell short but this time it fell within shrapnel range of Sergeant Goodison's riflemen!
On the roadway, Archer's men were charged by Delabord's dragoons.
Sadly for Delabord, his men had not quite reached the point of contact when the Borsetshires let loose an impressive volley of musketry. At this point I made an error in applying the rules. One group of the Borsetshires was routed but so was the group of Dragoons. The result should have been different with the shock and casualties on the British side being shared equally between the fighting and supporting groups.
Either way, though, it had been a small victory for the British, although their Force Morale was falling faster than that of the French.
At this point Ron began to try and extract his forces from the tightening trap. Although the Dragoons had been driven off on the right and seemed unlikely to bother him again, on the left French pressure was beginning to tell and the Hussars threatened a wide outflanking sweep. The narrow main street of Rebolosa was soon thronging with confused British soldiers.
Menaced by Voltigeurs, the rocket troops withdrew.
It had taken Lt Chouxfleur an age to get his hussars through the wheat fields (not that they were bad going but suddenly Andy was unable to roll anything higher than a two on his movement dice).
Faced with a choice of dashing for the higher ground and perhaps safety or standing and firing at the approaching horsemen, Lt Smythe of the Rifles made the wrong call.
The brief fusillade was ineffective and Smythe's men were badly mauled. The lieutenant himself fell senseless and had to be dragged away by the few survivors.
Although Major Markham, having escorted Cairns to the safety of the mountains, returned with one group of infantry, the collapse of the British position was already underway. Force Morale was down to four, with the loss of one command card resulting.
As the British attempted to push through the village to safety, the first group of Voltigeurs entered Rebolosa...
... only to find themselves scattered by rampaging livestock!
The damage to French pride and cohesion was minor, however, and further casualties to Sergeant Goodison's rifles tipped the balance. British Force Morale reached zero and the retreat turned into a rout.
So the Borsetshires have taken a very bloody nose at Rebolosa. Who will manage to escape the clutches of Johnny Frog? Perhaps only the need for Lt Chouxfleur to rally his Hussars gives any cause for hope?
I think there's a case for the next scenario being a chase across the high moorland as the French continue the pursuit of Major Cairns. I shall have to give this further thought.
Christmas Games part two - Argad
Our second game this Christmas period used a new set of rules (to me) and the only one in my collection that was originally published in Breton! Rather appropriately our first game of Argad was set in the part of Gaul that is now Brittany.
Armorica in the fourth century CE was notionally part of the Roman Empire but was de facto an independent state controlled by the bacaudae. Historians seem to differ as to whether the bacaudae were bandits, proto-proletarian revolutionaries or simply bourgeois Roman citizens keen to avoid paying rent to absentee Roman landlords. In this game my interpretation tended towards the last.
Our table was set up thus:
The table represented the civitas (in this case meaning a district) of Kerantrech, home of some members of the thoroughly Romanised Coriosolitae tribe.
A large villa (home of the local magistrate, a coriosolitae noble by the name of Syagrius) is the economic centre of the civitas. A village stands nearby, it and the villa being set back from a nearby Roman road.
At the northern (near) end of the table a watchtower overlooks a small inlet. A handful of soldiers of the local limitanei (border force) keep watch for Saxon or Irish raiders.
Jamie, Richard P, Kevin and Leo came over for this game. Argad sits somewhere at the intersection of wargame and role-playing game. The character roles for the players were:
Antonius Mago had an escort of legionaries and some mercenary Alan horsemen.
Argad moves pretty quickly and with Syagrius out patrolling the civitas and Ellifer busy trying to ensure that Bishop Severinus didn't bump into Malgwyn the Druid as the latter conducted a pagan blessing of the orchard, Clodis was soon in possession of the villa and seeking to dictate terms to all and sundry.
Clodis soon brow-beat Syagrius into supporting the new status quo. The fact that Clodis had possession of the letters wife and newly-born daughter was pretty crucial here.
Meanwhile, Clodis found his newly achieved domestic tranquility disturbed who Antonius Mago's legionaries tipped over the statue in front of the villa and began digging under its plinth.
A fight developed between the Franks and the legionaries for possession of a strongbox found buried under the statue. In the end the Franks were successful and Antonius Mago was forced to withdraw with nothing to show his sponsor back in Rome. All in all it was a victory for the Franks - so in line with the broad sweep of history then.
As a final bonus, here's a shot that captures two random groups that entered into the action; in the foreground some Sarmatian mercenaries and in the background, Agravaine son of Lot with his Numidian servant seeking the Holy Grail (idea stolen from Fabrice of Argad).
Armorica in the fourth century CE was notionally part of the Roman Empire but was de facto an independent state controlled by the bacaudae. Historians seem to differ as to whether the bacaudae were bandits, proto-proletarian revolutionaries or simply bourgeois Roman citizens keen to avoid paying rent to absentee Roman landlords. In this game my interpretation tended towards the last.
Our table was set up thus:
The table represented the civitas (in this case meaning a district) of Kerantrech, home of some members of the thoroughly Romanised Coriosolitae tribe.
A large villa (home of the local magistrate, a coriosolitae noble by the name of Syagrius) is the economic centre of the civitas. A village stands nearby, it and the villa being set back from a nearby Roman road.
At the northern (near) end of the table a watchtower overlooks a small inlet. A handful of soldiers of the local limitanei (border force) keep watch for Saxon or Irish raiders.
Jamie, Richard P, Kevin and Leo came over for this game. Argad sits somewhere at the intersection of wargame and role-playing game. The character roles for the players were:
- Jamie - Antonius Mago, representative of the Roman landlord who theoretically owns the civitas
- Leo - Syagrius, the magistrate of Kerantrech
- Richard P - Ellifer, the commander of the limitanae
- Kevin - Clodis, leader of a group of Franks who have papers to say that they have been given the civitas in exchange for service in the Roman army
- Richard C - umpire and all other roles.
![]() |
| Genovefa's raeda passes the old pagan temple |
![]() |
| Part of Mago's escort - perhaps not the finest legionary soldiers but professional enough? |
The southeast corner of the civitas saw the arrival first of Bishop Severinus (come to baptise the child) and then of Clodis and his mixed force of Franks and Roman spearmen.
![]() |
| Richard P, Leo and Jamie (l to r) look on at Kevin deploys his Franks |
Clodis soon brow-beat Syagrius into supporting the new status quo. The fact that Clodis had possession of the letters wife and newly-born daughter was pretty crucial here.
Meanwhile, Clodis found his newly achieved domestic tranquility disturbed who Antonius Mago's legionaries tipped over the statue in front of the villa and began digging under its plinth.
A fight developed between the Franks and the legionaries for possession of a strongbox found buried under the statue. In the end the Franks were successful and Antonius Mago was forced to withdraw with nothing to show his sponsor back in Rome. All in all it was a victory for the Franks - so in line with the broad sweep of history then.
As a final bonus, here's a shot that captures two random groups that entered into the action; in the foreground some Sarmatian mercenaries and in the background, Agravaine son of Lot with his Numidian servant seeking the Holy Grail (idea stolen from Fabrice of Argad).
Friday, December 22, 2017
Not another project?
Sometimes you feel like a plaything of the gods. The muse of wargaming seems to be following
me around and whispering stuff in my ear at the moment.
Back in 2010, with the considerable help of SOTCW colleagues,
I finally managed to get to the table the long-cherished idea of a big game of
Rapid Fire based on the US Rangers’ and RM Commandos’ landings on the left
flank of the September 1943 Salerno landings.
I needed some extra kit to complete the Ranger battalion I
was contributing and so I went out and purchased the Revell US infantry. I knew they would give me the 50cal HMG and
the mortar I needed to add to my Italeri yanks.
What I’d not checked was that the Revell chaps, lovely though they are,
are in distinctly wintery garb. As a
result they mostly stayed unused.
Cut to a few years later and I’m in a second-hand
bookshop. I find a copy of Lise M
Pommois’ book on the fighting in Alsace over the winter of 1944/45. It’s full
of detail and, while I have no plans to wargame Operation Nordwind, it’s from a
small French publishing house and I’m unlikely to ever see another copy on sale.
I grab it.
Later still, a family holiday is mooted. After surprisingly little discussion we settle
on a week in the Northern Vosges region of Alsace. It’s a lovely place and I especially enjoy
our visits to the Maginot line at Schoenenbourg and to the magnificent 18th
century Citadel of Bitche.
All goes quiet until a couple of weeks ago. Tom Davis has
borrowed and now returns my copy of this Osprey book:
I looked anew at the cover and thought, “I could use those old
Revell figures and do a winter 44/45 platoon for Chain of Command!”
Looking at the platoon organisations for the Americans in
the rules, though, I’m short of about a dozen riflemen so I go back to the
model shop that provides for my plastic soldier needs. They haven’t got the Revell winter Americans
but they do have a similar pack from Italeri.
I take them home.
The Italeri chaps prove a very good match for the Revells in
terms of stature and sculpting style so I’m happy. But what’s this? Three of the figures are armed with the
rather rare M1919A6 .30cal light machinegun with bipod. Who were they issued to?
Well it turns out there are two US army divisions that get
the M1919A6. One of them sees action in Brittany
in summer ’44. The other is the 100th
Infantry Division.
The 100th Infantry Division? What can I find out about them? Well, they saw action in the Vosges during the
winter of 1944/45, they stood up to German attacks during Operation Nordwind and they are now known as the Sons of
Bitche because of their fierce fighting for that town in early 1945.
I think my destiny is clear don’t you?
Sunday, December 17, 2017
Christmas Games part 1 - X-Wing
I think we're close enough to count this as a Christmas game for 2017 don't you?
Gus and Arthur came over on Saturday to join Charlie and me in a game of X-Wing. I planned a scenario to take advantage of the models I own. The Empire was launching a strike on a rebel base. To complete the mission they had to get a strike package off the far end of our nearly six foot long table.
The strike package consisted of two TIE Bombers with a Lambda class shuttle as electronic warfare support. Escort for the bombers was in the form of four TIE fighters from the Black Squadron under the command of Gus. I ran the bombers as it was easier than explaining the bombing rules to someone else at the start.
I kept the TIE Fighters pretty vanilla so Gus could concentrate on flying them in what was only his second game. The TIE Bombers were loaded down with exciting ordnance including concussion and fusion bombs, which I was keen to try for the first time.
Of course the strike mission had to get through an asteroid field to get to the mission location. The Rebel forces could come on from any of the other three edges of the table. Charlie picked three Z-95 Headhunters while Arthur had Luke Skywalker and his rookie wing-man. Again, for ease of play I avoided too much in the way of enhancements to these ships, though some of the pilots had spiffy abilities.
The Rebel leaders chose to both come on from the same edge...
The Rebels seemed to be a bit hypnotised by the bulk of the Lambda class and concentrated their attacks on it. This left the faster TIE Bombers free to make a dash for the bombing line.
Luke's wing-man seemed not to have paid too much attention to the "wing-man" part of his brief and proceeded to get well stuck in going after the Lambda class. This left Luke to deal with two TIE Fighters.
In the picture above the TIE Bombers are at the half way mark and there's no-one handily placed to stop them so I decided that Han Solo and Chewbacca should intervene. The Millennium Falcon entered from the edge nearest the Empire's objective.
Just as the shuttle had attracted fire from the Rebels, so the Millennium Falcon was a bullet magnet (plasma magnet?) for the Empire forces. Gus developed a tactic of throwing TIE Fighters into the path of the Falcon to keep it from firing while I shot at it with missiles and dropped bombs in its path!
In the pic below the Falcon has already met an explosive end! Also Rookie Pilot (who seemed to be something of a bomb magnet) has joined Han and Chewie in being spread thinly across the Galaxy Far, Far Away. Quite frankly I detected but a minor disturbance in the Force.
As you may notice, there are two Z-95s and an X-Wing (Luke) on the shuttle's tail. Just moments after this was taken the shuttle also broke up in a flaming ball of expensive special effects.
However, next move the Bombers were off the table to give the Empire a marginal victory.
On the whole, I'm not entirely unhappy with the scenario balance. I wasn't sure how many players I was going to get so I broke the available models into roughly similarly pointed packages. We ended up using five out of the eight.
I have to admit that the Bombers did get rather more points as they were supposed to be the number one target for the Rebel side. If the Rebels had started from both sides of the table they would have had more chance of slowing down the TIE Bombers.
An enjoyable game and we finished in time to get in a couple of games of Tsuro afterwards. My thanks to the players; we must do this again some time!
Monday, December 11, 2017
Another Mini-Kursk
On Friday evening I took a couple of boxes of tanks and some terrain down to the Christmas Fair of the local primary school and gave my simplified tank game another run for its money.
This time I planned a simple campaign with up to four stages. In the first game the Germans had to cross the remains of the Soviet minefield and get off the far end of the table. If they did so the Soviets wouldn't have time to blow the bridge in the second game.
Here's the first table:
In the event the Germsn managed to get a few tanks through the minefield belt but didn't penetrate to the edge the table.
As a result the following game saw the bridge destroyed. This was a more exciting affair. There were no fewer than three German tanks within a move of the far table edge when the last card came up....
... unfortunately for the Germans the last card to come up was a red so they didn't quite make it.
And that was it. Sadly I didn't have time to take any more pictures.
The kids had a good time and we raised over £20 for the school which can't be bad.
Saturday, December 2, 2017
Flashpoint Potsdamer Platz
Chris Barnes came over on Wednesday evening and I introduced him to Arc of Fire to give him a chance to use his new Cold War-period British platoon. Chris is building Berlin Brigade models so a Berlin-based scenario was called for.
I designed an introductory scenario in which a KGB operation to snatch back an important defector from under the noses of British intelligence has gone wrong. At the start of the game the KGB snatch squad is heading for the Wall (the Anti-Fascist Protection Rampart if you wish) at Potsdamer Platz where a VDV Spetsnaz team waits to activate the emergency extraction plan.
Fortunately for the British a platoon from 1st Bn Royal Hampshire Regiment (The Tigers) is patrolling nearby in the Tiergarten. Even more fortunately, I forgot the scenario set-up I myself had written and allowed Chris to deploy his men well forward through the wooded area instead of starting them from the edge of the board.
This meant that Chris was able to open fire almost immediately on the fleeing KGB team who had the drugged defector in the back of their Volkswagen.
This fire proved to ill-advised in the extreme. Three rounds from the fusillade of shots found their mark. All three of them hit the defector killing him instantly. In that first moment Chris had technically lost the game! However, he could at least prevent the KGB agents from escaping.
A shaped charge was rapidly placed and exploded...
By this point the KGB agents had taken cover behind the VW but the incoming fire from two British sections and the platoon HQ's 51mm mortar was too much.
The female agent was killed but her male colleague made a successful dash into the frightened crowds milling about around the viewing platform.
At this point it became apparent that my initial error in the British set-up meant that the game wasn't going anywhere. With an entire platoon's SLRs aimed at the breach in the Wall any Soviet attempt to move through would be suicidal. We agreed to wrap it up there.
It was nice to get some new toys on the table and I was reminded how much I enjoy Arc of Fire. With over thirty games played or umpired it's well clear in second place (behind HOTT) in the list of my most-played games.
I designed an introductory scenario in which a KGB operation to snatch back an important defector from under the noses of British intelligence has gone wrong. At the start of the game the KGB snatch squad is heading for the Wall (the Anti-Fascist Protection Rampart if you wish) at Potsdamer Platz where a VDV Spetsnaz team waits to activate the emergency extraction plan.
![]() |
| A camera crew was filming interviews at the Wall |
Fortunately for the British a platoon from 1st Bn Royal Hampshire Regiment (The Tigers) is patrolling nearby in the Tiergarten. Even more fortunately, I forgot the scenario set-up I myself had written and allowed Chris to deploy his men well forward through the wooded area instead of starting them from the edge of the board.
This meant that Chris was able to open fire almost immediately on the fleeing KGB team who had the drugged defector in the back of their Volkswagen.
This fire proved to ill-advised in the extreme. Three rounds from the fusillade of shots found their mark. All three of them hit the defector killing him instantly. In that first moment Chris had technically lost the game! However, he could at least prevent the KGB agents from escaping.
![]() |
| The British in NATO T-formation on the edge of the Tiergarten. |
As the KGB agents got out of the immobilised car, their would-be rescuers arrived by truck on the eastern side of the Wall. This was a first chance to use the enormous 8-wheeled truck I got from The Works.
![]() |
| First VDV squad debusses |
By this point the KGB agents had taken cover behind the VW but the incoming fire from two British sections and the platoon HQ's 51mm mortar was too much.
The female agent was killed but her male colleague made a successful dash into the frightened crowds milling about around the viewing platform.
At this point it became apparent that my initial error in the British set-up meant that the game wasn't going anywhere. With an entire platoon's SLRs aimed at the breach in the Wall any Soviet attempt to move through would be suicidal. We agreed to wrap it up there.
It was nice to get some new toys on the table and I was reminded how much I enjoy Arc of Fire. With over thirty games played or umpired it's well clear in second place (behind HOTT) in the list of my most-played games.
Subscribe to:
Posts (Atom)