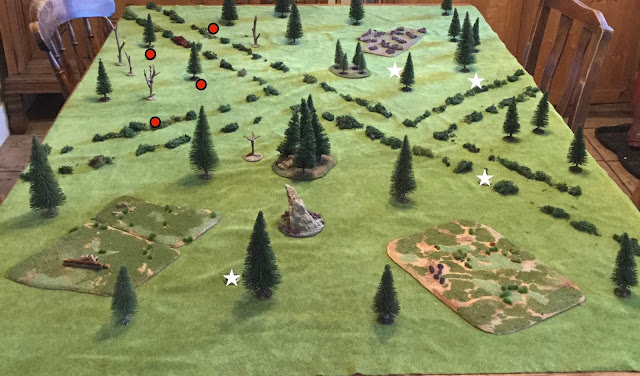
The terrain was roughly as for my previous (solo) Reichswald action but this time we played scenario 5, Flank Attack, from the CoC rule book. The jump off points are shown as red circles (German) and white stars (British).
Most of the table was wooded with the exceptions being three clearings and the green lanes that run across the area.
Chris played the British attackers and had a force based around a Motor Platoon from 11th Armoured Division. He elected to reinforce the platoon with a carrier section (two Universal Carriers with Bren guns) and a flamethrower team. He also had a pre-game bombardment, a medical orderly and the battalion adjutant off-table guiding his troops to their jump-off points.
Tom commanded a defending German Heer platoon and he took three lengths of barbed wire and two minefields as his supports.
Chris was lucky when it came to the rolls for Force Morale; the Germans ending up on 8 whilst the British had 11. This would prove crucial in the events that followed.
Tom sealed off his right flank with some of the wire and both minefields wire and put the remaining wire in front of his left in an attempt to channel Chris's forces into a killing ground by one of the green-lane junctions.
Chris deployed a section centrally and advanced it towards the gap in the German field defences. Tom immediately deployed a squad in the trees behind the junction and demonstrated the superior firepower of the MG42. In short order the British section had taken more casualties than it inflicted and the Bren section fell back (though unfortunately for Tom without any loss to British Force Morale).
Among Chris's particular interests is the First World War and he took what seems to me a rather Great-War-ish approach at this point, swapping out the depleted section before it broke completely and putting a fresh one in its place. Reinforcing failure? Well perhaps but the opposing Germans were taking some casualties and Chris's carrier scout section was moving up the lane on his left despite some wayward delivery of smoke by the platoon's 2" mortar.

All this time Tom was unable to bring on reinforcements thanks to the continuing effect of the British preliminary bombardment.
 |
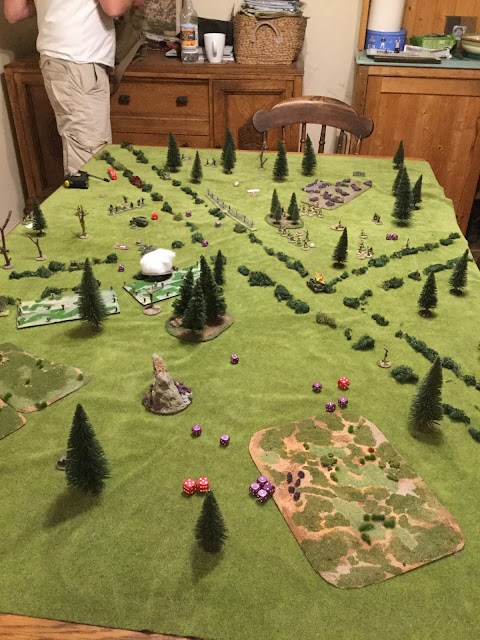
| View from the German side as the first British sections Bren team breaks (top centre) and the Carrier Section enters on the green lane (top right). |
The carriers moved cautiously up to the first junction before turning the corner and charging, light-tank-style towards the German position with their Bren guns blazing. As they did so two rockets shot towards them. A Panzerfaust round shot harmlessly overhead but the German Panzerschreck team were better trained; one of the carriers was thrown into the air by a violent explosion...
At about this time Chris managed to throw three sixes thus ending the first turn. In rules terms the ineffectual 2" mortar smoke dispersed and Tom was no longer under the influence of the pre-game bombardment.
Tom took advantage of this by deploying one of his remaining sections from the ump off point on his left flank. They moved cautiously through the trees (moving with 1d6 and going Tactical). Unfortunately they found themselves just within 16" of one of Chris's JOPs. This was exactly the distance that would allow him to deploy a unit to fire on them before Tom could respond.
Chris threw a one among his command dice and was therefore able to deploy his flamethrower team and send a jet of flame at the flanking section.
In CoC, hits are evenly allocated between adjacent teams but before rolling for the effect of the hits. The hits on the rifle team of the German section were ineffective but the LMG team took two kills and four points of shock! The one remaining gunner took to his heels.
By this point Tom's Force Morale was plummeting. A couple of teams had broken (the LMG team of the first squad had also pulled back) and one of his junior leaders had been wounded. Chris decided to press the attack and the one remaining carrier charged into the middle of the German position and occupied one of the JOPs. You can just make it out above the puff of white smoke in the picture below.
Tom wanted to close assault the carrier with the remains of his nearby section but the rules as written didn't allow this. Given that it was now gone 11pm I tried to cut short debate on the point and we pressed on to roll for Force Morale losses for the couple of Tom's teams that had just broken. The Germans' morale did indeed reach zero giving Chris the win. Well done Chris.
It was hard luck for Tom. The Force Morale differential was unfortunate and in retrospect he ended up defending against an assault on the exterior corner of his position. This is where the defender's firepower is most limited; it's the reason for fortresses having external bastions after all.


No comments:
Post a Comment