Sunday, March 27, 2022

More Riga ruins progress

As the title says, I've made more progress on producing the terrain for a future game set in the ruins of Riga's suburbs in 1812.


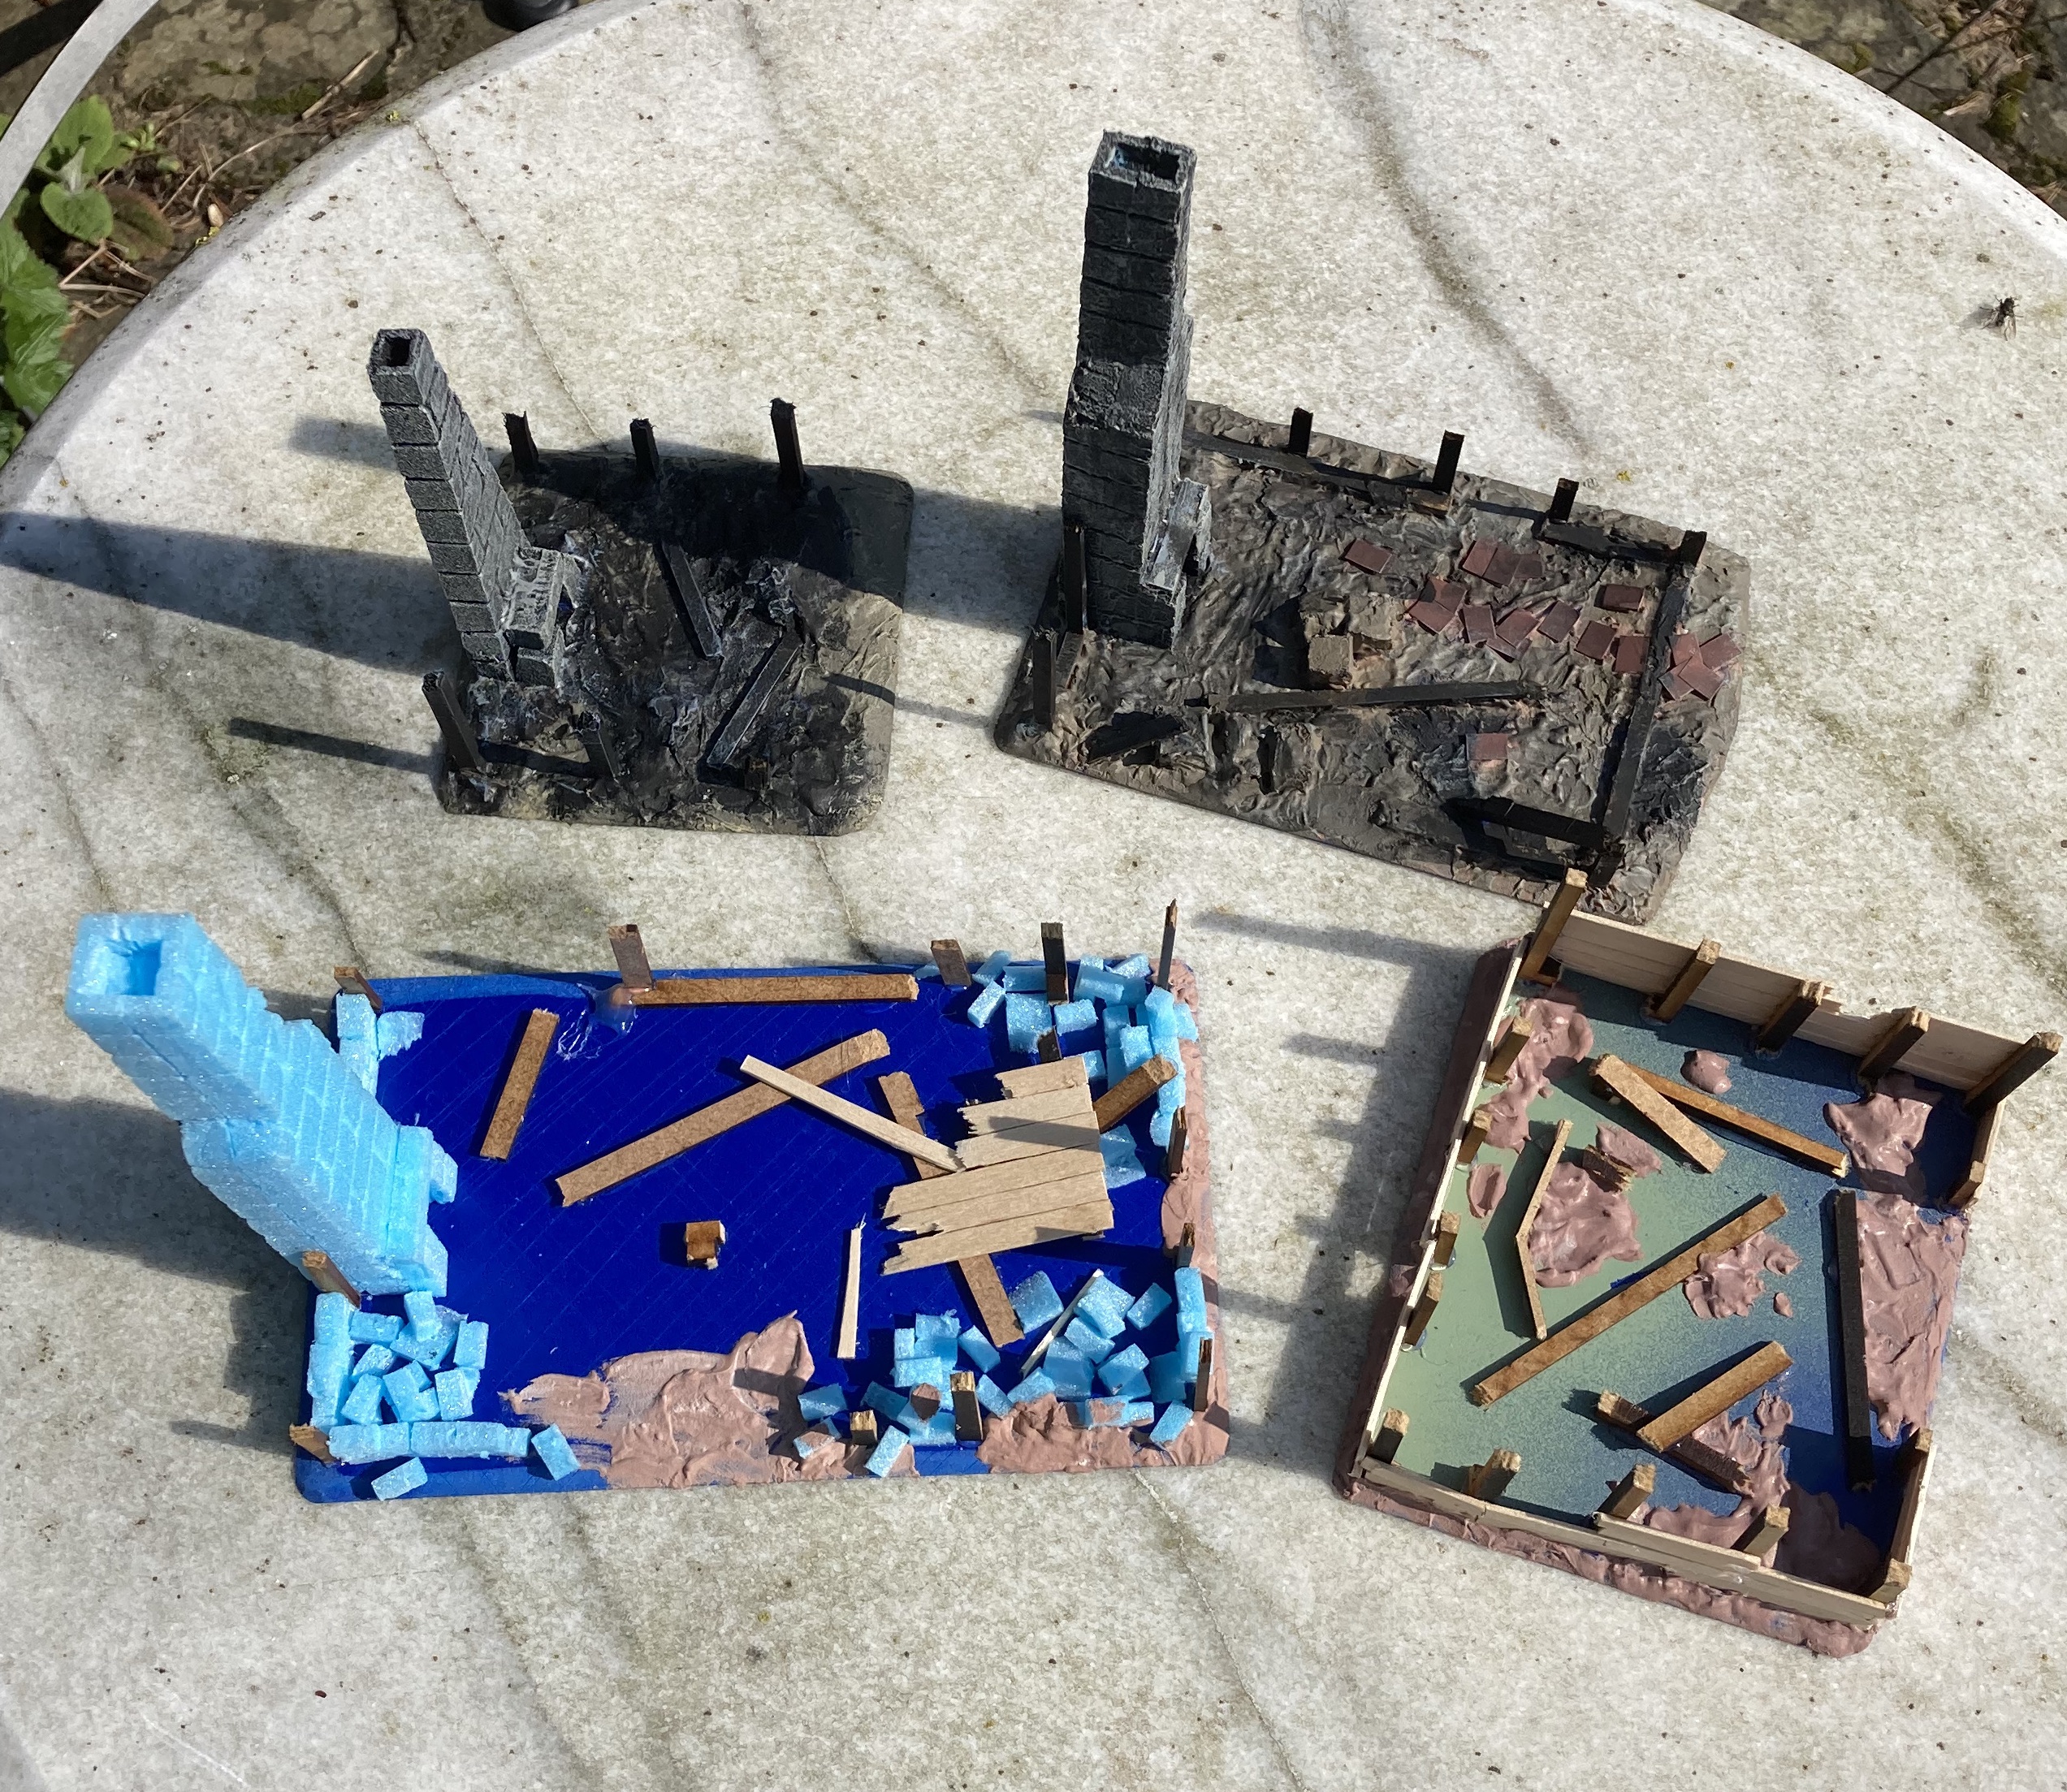
As you can see the second building is now complete and I've moved on to numbers three and four.


As before, the materials are PVC board, Firedragon foam sheet, and off-cuts of MDF. Oh and the burned-out shed (bottom right in the pic above) has its remaining walls made from coffee stirrers.

There should probably be more ash and rubble in and around the building footprints but there needs to be a compromise if units are to move within them.

Update: This afternoon I’ve started on a partly burned-out tower to add to the suburb:


This is made with foamcore and off-cuts of MDF on the usual pvc base. 


Friday, March 25, 2022

Folland Gnat

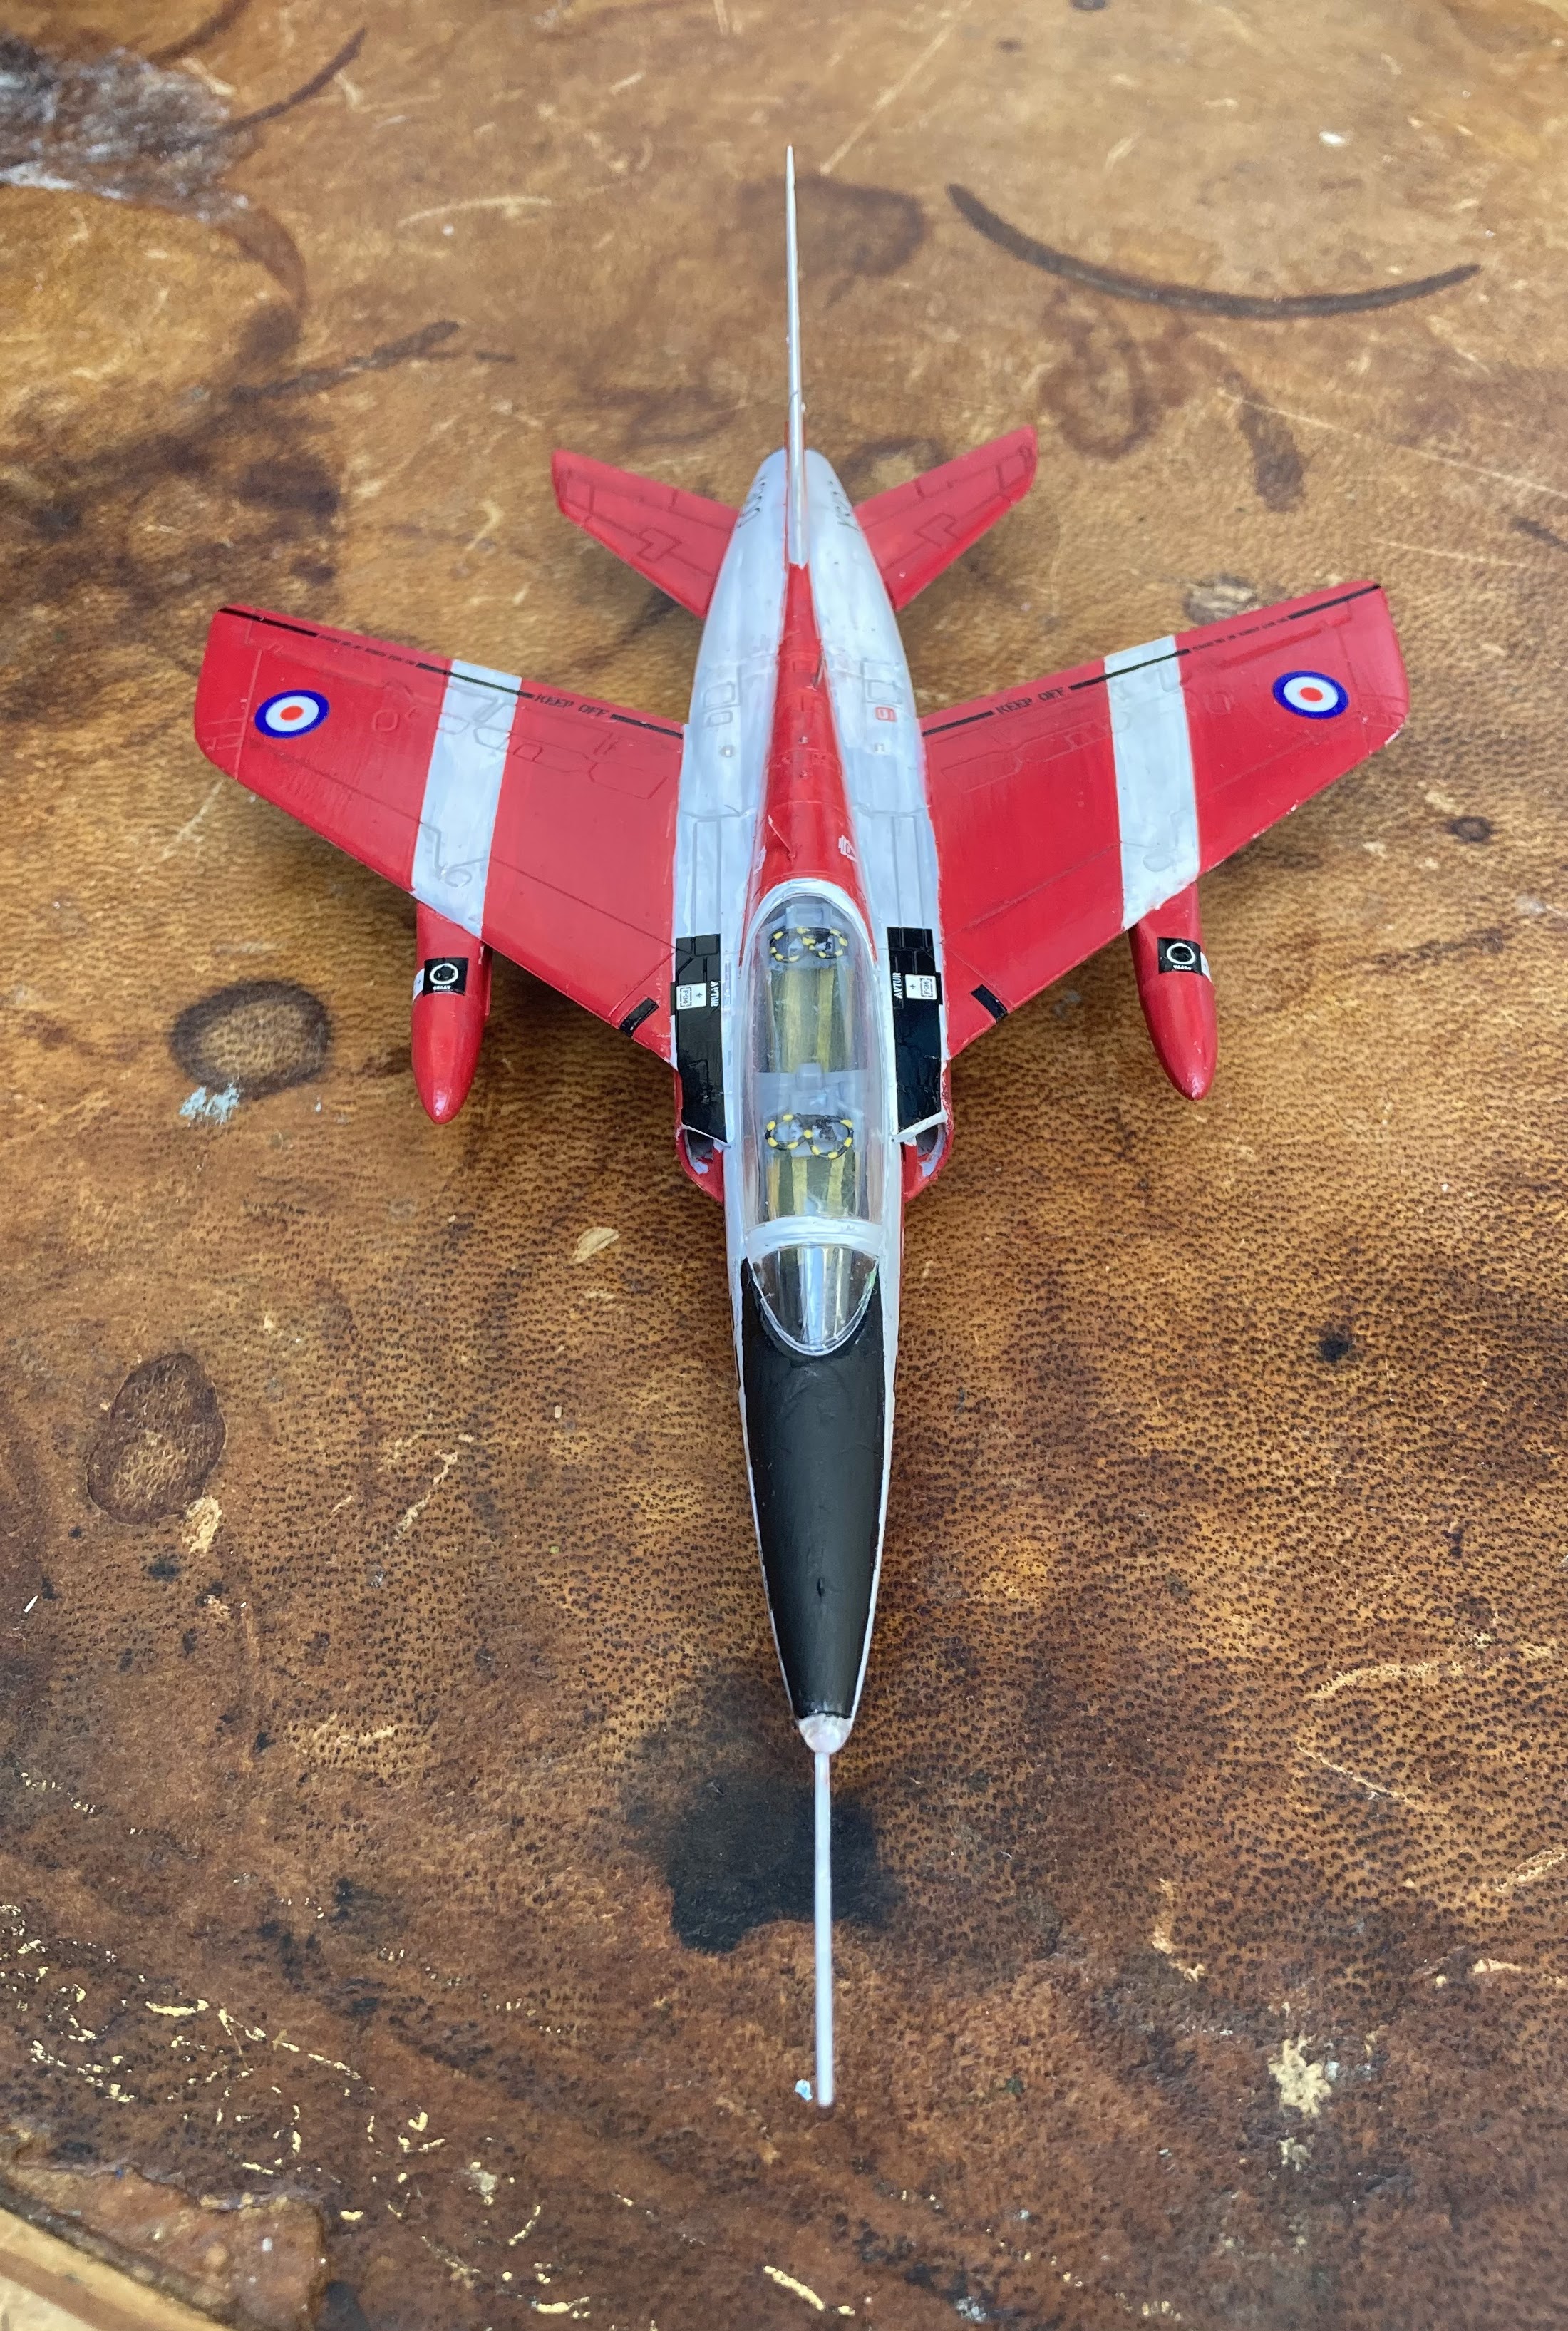
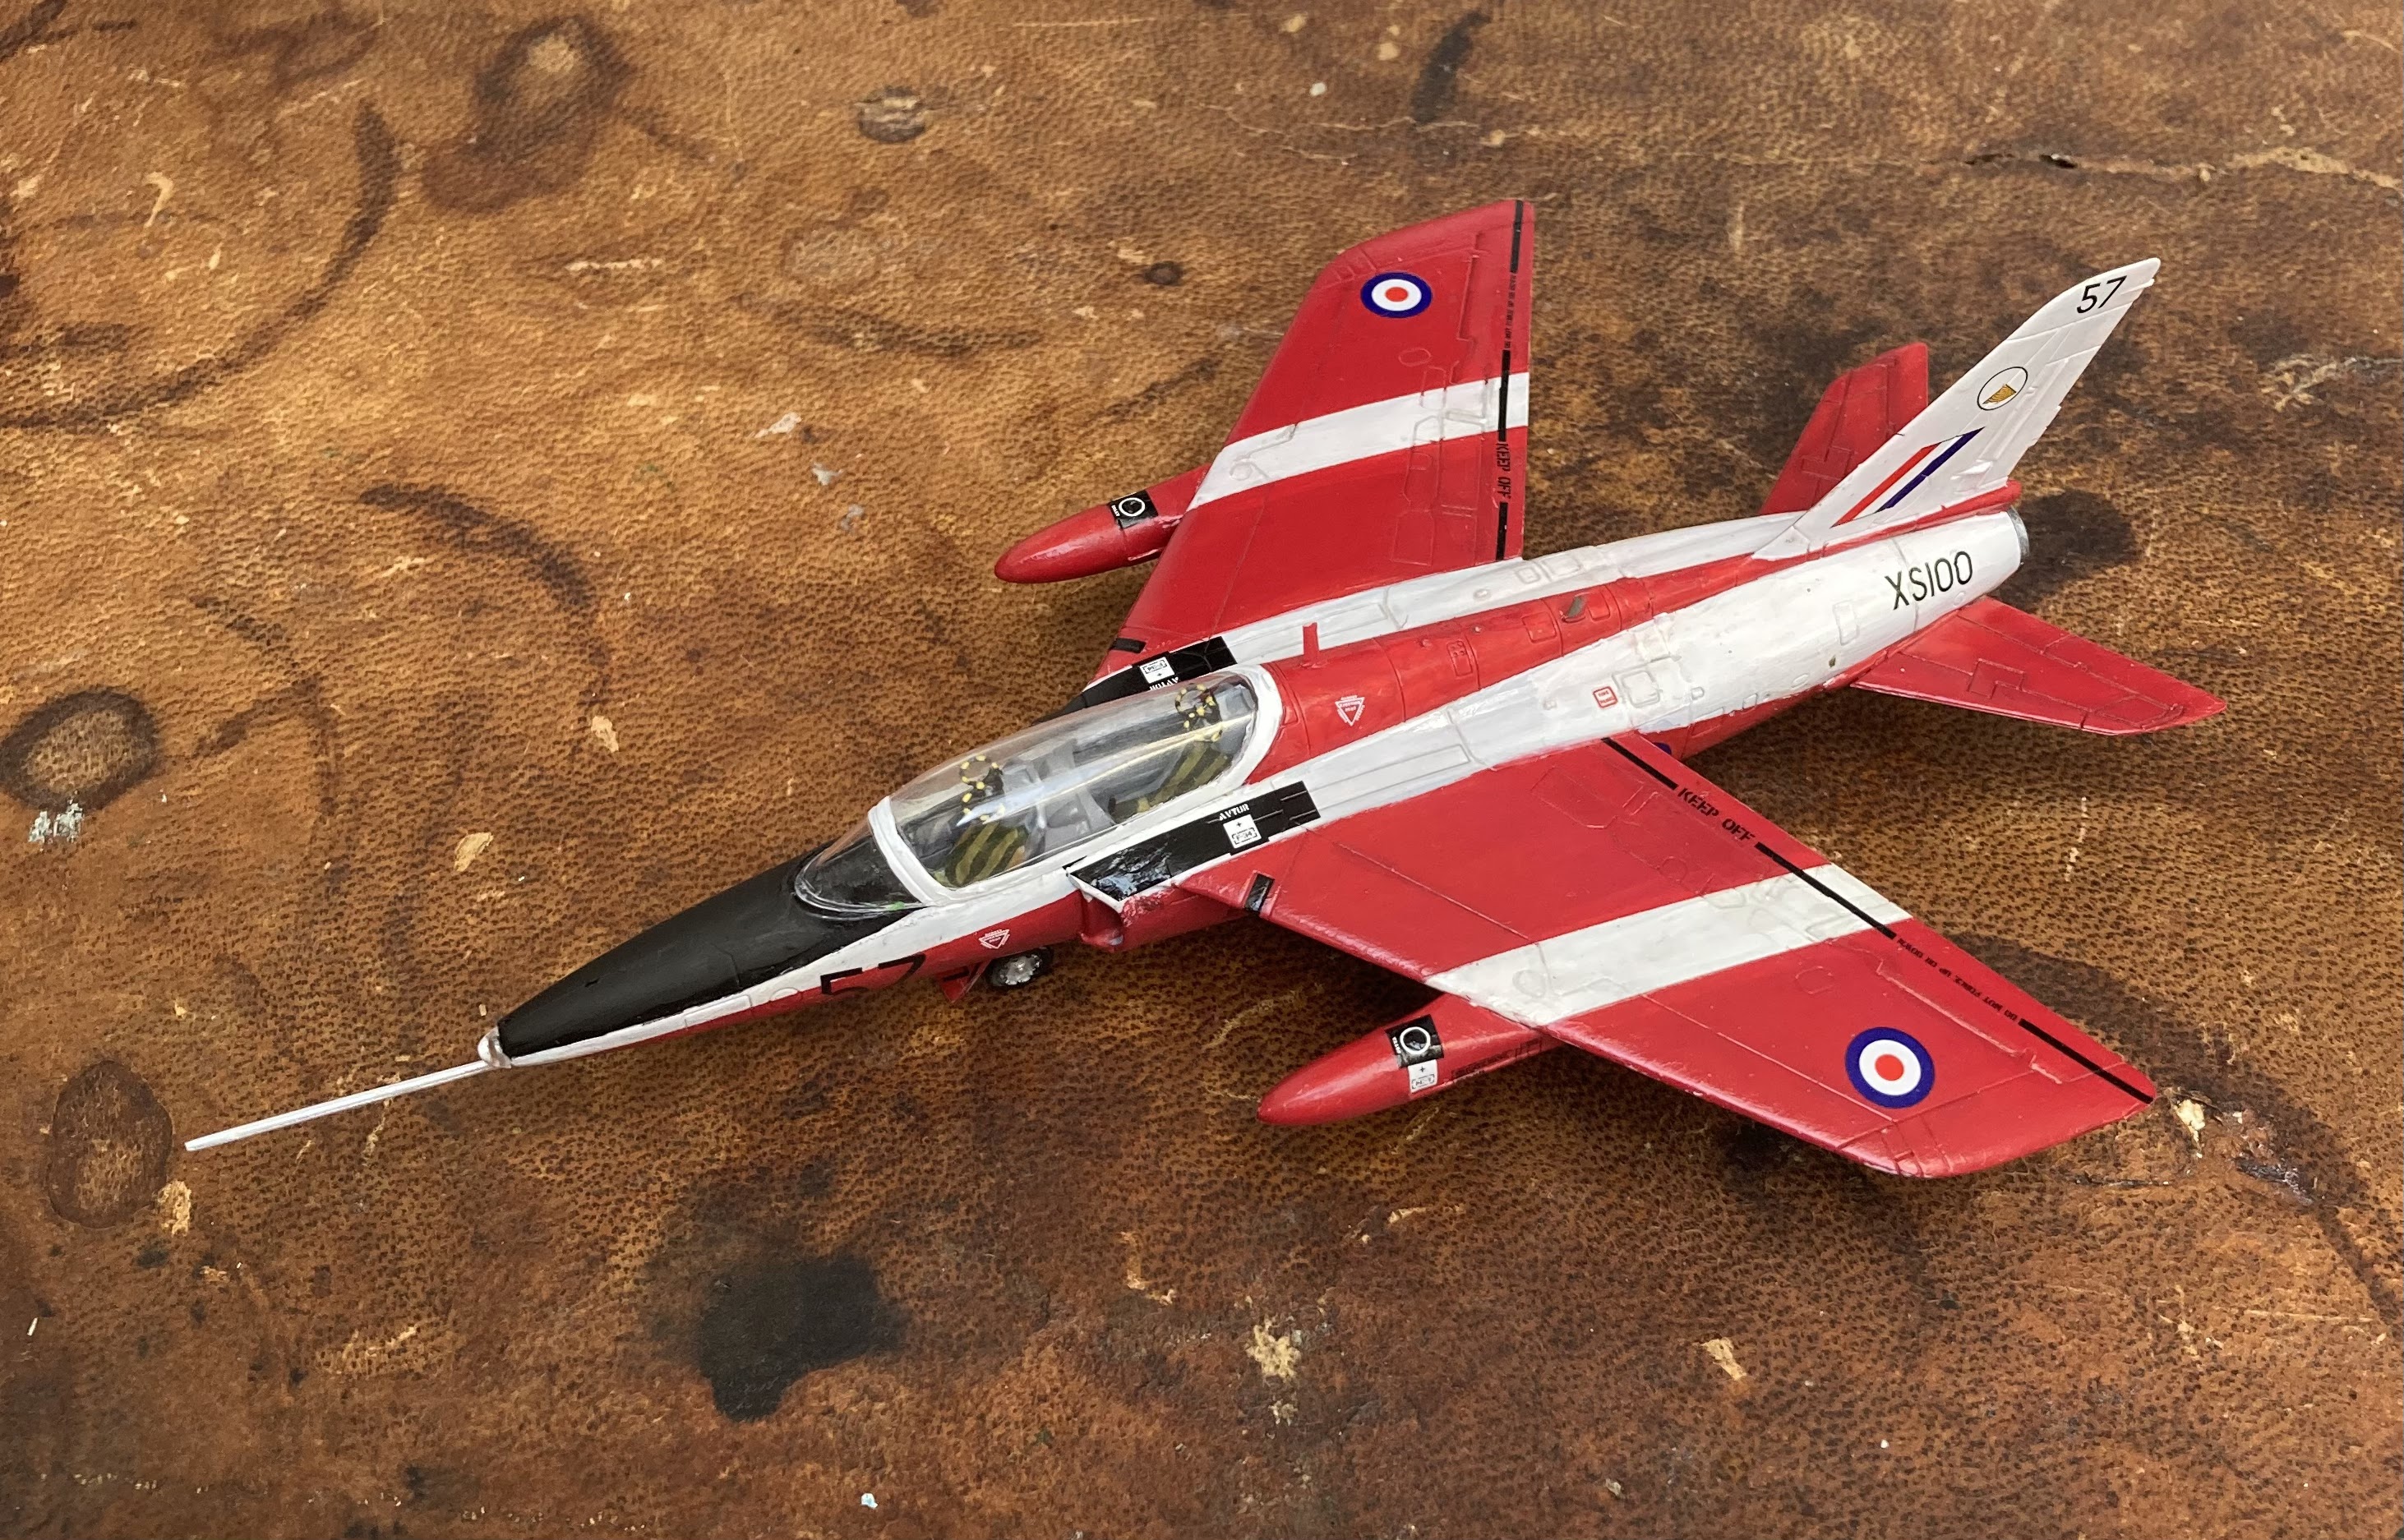
Further inspired by Youtube model-making videos I went out and bought myself the Airfix Folland Gnat in 1/72 scale.

We used to go to Anglesey quite often for summer holidays when I was a kid and we'd see Gnats flying from RAF Valley. On one holiday my Dad and I built a Me262 kit and then bought a Gnat kit from a toyshop, probably in Caernarfon. Unfortunately the kit got left on the rear parcel shelf of the car in direct sunshine and it warped horribly!

Despite this, I have fond memories of the Gnat (I think Airfix sent us a replacement) and I thought it would be nice to build the newer Airfix kit of the type, particularly as it comes with markings for a 4 OTU aircraft based at Valley.

Airfix call this a level one kit (presumably based on the number of parts) but I have to say this is hopelessly unrealistic.

It didn't build too badly, though I found the port-side jet intake didn't fit well and needed some filling as did the nose in front of the cockpit.


After building the FW190 straight out of the box I decided to do a little bit of extra detailing on this model. I added fine wire firing handles and masking tape seatbelts to the ejector seats.

Where the kit did, for me, step way outside the realms of the level one kit was in the paint job and decals. Any beginner would struggle, I feel, with a paint scheme that needs some pretty complicated masking. In places the painting diagram doesn't show the lines of demarkation between red and white areas at all well.

I should probably have got myself a white rattle-can and sprayed the whole aircraft that colour first.

As well as the complex paint job the kit also comes with more than 60 individual decals; some of them only a millimetre or two across. In the end I decided to forget about most of them and just get the model to a reasonably finished condition. 


All in all I've found this kit a rather discouraging one to build. I'm trying hard to regard it as a learning experience. If I see the same kit in the alternative, and simpler, Yellowjacks Display Team colours I'm tempted to have another go and see if I can do a better job next time.


Tuesday, March 22, 2022

On the workbench - Riga ruins UPDATED 25 March

I'm making a start on building a section of the the burned-out suburbs of Riga for the Sharp Practice games Richard P and I have planned. It's also something I may run at a future Lardy Day.

On 24 July 1812 the French army, in the form of Marshal Macdonald's X Corps, moved to threaten Riga. In line with a plan previously discussed with Minister of War Barclay de Tolly, von Essen, the military governor ordered that the Moscow and St Petersburg suburbs of the city be torched to deny their cover to a besieging army. The fire soon got out of control, however, and destroyed much of Riga-outside-the-walls causing great hardship to the residents.

I envisage a night-time operation involving opposing patrols stalking each other through the ruins. I have a 4'x4' cobbled city mat that should be ideal for this.

This painting gives some idea of the scene before the fire...


And this one of the fire at its height...


Having looked at a few photographs of burned-out villages made of largely wooden buildings, the overwhelming impression is of a forest of chimneys left standing among the ashes.  

UPDATED: Here's yet another picture of the same scene - this time after the fire:

That's the effect I'm going for.


The one on the right was a first test piece. The one on the left is the first of the production run and is work currently in progress. 

As I usual for my buildings these days, I'm using a base of PVC board covered in Tetrion. The chimney is made from Firedragon Games stone-textured foam sheets. The remaining wooden beams are broken pieces of MDF "sprue" left over from various building kits. I'm adding some roof tiles from thin card.

I don't think I'm going to get to the point where I can cover an entire 4'x4' board with such ruins. Looking at the paintings I can certainly justify some animal pens and other open areas. Maybe a stream flowing towards the Riga River (by that time part of the city's protective moat)?

Monday, March 7, 2022

Double Rogue Stars

At the tail end of February Gus, Phil, Andy, and Richard P came over to Stately Counterpane Manor for a first go at Rogue Stars

Rogue Stars as published is very much a two-player game. The initiative system is fun and great at keeping both players involved in the action all of the time but it won't easily work with three or four players. Although the online FAQ suggests a solution, I didn't want to risk my players' first experience of the game being spoiled by this not working properly.

So I set up two boards so we could do two one-on-one games in parallel. My old length of Pavis city wall formed a handy barrier between the two.

One of the boards was the starport - a chance to use my homemade shuttle craft.


Andy ran a street gang (the Undercity Hivers) trying to smuggle three crates of contraband across the starport while Gus was in charge of the Okh - kind of police-for-hire; in my mind vaguely based on the Judoon from Doctor Who.

The other board was a wasteland area that had been used to set up a hazardous chemical storage facility.


We used the Get to the Ship scenario on this board but the "ship" was replaced by a Stargate. This was the first time I've used the model that came as a souvenir of a long-ago Berkeley Hordes of the Things tournament.

In this game Phil took on the role of Commisar Lukan...

I based her on the evil Servalan from Blakes 7 and gave her a squad of fairly unimpressive soldiers (who happened to be named after prominent military historians but that's a side issue) as well as a fairly chunky combat robot. Apart from the robot, all of this squad were figures from the original 1970s Gamma World Adventurers box by Grenadier Miniatures.

Richard ran the crew of the Free Trader Gilgamesh; a squad made up of a mix of various miniatures. It was this group that had the task of escaping via the Stargate. They also had a military robot...

On the Starport side, Andy quickly managed to get Eloise (his machine-gun-armed-military-veteran pilot) into an overwatch position on top of the Starport Security building. Having an army-surplus jump pack helped with this!

Meanwhile the rest of the crew set off with their grav-sleds of dodgy merchandise.


The first shot of the game saw Sergeant Gnaar, the Okh leader, caught in a hail of machine-gun bullets and put out-of-action. This was a taste of things to come. Gus was unfortunate to lose another officer to the streetgang's firepower and was always chasing the game after that.

I saw less of the wasteland game as Richard was reasonably familiar with the rules so less guidance was needed from me. Above we see Troopers Glantz and Erickson taking cover behind a rock spire.

Phil/Commisar Lukan was successful in this game. In Richard's words, "Well and truly stuffed me with some excellent dice!"

The back-and-forth nature of the game was appreciated by the players and we plan to have another go in March. Since the game, Phil has bought a copy of the rules and he and Richard are both working on building squads based on figures they own. Rogue Stars is great that way - you can use pretty much any figures you have to hand.

For these first games I had set up the forces such that we avoided using some of the rules - tactical doctrines, grenades, and psionic were all off the table (see what I did there?)  I suspect for the next game I'm going to come under pressure to use the full rules.


Thursday, February 24, 2022

Adapting Sharp Practice ver1 scenarios

Having written some notes on covering Bob Mackenzie's Command Decision scenarios to TacWWII, I thought I'd have a go at presenting something similar on adapting old Sharp Practice scenarios to version 2.  My chief source of pre-version 2 scenarios is The Complete Fondler and I propose to work through a sample here. 

Let's look at Chapter Thirteen - Fondler's Siege. The scenario begins with some of Richard Clarke's deathless prose in which we learn of the improvised plan to give a bloody nose to a raggedy army of British and French deserters holed up in a ruined castle. Oh and of course there are ladies to rescue! 
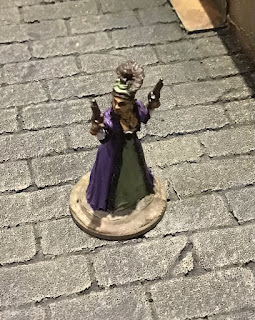
A lady - perhaps not in need of rescue

I wouldn't dare to challenge this stuff; with its ridiculous names and stereotyped characters (including the charming Major O'Stereotype himself), it is the very acme of Sharp Practice pre-game story-telling.

So we move on the the two sides' briefings. To some extent these recap information we've had from the introduction. Umpires will want to adjust these briefings in line with any changes they need to make to the scenario for logistical reasons (see below).

Force Sizes

Fondler's Siege has a British force consisting of ten 95th Rifles, thirty 60th Rifles, and twelve men of a rocket battery with four launchers. These numbers don't work for version 2 of Sharp Practice as version 1 didn't use the standard-sized Groups. We need the Rifles rank-and-file to be multiples of six and the artillery should have five gunners per piece. 

Then there's the enemy - in this case assorted deserters from both French and British armies. Here we require about 170 rank-and-file figures; rather more than we've come to expect of a typical SP2 force!
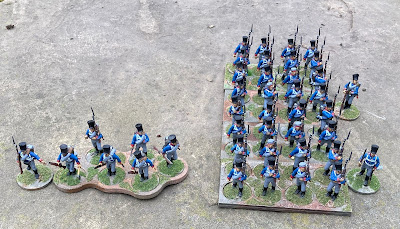
A typical (smallish) SP2 force

As a result, the advice must be to adjust the forces to meet the models you have available. But how to do that?

My suggestion would be to start off by maintaining the same ratio of force sizes. In this case, the deserters need to outnumber the British by about 3:1. In addition, though, we need to maintain the ability to split the forces as required by the story. In this case, the doughty Sergeant Paisley starts the action "off-camera" with a quarter of the riflemen rescuing distressed gentlewomen. 

If we say that he needs a minimum of one Group of six rifles to accomplish this, the implication is that Fondler's force should have a minimum of 24 riflemen in total. Again maintaining approximate ratios of men, we'd then have one rocket team with five crew and their Leader Lt Cholmondley (of whom later).

Keeping the deserter forces in proportion we'd then need a more manageable 72 figures or thereabouts. All the more manageable when we consider that the nature of the force means you can mix and match figures from all over the place! If you think your player representing Fondler needs a few more toys to push around, you'll need to up the enemy in proportion.

Oh, and if you don't have any RHA rocket troops you could either have them firing from off-table or replace them with attached group of guerrillas. 

Unit Stats

The Complete Fondler and SP1 both identify troops as Elite, Good, Regular or Poor. Obviously SP2 doesn't use that approach. In addition, SP1 allows troops to switch between line and skirmishing roles during the game. SP2 has them start on one role or the other and stay that way throughout.

We therefore must decide how to "stat up" the troop types and how to divide them into Line and Skirmish troops (or indeed Mass troops if our scenario includes natives or sailors). 

The Rifles and British artillerymen are easy in our sample case - the stats for Rifles are in the rule book and we simply need to swap rockets for guns for the artillery.  

But what about the deserters? I think I'd take a lowest-common-denominator approach. The British would have been "Regulars" and the French "Conscripts and Volunteers" before they left the colours. Let's go with the latter for the mixed deserter units. This reflects their reduced discipline. Both rated "First Fire" and could "Always" enter Formations so we'll let them keep those statuses. The French can only fire a Controlled Volley the first time they shoot and I can see a bunch deserters being somewhat flaky under fire so let's apply that rule to them.

Taking the worst value for "CrashingVolley", "Step Out", and "Drill" we end up with all threes. And finally I'd be inclined to remove the British Sharp Practice and the French Pas de Charge rules but perhaps give them Aggressive to reflect a degree of desperation? They know that capture probably means hanging.

In terms of unit types, I'd suggest the mutineers are mostly Line troops. Maybe you'd want to give them one unit of Skirmishers to represent the occasional more well-organised deserters. Oh, and Weedy Coves to represent those deserters who are drunk still applies in SP2.

Leaders

This is just a gut feeling that I can't really justify but I rather feel that SP1 assumed a slightly higher proportion of higher-grade Leaders (Big Men in SP1 terminology) than is common in SP2 games. You may want to consider being slightly less generous.

The SP1 descriptors work out as follows:

  • Cock of the Walk = Status IV
  • Jolly Good Chap = Status III
  • Fine Fellah = Status II
  • Young Buck = Status I

Clearly we need to include the major characters - Fondler and Paisley for the British and Hogshead and Noudelle for the deserters - without them a lot of the essence of the story is missing. Cholmondley to command the artillery makes sense. We could perhaps do without Frederick Williams but if you have the perfect figure to represent him it would be rude to leave him out.  

The deserters have a few minor characters and I'd perhaps leave out one of the "Captains" given that we'll probably be scaling down the rank and file.

Leaders' character descriptions generally read across quite well from SP1 to SP2. The following equivalences might help:

  • SP1's An accomplished swordsman = SP2's Flashing Blade
  • SP1's An accomplished horseman = SP2's View Halloo
  • SP1's Handsome Devil or Pretty Boy = SP2's Handsome Devil
  • SP1's Linguist = SP2's Stunning Linguist
  • SP1's Athlete or Countryman = SP2's Sporting Life 

Where a character description isn't given above and you don't recognise it from SP2, like "an occasional horseman" or "a slasher with a sword", you can ignore it for rules purposes and just regard it as a bit of background colour.

Cards

SP1 used a different deck of cards (in fact two decks) and used them in a quite different way to SP2. As a general rule the Game Cards and Bonus Cards sections of an SP1 scenario can be ignored by SP2 players. However, note that our example scenario uses the Blank Card to determine when the deserter reinforcements arrive. This will still work with SP2; there's a blank card in the deck available from TFL. More on this below.

Deployment

When it comes to deploying units onto the table there are two significant differences between SP1 and SP2. Perhaps surprisingly, one of these is shooting range. In general, weapons shoot about one-third further in SP2 than they did in SP1. This means that the battlefield is effectively smaller - troops get into the action more quickly and there is less need, or scope, to play out the forces' approach marches.

Given this, the designers were able to do away with Blinds, which were templates moved on the table to represent units not yet spotted by the enemy. SP1 used a system of spotting rolls to see if a Blind should be removed and replaced by the troops it represented (if any). Although they did add some interesting fog of war, I've also known them give some game-breakingly silly results. Fortunately, I don't think ignoring them will seriously unbalance most scenarios. 

As a general rule I'd suggest that you ignore the notional change in the size of the area covered by the scenario.  Place your SP2 Deployment Points in the locations where the SP1 scenario suggests units enter the table.  It should be easy enough to assess which of the entry zones represents a Primary Deployment Point. Often Secondary Deployment Points will just be "where-the-road-meets-the-edge-of-the-table" or the like.

If your scenario really does require some degree of hidden deployment or hidden movement there are a few ways you could allow for this:

  • give a sneaking attacker a Moveable Deployment Point
  • let the attacker dice to see how far forward his fixed Deployment Point can be deployed
  • and (defenders in particular) remember that just because your Leader's card has come up, you don't have to put his troops onto the table straight away!

Game Duration

In the context of how long (in game turns) a scenario should last, I think we need to consider what proportion of the plot development each turn represents. Our sample scenario requires Fondler's men to capture the ruined castle, search it for clues, meet up with Sgt Paisley and the rescued ladies, and then hold off a deserter counter-attack. Does the number of game turns required to do this vary significantly between SP1 and SP2? 

Having played a few games of both, I'm fairly comfortable with the idea that a turn represents about the same period of time in both editions. As a result the so-many-turns-of-the-Blank-Card approach mentioned above (and used in several of the Compleat Fondler scenarios) should be fine without modification.

Note also that the Task system (roll 1D6 for each action used in attempting a Task) is the same in both versions (unlike Infamy Infamy, which has a unit rolling 1D6 when a it spends its entire activation attempting a task). As such, Task values should port over fine from SP1 scenarios to SP2.


That's it for now, I think, unless any of my horde of readers have any questions about specific SP1 scenarios?
Saturday, February 19, 2022

Warrior!

Just finished this evening in another plastic kit but this time one that I can definitely see coming in useful in a war-game. 

I'm not sure where I bought this Trumpeter 1/72nd scale kit of the British Warrior MICV but as you can see I only paid a fiver for it.


This is a really nice kit and I think it's probably worth getting on for twice price that if you want a Warrior to support your British infantry.

It's a fairly easy build with all the parts going together cleanly with very few gaps. The tracks and the outer road wheels are moulded as a single piece - so no messing about with individual track links or rubber band tracks.


The moulding is nice and crisp with excellent detail. The only slight concern I have about using it in games is the potential vulnerability of the wing mirrors.


The black-and-white illustration of the paint scheme and where to put the decals would be better in colour. I got a bit confused and put the rear vehicle number plate in the wrong location. By the way the vehicle comes with two sets of these so if you bought two kits you wouldn't have to scratch around for spares so as to avoid having two vehicles with the same number in your force.


I'm pleased with this model and I look forward to seeing it in support of the NATO intervention force in Andreivia.

Wednesday, February 16, 2022

Russian Officer Backgrounds

To support our Livonia 1812 "campaign" - not sure how many games we'll get in - I had a go at producing a set of background tables for Napoleonic Russian officers. This first appeared on the Too Fat Lardies forum but I thought I'd save it here as well.

Roll initially 2D6 for your Leader's ethnic background and then follow the rabbit hole in most cases.

Russian Officer Background for Sharp Practice

2 Russian minor noble, poor, joined a Guards regiment as a gentleman sergeant

3 French emigré:
  • 1-3 Minor noble
    4-5 Officer in the former pre-revolutionary army
    6 Disenchanted former Bonapartist (thoroughly bourgeois but trying to hide it)
4-5 Minor noble born in the Russian Empire of non-Russian stock:
  • 1-2 Polish or Lithuanian
    3-4 Baltic German or Finnish
    5-6 Georgian, Tatar or Caucasian
Roll again as for Russian below for detailed background

6-9 Russian* noble: (Roll 1d6, adding one if rolling for your Force’s overall commander)
  • 1 A poet and a dreamer; joined the army out of misplaced romanticism 
    2 Illegitimate son of a household serf - found a place in the army by his noble father
    3 Spent most of his life on his family’s small country estate
    4 Known at court for his dangerously modern ideas but still fiercely patriotic
    5 Son of a respected noble family (it’s rumoured that his true father is a prince of the blood)
    6 Family have been army officers for generations
    7 Younger son of a princely family
10-11 German emigré officer:
  • 1-3: unemployed as a result of limits on the Prussian army after Jena
    4-6 refuses to serve under Napoleon
12 Other emigré professional soldier:
  • 1 Italian
    2 Swiss
    3 Swedish
    4 Polish
    5 Scot
    6 Player’s choice

* Note that for the purposes this table “Russian” includes Russians, Ukrainians and, because I love a bit of historical obscurantism in my terminology, White Ruthenians.

I must acknowledge the contribution of Captain Fortier on the forum, without whom this wouldn't be half as good.