Showing posts with label To The Strongest!. Show all posts

Friday, January 17, 2025

Models for Moonbroth

I'm helping out Simon Miller and Ian Notter put on a the Battle of Moonbroth at Hammerhead in March. It'll be great to get at least some of the GloryGeeks back together for the first time since... gosh, 2006?

I'm gradually going through my Gloranthan 28mm stuff to see what can be put on to temporary 120mm-wide bases to serve as To The Strongest elements.

First up are these Ostrich Riders.


These guys have appeared here before in a couple of Song of Blades and Heroes skirmishes. The riders 20mm scale plastic HaT Numidians with 28mm scale Numidian heads transplanted on to give a Pygmy appearance. The ostriches are white metal castings I bought at a show somewhere; sorry can't remember the manufacturer.


I made the sabot bases out of two layers of card and then textured, painted and flocked them to match the existing figure bases.


I'm assuming they function as conventional javelin-armed light cavalry in To The Strongest.

Next up we have a unit of Sun Domer archers.


I had one Hordes of the Things element of these but Simon very kindly sent me three more similar figures. I added arrow quivers (four from the Victrix late Roman light cavalry set and a couple that I designed and 3D printed myself. The second chap from the left also received the transplant of a hand with bow from the same Victrix set. A painted gold wristband helps disguise the join.

Not sure if these will be light infantry or bowmen in the game. I'll leave it to Simon to rule.

The rest of my Sun Domer Templar army will get a sprucing up next. It looks like forming a couple of deep pike units. There's also the Standard of Sun County which, if I recall correctly, has a never-retreat-in-battle thing going on. We'll have to consider its effect.


Wednesday, January 31, 2024

Freebie sabot base

I noticed that a piece of laser-cut MDF in the collection of left-overs had five 30mm holes in it. I can't remember which kit it was from but I thought I might as well make use of it.

Trimmed to a 10cm frontage rectangle and with a thin card base added it makes a nice sabot base.


I don't have much on 30mm round bases but it does give me the option of fielding these Picts as a To The Strongest unit.

Monday, January 3, 2022

Christmas Games 2021

As usual we managed to get in a couple of wargames over the Christmas-New Year holiday period.

The first was a six player Hordes of the Things game played using my collection of 6mm scale figures. Here are a few pictures:


The pic above shows five of the six entry points marked by white cards with dice on them. The sixth is out of shot on the bottom right corner.

The aim was to capture the large tower in the middle of the table but this could only be done after certain other tasks had been achieved.

Mostly Irregular Republican Romans with a unit
Rapier cataphracts


The Wolfkin Goblins have captured the native huts


The players


Cave trolls attempt to capture the castle

The army of the Consulateship of Salydia arrives
to disrupt the Cave Trolls' plans

Opposing forces attempt to capture the Stone Circle

The Wolfkin Goblins, having captured the mud
huts, approach the Tower of the Magician Dukes

Three different armies threaten the stone circle

The action ended when the Wolfkin Goblins, commanded by Odette, captured the central stronghold.

For those who are interested, the forces were all 6mm scale models; mostly by Irregular but with one army composed of Baccus Republic Romans.

Our second game was the Battle of the White Meadows; the scenario Jamie had intended to run at Crisis Point 2020 (had it taken place). It was a To The Strongest scenario sent on sixth century Andreivia. John and I commanded a Byzantine army against a Persian force under Richard P and Gus.


The battle was characterised by exceptionally bad luck for the Byzantines. In virtually the first close combat of the game, the Byzantine commander, Justinian, was killed. This made it difficult to keep the Roman army moving forward.

In the end we decided the day was probably lost for the Byzantines but there was just a chance that John's allied General could lead his heavy cavalry in a last minute charge against the flank of the Shah Khosroe's bodyguard. 

At this point the words of the Roman generals were as follows:

Rich:      Of course, the way things have been going, you'll probably draw two ones.

John:    <draws a chit> Well, there's one.

John:    <redraws a chit as the General is present> ...and there's a second one!

At this point the game was clearly up!

Richard P has an excellent write-up of the game here.


Thursday, March 18, 2021

A couple of recent games

The blog has previously seen no evidence of a couple of games recently held at Stately Counterpane Manor, mainly because neither of them was particularly photogenic.

A few weeks ago I ran what I hope will be the first of a series of games based on Unternehmung Nordwind - the final major German offensive on the western front during WW2. We used Chain of Command to recreate a typical German platoon attack in the early hours of New Year's Day 1945.  

At Schlietzen Hill just west of the Alsatian village of Rimling, Panzergrenadiers of the 17th SS Götz von Berlichingen Division assaulted positions held by the GIs of the 100th Infantry Division.

The German command believed that they had achieved strategic surprise in launching the attack in a quiet sector of the front. They would achieve tactical surprise by attacking with no preparatory reconnaissance or bombardment, using troops who had only arrived in their attack sectors in the last twelve hours. The men were fired up on alcohol and stimulants to make up for the fact that they mostly hadn't slept in the last 24 hours.

In fact, the Americans were fully alerted thanks to radio intercepts and prisoner interrogation. From units across the sector, accounts uniformly describe the German attackers as advancing drunk and shouting insults in English and German.  I considered it reasonable to field that unusual beast, the Panzergrenadier platoon rated as Green!

The battlefield was largely open. A single low hedge (with a couple of breaks) crossed the hillside. At the eastern end of the battlefield was a single house next to a clump of trees. Near the western end was a small rocky outcrop. Richard P's Germans were attacking from the north with Dex's Americans to the south.


After the patrol phase Richard ended up with a deployment point behind the hedge, another on his baseline and a third a little way up the western flank side of the table. Dex had one behind the house, one on his baseline and one behind the rock outcrop.

Early in the game Richard deployed a squad and an attached tripod MG42 behind the hedge.


Dex had a couple of minefields - one in the clump of trees by the house and one on his left flank between the rock outcrop and the hedge. He quickly deployed a squad in the house and another, dug-in on the rocky outcrop.  


Richard got four squads deployed in positions where they could fire on the GIs on the rocky outcrop.  The second American squad, in the house, were not in a position to make a significant contribution.


Eventually the action bogged down into a static firefight. With eight MG42s available (Richard had bought a tripod MG and an additional infantry section with his support points) the Germans just about had the advantage in firepower. They were taking heavy casualties from the GIs' M1 Garands and BARs hitting Green troops on 3-6 and rerolling ones but the Americans never got a decent crossfire going. In the end the American Force Morale was whittled down to zero.

In retrospect, I think the Americans made a couple of mistakes.  Firstly, they had a very limited choice of useful cover. They'd been able to buy foxholes for two teams and then there was the clump of trees by the house and the rock outcrop (which would both have given soft cover). They mined the woods and put one team in the house but they never had line of sight to the enemy. The foxholes were put on the outcrop, thus giving them room for only one squad's worth of firepower from a covered position facing the enemy.

Finally, Dex rushed to deploy too early. If he'd waited, the Germans would have been forced to advance beyond the hedge line and could have been hit by devastating firepower from American troops suddenly appearing in front of them.

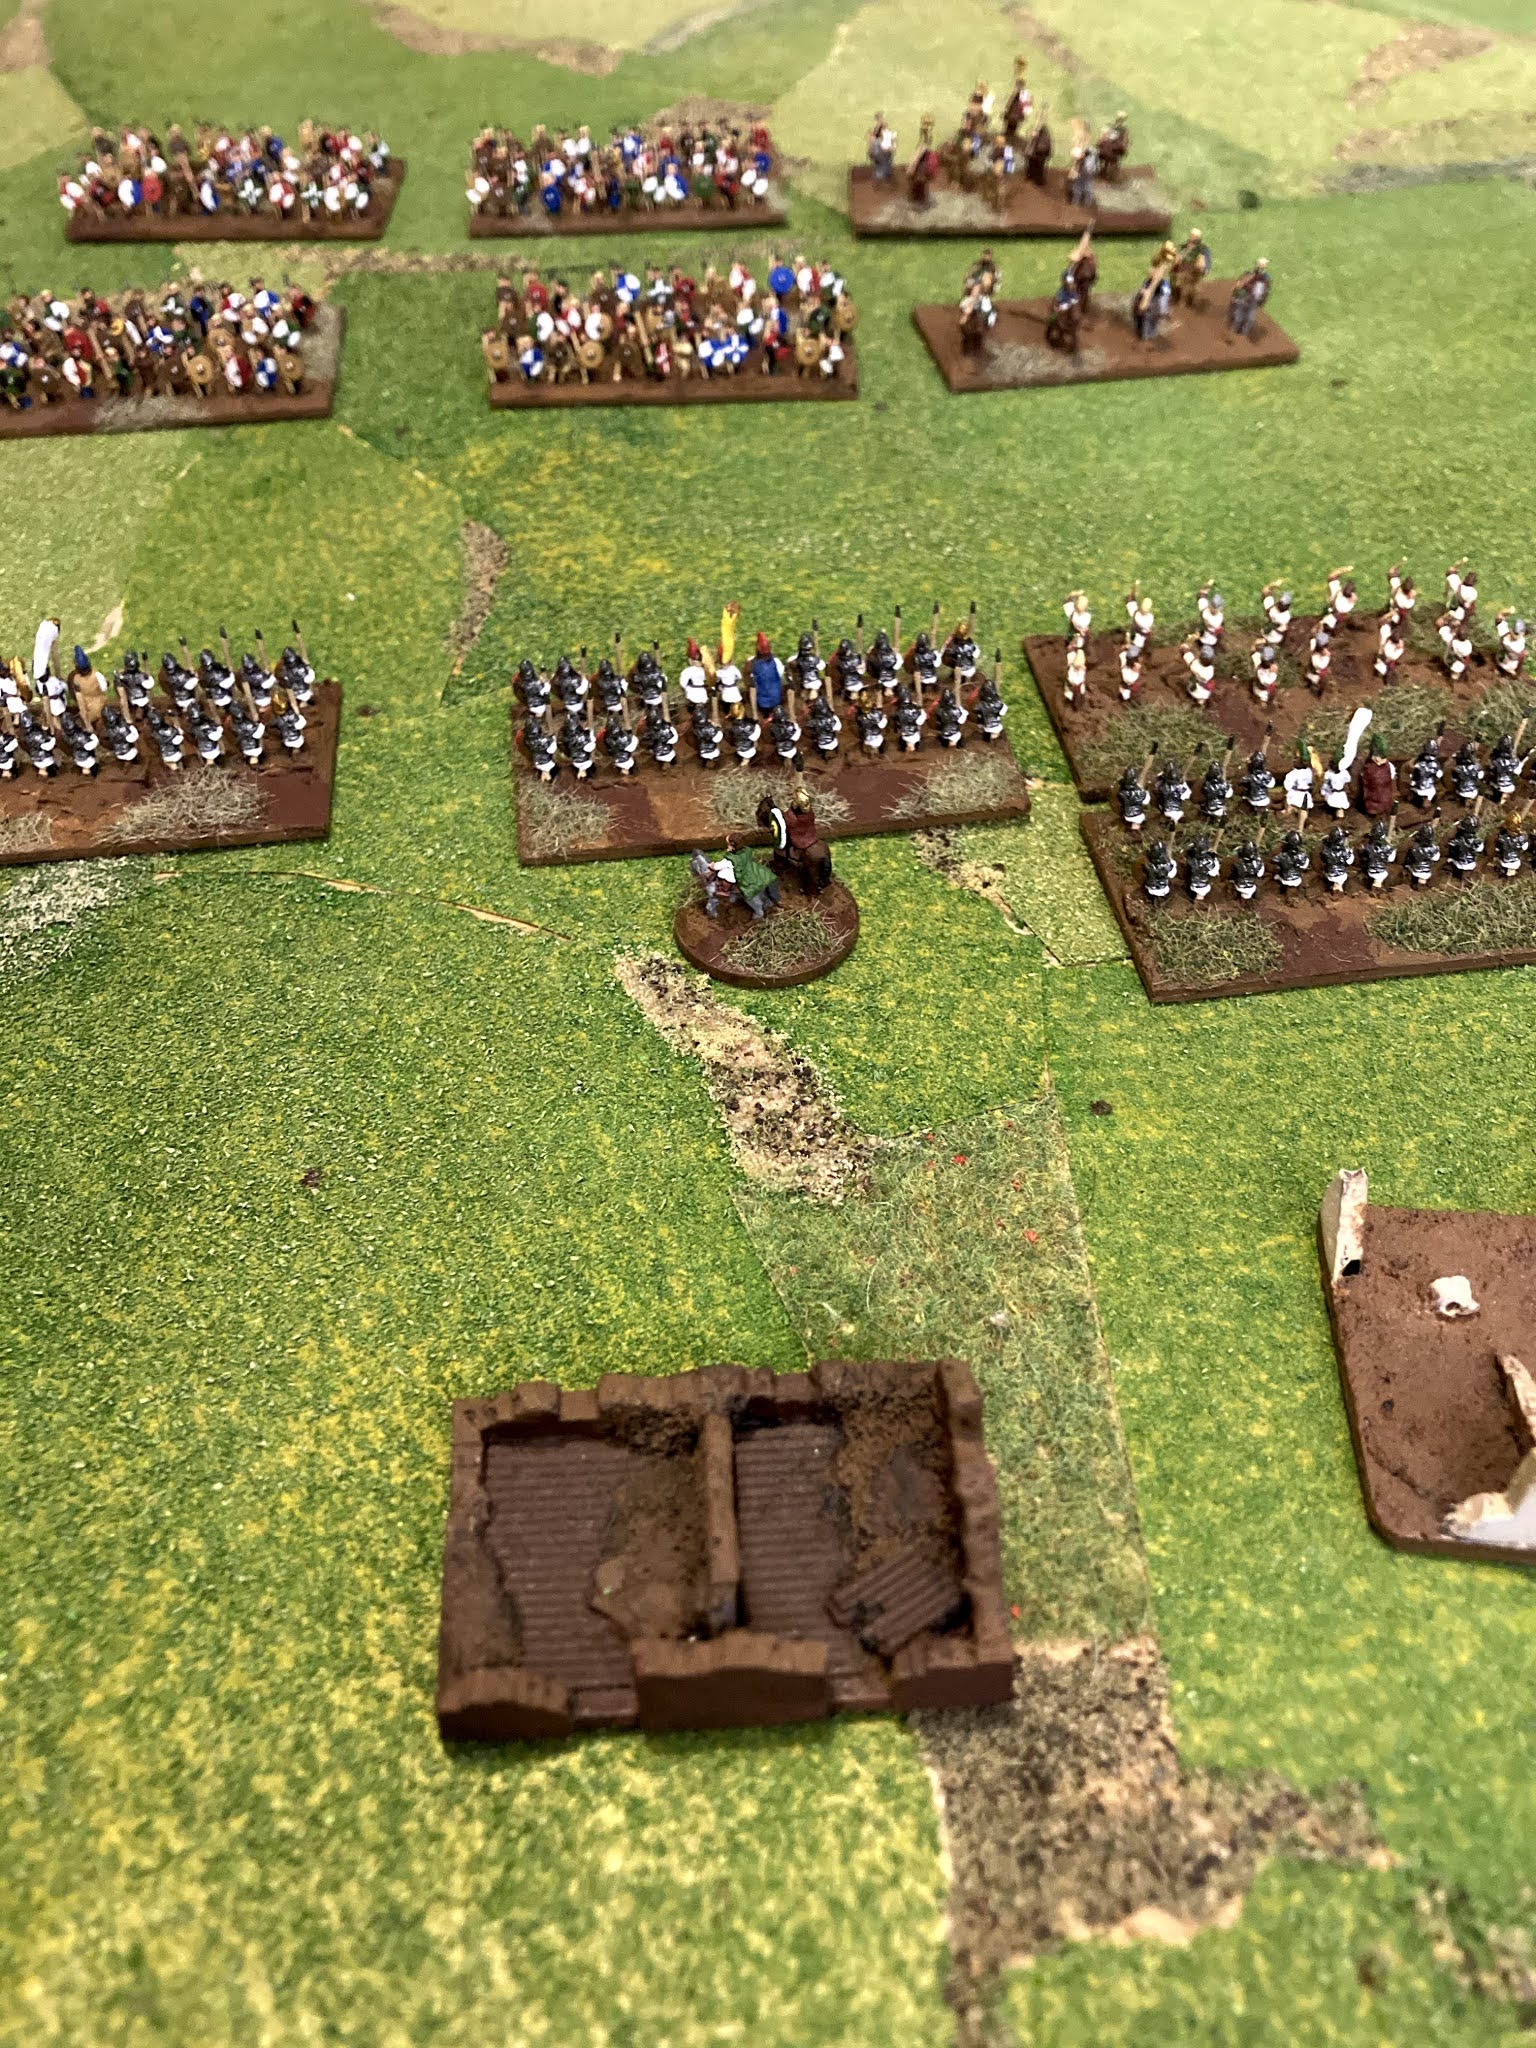
The second recent game was a first try at using Jamie's sixth century Byzantines and Vandals. We set up a very simple action using To The Strongest! We plan to run the North African battle of Ad Decimum (533CE) at the Joy of Six this year (if it happens) and Jamie is providing the armies.


Ad Decimum will get its own dedicated terrain board (my contribution) but for this game we just used my existing 6mm TTS board.

Moorish cavalry


Vandal foot approach the Roman centre

We'd both forgotten a fair amount of TTS and we made a few mistakes so it was good idea to get this practice game in. For the record it was a narrow Byzantane victory, Belisarius's right wing cavalry having seen off the Vandals' Moorish allies and turned their flank.

Sunday, April 7, 2019

Time for terrain

I've decided to spend a little while working on some 6mm terrain.  Nothing major, just making best use of some bits I've got lying around and trying to give my battlefields a lived-in look.

First up, I'm going to make a generic banked camp for my 6mm Late Roman forces.


It's very simple; just a piece of artist's mounting board cut to 150x75mm.  That's the size of two squares on my smaller To The Strongest! board. I've started glooping it with my usual coloured tile grout.

I've also dug out this resin castle.  I bought it years ago and it saw use once or twice as a Hordes of the Things stronghold.  It's slightly smaller than 6mm scale and one corner of the cast-on resin base has broken off.


What I think I'll do is mount it on a piece of PVC board shaped to give me a natural-looking hill.  It'll make a nice piece of set dressing for 6mm scale battles in any period from the Middle Ages onwards.  I think I might break off the other square corners as they tend to catch the eye even when buried in gloop.

Apart from that it's just a case of scrabbling around in the bits box to see what else I may have that can be turned into passable 6mm scale stuff.


Wednesday, April 3, 2019

Crisis Point 2019 Report

As usual after Crisis Point, the last thing I want to do is sit down and blog about it at length.  But here's a brief over view of the games.  The weekend went very well; I'm really pleased with the number of people who came and the spirit in which the games were played.

On Saturday we had three games.  On table one we had my Menton 1940 Chain of Command game, of which more anon...


Table two was occupied by Jamie's game of Song of Drums and Shakos.  This was set in 1794 and saw two groups of revolutionary French up against a combined Austrian and Sardinian-Piedmontese force.
  

From what I could see, this seemed to go very well, with four players engrossed right up the the close of play.  

Finally on day one we had big table depicting part of Malta in 1942.  This used Will McNally's excellent terrain on which a fictional German invasion was played out using the Battlegroup rules.


On Sunday, I switched to running a game of To The Strongest! set during the Second Punic War.  

Jamie was keen to play in this game and as there were three other games to hoover up players, Jamie and I ended up playing this game with just the two of us.
  

Surprisingly, for such a fast-play set of rules we didn't quite reach a conclusion.  I think my Carthaginian left was going to collapse before my right wing captured Jamie's Roman camp.

The next game on Sunday was Kevin Tingle's Beirut Force on Force game.


Kevin's game was a masterpiece of low-cost city building, using cardboard and balsa wood instead of expensive resin castings.

Neil Mc and Andy T from the Cold War Commanders group brought a 6mm 1989 Soviet landing at Gallipoli game.  Again lots of cardboard construction was in evidence...

I didn't get to see much of this game in action but the idea of Soviet airborne troops landing at a half-constructed airport was a fun one.

Finally on Sunday, the Malta game continued, this time moving on from the initial airborne attack to a German seaborne invasion.


I'm very pleased with how Crisis Point went.  it was a pleasure to welcome attendees both old and new and in particular to see how the younger gamers (four this year) coped well with a whole weekend of intense table-top action.


Wednesday, February 27, 2019

I've not reported yet on the game of To The Strongest we (Gus, Ron, Leo, Arthur and I) played a couple of weekends ago.

I don't want to share too much here at this stage as it's one of the games I plan to run at Crisis Point.  However, here are a few pictures....


There's a real mix of figures in 25/28mm scale, ranging from very old Lammings to modern plastics from Victrix.


Sunday, May 20, 2018

Somewhere in the Known World

Tom and Rob came over yesterday and we had a game of To The Strongest using my newly completed collection of 28mm troops for the Punic Wars.

Actually this was the first time I've had to whole collection out on a table at the same time and I was quite please with the look of the troops en masse.  I'm particularly please that I've managed to achieve this in about 13 months of building and painting!
The Roman army:


And the Carthaginians with their Numidian allies:


The scenario was a straight line-up-and-go-at-the-enemy job.  I prepositioned the armies but let each player have a bit of a switch around of units before we started.  I know that Rob repositioned his elephant and moved his Carthaginian general to be with one of his two units of Gallic warriors.  This was probably a good move as a big warrior unit backed up by a hero and a general is quite a powerful striking force (or it would have been if Rob's ability to draw the wrong activation chit just when it mattered hadn't come to the fore).

Tom, as the Roman commander Marcus Gaius Piso (on the left in the picture below),  moved first and threw his Roman cavalry forward on his right flank whilst his mercenary slingers moved towards the bad going forward on his left.  His centre was a bit slow getting moving.


Rob, meanwhile, as Carthaginian general Hanno, pushed forward the Numidian light cavalry on his right wing but was unable to get the Catrthaginian centre moving at all! It seems the trumpet signal for a general advance was misunderstood as, "Let's wait here and see what happens".


I had warned the guys that this was a game in which units could melt away a the drop of a hat if things went against you. Sure enough, the first offensive action of the game saw lead slingshot from the Romans' mercenary slingers caused a unit of Numidian light horse to flee the field.  More shockingly, they left behind the corpse of Prince Arabio, Rob's allied commander!  From now his army would be far harder to control.


[In act it would have been even harder to control if I'd remembered to apply the "out of control" modifier to all of the Numidian command's troops for the rest of the action.]

The shot below shows the Gallic horse on the Carthaginian left.  You can see that I used a variety of means including single trees, grass tufts and small piles of cat litter rocks to mark out the corners of the square grid that these rules require.  This seemed to work nicely without being too visually intrusive.


Command and control continued to prove unreliable for both sides.  The Latin allied legion (background in the pic below) moved forward aggressively but the Roman legion (foreground) seemed reluctant to move.


In the pics above and below we can see the Latin allied legion nicely lined up but further forward than the Romans proper.  Also in the pic below some allied Bruttian javelin men (left) are about to clash with the Carthaginian citizen levy (right).


At last, a clash in the centre!  The Romans finally get moving and their Velites throw javelins at the Carthaginian spearmen while the aggressive Bruttians go in to close combat....


On the other flank, a confused melee develops.  Numidian light horse threaten the Roman left.


In the centre a breakthrough looked possible as a unit of Gallic warriors drove off some Roman Velites and pushed forward into the gap they left in the Roman line.  Unfortunately Rob struggled to get them to turn into the flank of the adjacent legionary maniple.

The Gauls are old Lamming 25mm models but I didn't feel that their lesser stature was too noticeable as we were playing.


The confusion on the Roman left continued and as the Roman saying goes, it came down to the Triarii.  In the picture below, Numidian horse threaten Arius Marcus Scorpio, the Tribune in charge of the Latin allied legion (foreground) whilst Roman horse threaten the Numidians' flank!


Marcus and the triarii are all that stand in the way of the Numidian sweeping into the Romans' left flank.


At about this time, the Carthaginian elephant, galled by Roman javelins, panicked and rampaged through the Carthaginian lines.  Fortunately Rob had left a space for this to happen and no further damage was done.


Throughout the battle, Rob had been taking a steady trickle of casualties.  In the centre a Roman legionary unit destroyed their Carthaginian spearmen opponents and split the enemy battleline in two.

Although Rob had finally managed to turn his victorious Gallic warriors into the flank of a Roman maniple, Carthaginian morale was faltering...


... with the loss of a unit of Numidian spearmen somewhere on the right, the Carthaginians had suddenly had enough and their army broke for the hills.

The picture below shows the final position.  On both flanks General Hanno had superior cavalry strength but in neither case could Rob manage to draw the right chits at the right time to take advantage.  The loss of Arabio to a misfortunate slingshot in the first moments of the battle was crucial. Alive, he could have led his light horse to cause chaos in the Roman read. Dead, he was an early drain on Rob's store of Victory Medals from which he was unable to recover.


I'm pleased with how the game went though we didn't really get to try out the new rules for the Polybian legion's line replacement ability and of course the fancy new units (elephants, I'm looking at you) didn't perform as advertised.  Wargaming rule number one, the newly painted unit always fails miserably on its first outing!