Showing posts with label Saturday. Show all posts

Monday, January 20, 2025

Battle of Mokre, August 1944

On Saturday, Phil and Andy came over to Stately Counterpane Manor to play the latest of my TacWWII adaptations of Bob Mackenzie's Great Patriotic War scenarios. The Battle of Mokre is a brigade-sized action during the August 1944 fighting in southern Poland.

The battlefield (at TacWWII's 1cm = 40m ground scale) is just 4 feet by 2.5 feet so the game fit very comfortably on the kitchen table.


The terrain is, I think, largely self-evident in the picture above with the possible exceptions that the pale linear features are ridge lines blocking line of sight (mostly - in some case there is line of sight across a ridge line from one that is deemed to be higher) and the beige-coloured rectangles bottom right are flooded meadows.

Our German player (Phil) began with a battalion (I/64 Panzergrenadier Regiment) holding Jablonice and an armoured battlegroup (KG Collin) advancing either side of the major ridge to the right of Mokre. 

Andy, as the Soviet commander, had 52nd Guards Tank Brigade in and around Mokre, 53rd Brigade on the left-hand side of the table below the woods, and 289th Rifle Regiment coming on behind them. Additional Soviet forces would arrive as determined by a die roll each turn. 

Contrary to what the designations above might suggest, in reality none of these Soviet formations was above what most armies would consider peacetime battalion strength. For example, here's 53rd Guards Tank Brigade advancing towards Jablonice:


There's the Brigade HQ, a platoon of T-34s with tank riders, and a platoon of IS-2s. They are approaching some outlying elements of I/64 Panzergrenadier Regiment:


Kampfgruppe Collin was forced by the scenario to deploy astride the ridgeline near Mokre. This would leave half of their tank platoons in a position where they could be fired upon by the ambushing 52nd Guards Tank Brigade. Phil decided to put his under-strength Panzer IV battalion in the "shop window".


Unfortunately for Andy the component units of 62nd Guards Tank Brigade were not properly alert as the Panzers passed in front of them. Only one of their company-sized battalions managed to spot the enemy and fire at the first opportunity. Although one Panzer IV platoon was knocked out, Phil elected not to return fire. This avoided keeping the transiting Panzers hidden from the sleepy Soviet tank gunners throughout the first turn.

The action had previously begun with the arrival of a flight of Il-2 Sturmovik. Andy's Bf-109s were able to intercept them and shoot them down. Subsequently, a flight of La-5FN fighters showed up. They engaged some SdKfz 251s but to no effect.


On the second game turn the Soviets again received the maximum in air support while the Luftwaffe was conspicuous by its absence. One of KG Collin's Panzergrenadier platoons was put out of action.

A light SU Regiment with SU-85s appeared alongside 52nd Tank Brigade. Although they didn't contribute any effective hits, their arrival seemed to wake up the nearby tankers. The German Panzer IV battalion was wiped out but the Kampfgruppe's overall morale held despite the losses.

One turn three 51st Tank Brigade arrived through Kurozweki...


... whilst their compatriots of the 52nd and 53rd Brigades engaged the enemy armour. 

The centre of the board saw an increasingly complex melĂ©e between converging armoured units. By the end of game turn 6 KG Collin had been broken and 52nd Tank Brigade was reduced to the strength of two platoons, albeit one of them was a powerful IS-2 unit. 


By the seventh turn of the game the Soviets had received all of their expected reinforcements. Perhaps key were the headquarters units of two off-table artillery regiments. With these manoeuvered into position, the Soviets would be able at leisure to bombard Jablonice. 

With our available time used up, the opinion was that the eventual result would be a victory to the Soviets but a pretty Pyrrhic one; certainly not the easy triumph they achieved in history.

My thanks are due to Andy and Phil for an enjoyable battle, hard-fought in the best spirit. We need to build on our increasing experience with TacWWII and get some more games in soon.


Wednesday, January 23, 2019

Hammer and Anvil

Saturday Afternoon WargamesTM are back and I want to try and keep it that way throughout 2019.

I put out a call for players for a game last Saturday and it looked at first like we'd be quite small in number so I decided on Lion Rampant; something I can't put on if we have a large number of people playing and something we haven't played for a while.  Despite a sudden, last minute rush of interest I managed to stick with the plan but with two 28 point retinues each divided in two.

The table depicted an area in the foothills.  The far end (where new player Harry is sitting in the above photo) was pretty open with just a wheat field (cover only; not rough ground) and a gentle hill.  The near end was dominated by rough going where the road branched either side of an impassible rocky pinnacle.


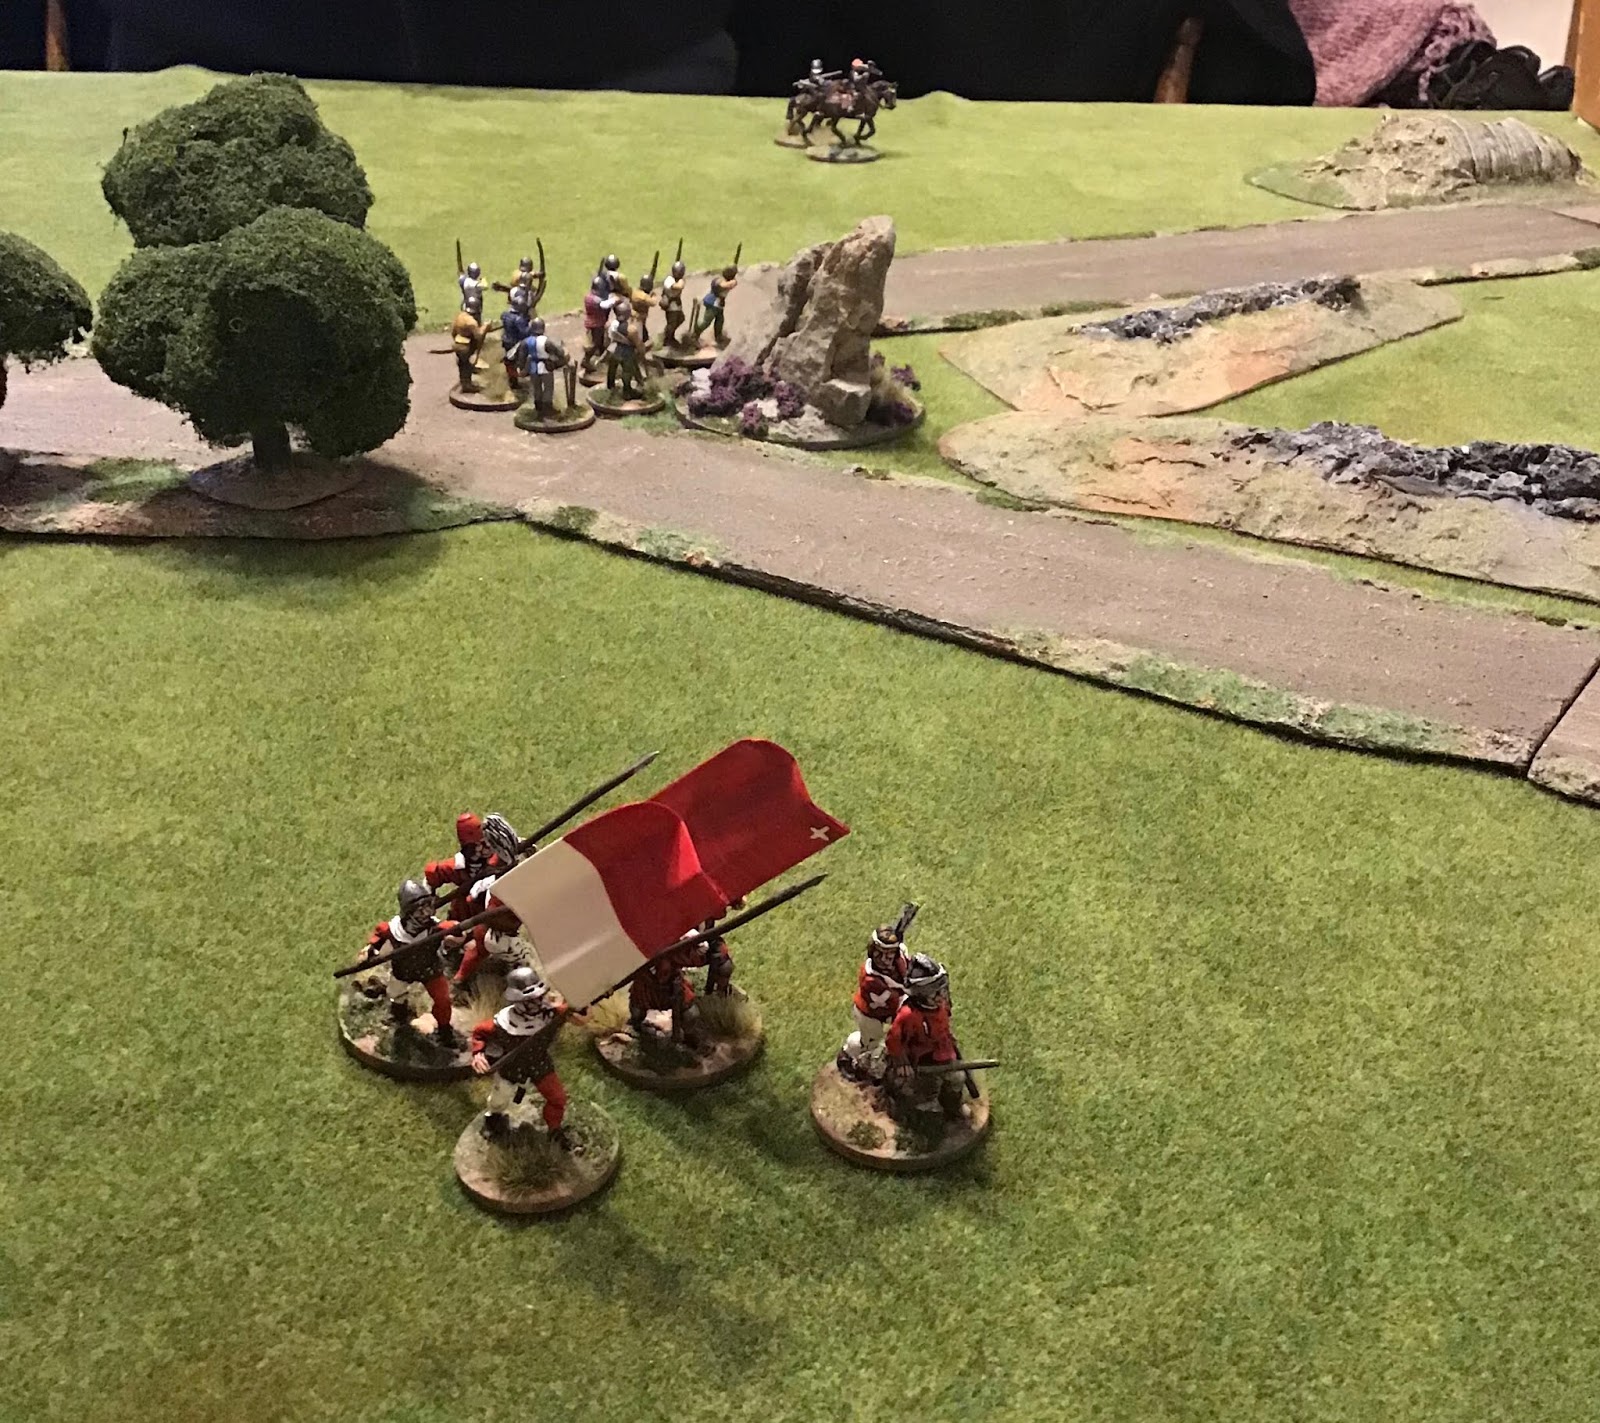
We were using my fifteenth century Swiss and Burgundians and playing the Lion Rampant rulebook scenario "Hammer and Anvil".  This has a returning raiding party (in this case the Swiss) in danger of being caught between two groups of the enemy (the Burgundians).  In the picture above, Jamie's half of the Burgundians would deploy around the road junction, while Andy and Harry's Swiss would enter at the far end, followed a turn later by Leo's half of the Burgundians.


The picture above shows Andy's half of the Swiss beginning their advance.  On the far left of the picture a unit of pikemen are on the road.  On their left at the foot of the hill is a unit of Italian mercenary crossbowmen and to their left in turn there's a mounted crossbow unit.  The two units that have moved forward are one of halberdiers (Fierce Foot in Lion Rampant terms) and one of handgunners (Bidowers).

As required by the scenario, Jamie deployed his Burgundians in two locations.  A unit of Bidowers and a group of Mounted Men At Arms were at the road junction...


...while a unit of ordinance longbowmen (Expert Archers) entered from the road on his right flank.


Both sides then manoeuvred. The Swiss on the left (under Andy's control) made pretty good progress while on the right, Harry's Swiss seemed to find it hard work crossing the wheat-field. It wasn't bad going; he just couldn't make the required activation rolls! 


At the start of game turn 2 Leo could start dicing to bring on his forces immediately behind the Swiss force.  In fact, it emerged, rather too close behind the Swiss force. 

The picture below shows the remains of a unit of Irish kern (Bidowers) they have just fallen back from melee with the Swiss mounted crossbowmen in the hill.  Meanwhile the Burgundian coustilliers, on the left side of the road, is about to be shot at by the Italian mercenary crossbow-men.


Meanwhile the rest of the Swiss were advancing towards the road junction.


Jamie's Burgundian Men At Arms now charged Harry's Swiss halberdiers and routed them. 


Then (although reduced severely in numbers) they charged the left hand of Harry's two pike units.  Two pikemen were killed but the result was catastrophic.  Harry rolled snake-eyes on the Courage Test and pikemen routed!


The field was now looking distinctly empty as units disintegrated all over the place.  Three Swiss units were left with a chance of getting past the Burgundian "anvil"; a unit bidowers and another of pikemen on the right and the remains of the mounted crossbowmen on the left. 
 

Jamie's longbowmen were obviously going to be the key decider of the outcome. 


In what might have been a mistake the longbowmen decided to target the weak-in-numbers but fast-moving mounted crossbows.  Their shots were ineffective and the crossbows became the first Swiss unit to exit the table.


In the next turn, however, they about-turned and launched a wicked volley of arrows at the remaining Swiss pikes.  The resulting Courage Test saw the pikes break and with them went the last chance the Swiss commanders had of winning the scenario.

It was nice to get these figures back on the table and we all enjoyed the fast moving action of Lion Rampant.  In retrospect I think it would have been better for the Burgundians to have waited before bringing on the "Hammer" force.  Allowing the Burgundians to advance and clear some space on the baseline would have given them more flexibility of deployment and time to shoot at on-coming Swiss units.  

We got finished about twenty to four and had a few games of Tsuro afterwards.  A most enjoyable return to Saturday Afternoon Wargames.

Sunday, February 25, 2018

A Village in Andreivia

Tom D came over on Saturday and I ran a small Arc of Fire scenario to introduce him to the rules in preparation for the Crisis Point game in April.

The scenario was a simple one.  It's 1918 and a small Turkish force (four-man HQ, 15-man rifle section, LMG team, and five-man "bomber" team) have to capture an Andreivian village.  The village is held by a small Andreivian army team and, unbeknown to the Turks, a temporarily immobilised Renault FT light tank.


The above pic shows the table from the southern (Turkish) edge. A brick-built warehouse dominates this side of the village but it has only two windows on the south side so it's not readily defensible.  Tom elected to advance to the right of the road, across the recently harvested wheat field and either side of the small copse of trees.


Pretty soon the Turks came under ineffective rifle fire from the back of the warehouse.  The Turks returned fire and were sure they'd achieved some solid hits.  In fact the first fusillade wounded the Andreivian forces commander, effectively ending his involvement in the fight.  The second round of firing from the Turks killed his second in command outright and the Andreivian HQ unit ceased to exist as a fighting unit!

As the Turks closed in on the village I knew that I'd have to move the only remaining Andreivian infantry unit (a six-man rifle section) from the graveyard to the central square if I was to buy time for the tank driver to repair the engine.


The tank driver was reasonably lucky with his TAC rolls.  As the Turks approached the village square they heard an internal combustion engine splutter into life (I was going to say roar into life but come on guys, this is only a Renault FT) and heard the grinding of caterpillar tracks.


The FT managed to get off a shot from its 37mm Puteau cannon.  37mm HE is not very powerful and the commander (the FT has a two-man crew) was firing while the tank was moving.  Even with a densely packed infantry target the shot was ineffective.  It would prove to be the tank's only shot of the game!


As the tank commander tried desperately to reload, a firefight developed across the village square.  The Andreivian infantry scrambled to take what cover they could but they were severely out-numbered and once the Turkish LMG came around onto their flank, their days were numbered.


It came down to race to see if the Andreivian tank could extricate itself from this unsuitable tactical situation before the Turkish bomber team could get close enough to use their grenades against it.

In the end a single Turkish bomber launched two heroic close assaults on the tank but he was unable to prevent it wheezing and clanking its was off along the northern road towards safety.


So that was Tom's first AoF game. The Turks had seized the village to a win for them.  The Andreivians had also met their aim of extracting the tank to safety but the loss of both commander and sergeant in the first few moments of the action took the shine off this achievement.

A fun game. We got done in a leisurely couple of hours and AoF again showed that new players can pick it up within a very short time.

Saturday, August 26, 2017

Near Obidos, Portugal, 15th August 1808

Andy, Chris, and Arthur came over today and we had great fun determining the names and characters of the officers of the Borsetshire Regiment and particular of the Regiment's Light Company.  All in all they seem to be a pretty unsavoury lot and I don't think it will be a happy mess, at least until some of the current crop are weeded out by the exigencies of warfare.

After that we played what will hopefully be the first of a series of games following the Borsetshires through the Peninsular War.

The action was based on the clash between Sir Arthur Wellesley's advanced guard and the French rearguard on the even of the battle of Rolica in August 1808.  Andy played a small (probably too small) swarm of French voltigeurs whilst Chris took on the role of Lt Villiers of the Borsetshires.  Arthur played the role of Sergeant Goodison, whose dozen men of the 95th Rifles were on the Borsetshires' flank.


Andy was tasked with holding off the British whilst gunners and drivers tried to empty a tightly
wedged wagon said to contain the General de Brigade's collection of stolen statuary.


First to arrive on the table was a small group of voltigeurs under Sergeant Jarier.  Almost immediately they were in trouble. It seemed their water discipline had been poor and it became apparent that, parched, they were lagging behind their expected pace under the hot Spanish sun.

Worse yet, three of the men thought they had spotted a Spanish señorita entering the building in the corner of the battlefield.  Keen to 'present their cards' they set off for the farmhouse leaving Sergeant Jarier with only three men.

Jarier set off after his men and caught them up as they crossed a small field...


... as Jarier began to remonstrate with his men, a fusillade of shots rang out as Sergeant Goodison's riflemen found their range. At once Jarier fell wounded and the three men decided that the farm house was probably a good place to hide too.

Meanwhile Lt Villiers' men of the Borsetshires' light company were approaching in open column.


By now the rest of the French force, two more groups of voltigeurs under Lt Delaborde had arrived in the centre.  There was some exchange of shots with Goodison's Rifles.


Keen to exhort his men to greater deeds, Goodison stepped forward and was shot in the buttocks for his trouble.  A random event came up, the Rifles had acted last so got a 'shooting random event' and Arthur rolled snakes eyes!


Meanwhile the Borsetshires marched up the flanks and Delaborde's men turned to face them.


The Borsetshire lads turned to form line, advanced and they sent a punishing volley into Delabord's men.


Caught in the crossfire from light bobs and rifles, the French stood no chance an they were soon in headlong retreat.  French force morale was down to two when we called it  day.

So Lt Villiers and Corporal Brown of the Borsetshires survived the Regiment's first action in the Peninsula.  Sir Arthur Wellesley will now march his army to Vimeiro, where the Borsetshires may again see action.

All enjoyed the game and we agreed we should play some more while the rules are fresh in our minds.

Sunday, July 20, 2014

Get Here Fast!

I've spent the last couple of weeks gradually churning through the process of basing up my 1/300th scale WW2 Germans for BKC so there's not been much in the way of photogenic stuff to report here. However, yesterday we got in another Saturday Afternoon WargameTM when Andy and Richard came over to play Arc of Fire.

The scenario was adapted from an idea by Bernard Garraty in the SOTCW Journal.  I set it in the Netherlands in March 1945 as I wanted an excuse to use my recently completed Comet troop and possibly my King Tiger! Here are the player briefings.  Jamie played the Germans:

German Briefing

You are the commander of the German forces holding a defensive position east of the small Dutch town of Steenbrug.  Following a hurried radio communication you are hastily putting together a small force for an urgent dash to capture a vital target a few miles west of your current position.  

The exact mission is not yet clear but speed is of the essence.  You can pick six elements from the following ten:

  • Infantry section in half-track
  • Infantry section in half-track
  • Infantry section in truck
  • Infantry section in truck
  • PaK 40 anti-tank gun with SdKfz 10 towing vehicle
  • Forward artillery observer team (in Kubelwagen) with 3x 120mm mortars in support
  • SdKfz 234/1 armoured car
  • Tiger II *
  • Stug IV *
  • Flakpanzer Möbelwagen *


The elements marked with a “*” will take longer to get ready.  They will arrive on Game Turn 1d6+1 (1d6+2 for the Tiger). All other elements arrive on GT 1.

The Möbelwagen is an experimental prototype with four 20mm flak guns which is in the area on field trials.


The SdKfz 234/1 is the version with an open-topped turret with a 20mm auto cannon.

 Andy and Richard played the Anglo-Canadian force:

Canadian Briefing

You are the commander of Canadian forces in the recently captured small Dutch town of Steenbrug, near Utrecht.  Following a hurried radio communication you are hastily putting together a small force for an urgent dash to capture a vital target a few miles east of your current position.  

The exact mission is not yet clear but speed is of the essence.  You can pick six elements from the following ten:

  • Infantry section in half-track with HMG
  • Infantry section in half-track (no mounted MG)
  • Infantry section + PIAT in DUKW amphibious truck
  • 3” mortar team in light truck
  • T-Force team (six men in two Jeeps, small arms only)
  • Comet tank (attached from the British 11th Armoured Division) *
  • Comet tank (attached from the British 11th Armoured Division) *
  • Comet tank (attached from the British 11th Armoured Division) *
  • Grant CDL 
  • Forward artillery observer team (in carrier) with 3x 25pdr guns in support

The elements marked with a “*” will take longer to get ready.  They will arrive on Game Turn 1d6+1. All other elements arrive on GT 1.

The T-Force team is attached from 21st Army Group.  They are specially trained in fast-moving operations to seize politically, commercially or scientifically important targets.  As such they count as TAC 4 for the purposes of this scenario.

The Grant CDL (Canal Defence Light) is a standard M3 Grant tank with the turret replaced by an armoured box containing a powerful searchlight.  It still retains the 75mm gun in its hull mount.

After finding out which selections the players had made, their choices are underlined above, I filled them in on the detail of the mission.  Some German VIP had been airlifted out of besieged Utrecht last night but the light plane carrying this person had been seen to make an emergency landing somewhere between the front lines.  Both side must race to retrieve the mysterious traveller.

I laid out the terrain (flat of course) as below:


The central road is on an embankment and blocks line of sight between the two halves of the table except from the upper storey of the pair of semi-detached cottages (where the target is hiding).  The Canadians and British entered from the near side.  In retrospect it would have made for more interesting tactical choices to put the embankment slightly nearer to them.  After this photo was taken I scattered on some foliage clumps to break up the uniform green of the GW Battlemat.

The hastily-landed aircraft (a Croatian Air force Hs-126) can be seen just this side of the road.


A river and a few open woods complete the terrain.

We started off with all troops deployed as blinds (painted cardboard markers used to disguise exact locations).


By game turn three the T-Force unit had reached the plane and found it to be empty of either mysterious Germans or useful documents.  Meanwhile the Canadian infantry had reached the embankment and deployed from their halftrack and DUKW.


They looked over to see two out of the three German Grenadier squads debuting from their halftracks...


...whilst the third made for the rear door of the cottages.  Here we can see, a few minutes later, Captain Horvath of the Croatian Air Force and Dr Strabismus (for it is he, whom God preserve) about to be escorted to a waiting vehicle.


At this point Andy and Richard got unlucky with the card sequence.  A number of Jamie's cards came up in sequence and the troops on the road came under withering fire:


The white markers show troops pinned down either by direct fire or thanks to a failed unit morale test.

With the objective taken by the Germans, all the Anglo-Canadians could hope to do was to make the Germans pay a heavy butcher's bill for their victory.


Andy threw his PIAT team forward to the corner of the Bridge parapet (so A Bridge Too Far!) and managed to hit and immobilise the Flakpanzer!


Meanwhile the Comet troop finally arrived (Richard had thrown a five so they arrived on game turn six).


Unfortunately for the 11th Armoured Brigade, the King Tiger arrived a turn later and soon two of the three Comets were burning on the road and the third was beating a hasty retreat.


So, a clear victory for Jamie's Germans.

As I said above, if we played it again I think I'd move the embankment from the middle of the table and put it firmly in the Allied half of the table.  As always, I was pleased with how well AoF moved along and felt that the card activation system gave a pleasing unpredictability to events.

Sunday, January 26, 2014

Who Won the Wars of the Roses?

It's a question my kids have asked a couple of times this weekend and the correct answer is of course, "Neither York nor Lancaster".  It was appropriate, then, that yesterday's large Basic Impetus game ended with a similar result.  Both sides lost!

I'd planned a four-handed game set in no particular phase of the wars (having units in an odd mix of liveries) with Richard of Gloucester and Richard Neville, earl of Warwick for the Yorkists taking on the duke of Somerset and the earl of Northumberland.  Each player was to handle a command roughly the size of a standard Basic Impetus army.

Unfortunately, one of our expected players had to cancel but we went ahead drawing lots for sides and Andy copped for running a double-sized Yorkist force against Jamie and me as the swinish Lancastrians.

The battlefield was fairly open.  The only significant terrain features were a wood if front of the Yorkist left and a cabbage field in front of the Lancastrian left.

The position at set-up; Lancastrian right wing in the foreground.
As Somerset I deployed on the Lancastrian right with a battle that was strong in archers and contained the only unit of mounted knights in the game.


Jamie, as Northumberland, took the Lancastrian left and centre.  He had a few borderers stiffened by a contingent of dismounted men-at-arms, a few retinue bills and bows and an organ gun, which in true medieval fashion never moved and never got into action!

A view from behind Jamie's battle.
Andy lined up a strong right and centre opposite Jamie and pushed forward some light horse, backed by Richard of Gloucester on foot against me.

A clump of Yorkist scurriers enter the woods (and pick up a
disorder marker - the shield on their base)


The Yorkists reach the woods.  That's the future
Richard III in leading the unit closest to the camera! 

Just before the main battle lines clash!


A couple of interesting rules questions came up during the fight around the woods.  Firstly, Andy ended up with a unit of archers astride the road flanked by a unit of my crossbow-armed, French mercenary skirmishers among the trees.  Andy’s troops also had a unit of Borderers to their front.  At whom should they shoot?  The skirmishers (represented here by a few singly based figures) who were closest and just edged into their firing arc or the Borderers who were the closest unit directly in front of Andy’s archers.  We decided on the latter.

Jamie rolls a 6 at the wrong time.  Andy's archers (red banner with white
diagonal cross) rout Jamie's borderers (to their front) just before they can
make contact.  The annoying Frenchies are in the trees at the bottom. 


The second incident occurred after Andy’s bowmen had driven off the Borderers.  They now found themselves disordered and sitting in the zone of control of the French skirmishers in the woods.  

The Yorkist bows were unable to move towards the skirmishers as the skirmishers weren’t in to their front.  They were unable to engage them effectively by shooting as they were at -5 dice (disordered, shooting at skirmishers, shooting a troops in a wood). And they were unable to move backwards as a rearward move isn’t possible for disordered troops.  All he could do was stand, rally away the disorder and hope that my shooting was ineffective and didn’t immediately disorder them again.

This seemed a bit hard on Andy but we justified it by saying that the archers were busy trying to sort out their formation whilst engaging the skirmishers with a little ineffective shooting.

Anyway, back to the battle.  The mounted Lancastrian knights drove off the Yorkist light horse and hit Richard Crouchback's men-at-arms as they pursued.  After a prolonged and bitter melee Richard and his men were routed and it seemed that Richard would be cut down but a fresh unit of Warwick's billmen intervened and chased off the exhausted Lancastrian knights. 

Casualties were mounting on both sides as the Borderers advanced into the teeth of a gale of clothyard arrows and several Yorkist units were routed from the confused fight around the treeline.

At around half past four the crisis was reached.  In a single game turn first the Yorkists and then the Lancastrians reached their breaking point.  We decided that in the confusion, both sides, fearing that the day was lost, had determined to pull their troops out of the battle.

Andy removes the final Yorkist casualties.
The game was great fun and I'm pleased with how impressive the figures look en masse with the Impetus basing scheme.