The last couple of days I've gone back to building work on the Harpers Ferry armoury.
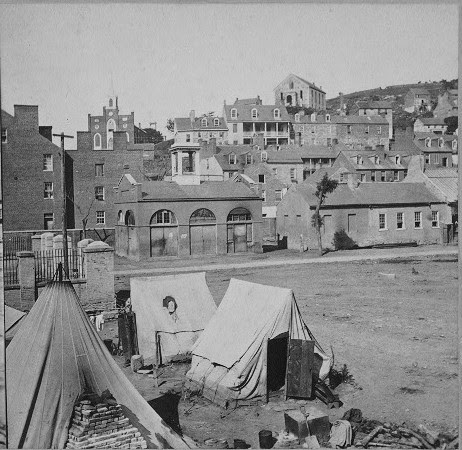
Researching the buildings isn't easy. All but the engine house (aka John Brown's Fort) were burned to the ground during the Civil War and the entire landform of the armoury grounds was later altered to make way for a revised alignment of the Baltimore and Ohio Railroad. I'm having to rely on a few contemporary photographs and drawings that inevitably concentrate on the storming of the engine house.
I previously finished the water tower that stood just inside the main gate of the armoury
and then went on to build the next building on the right-hand side of the area I'm modelling, which I believe to be a warehouse:

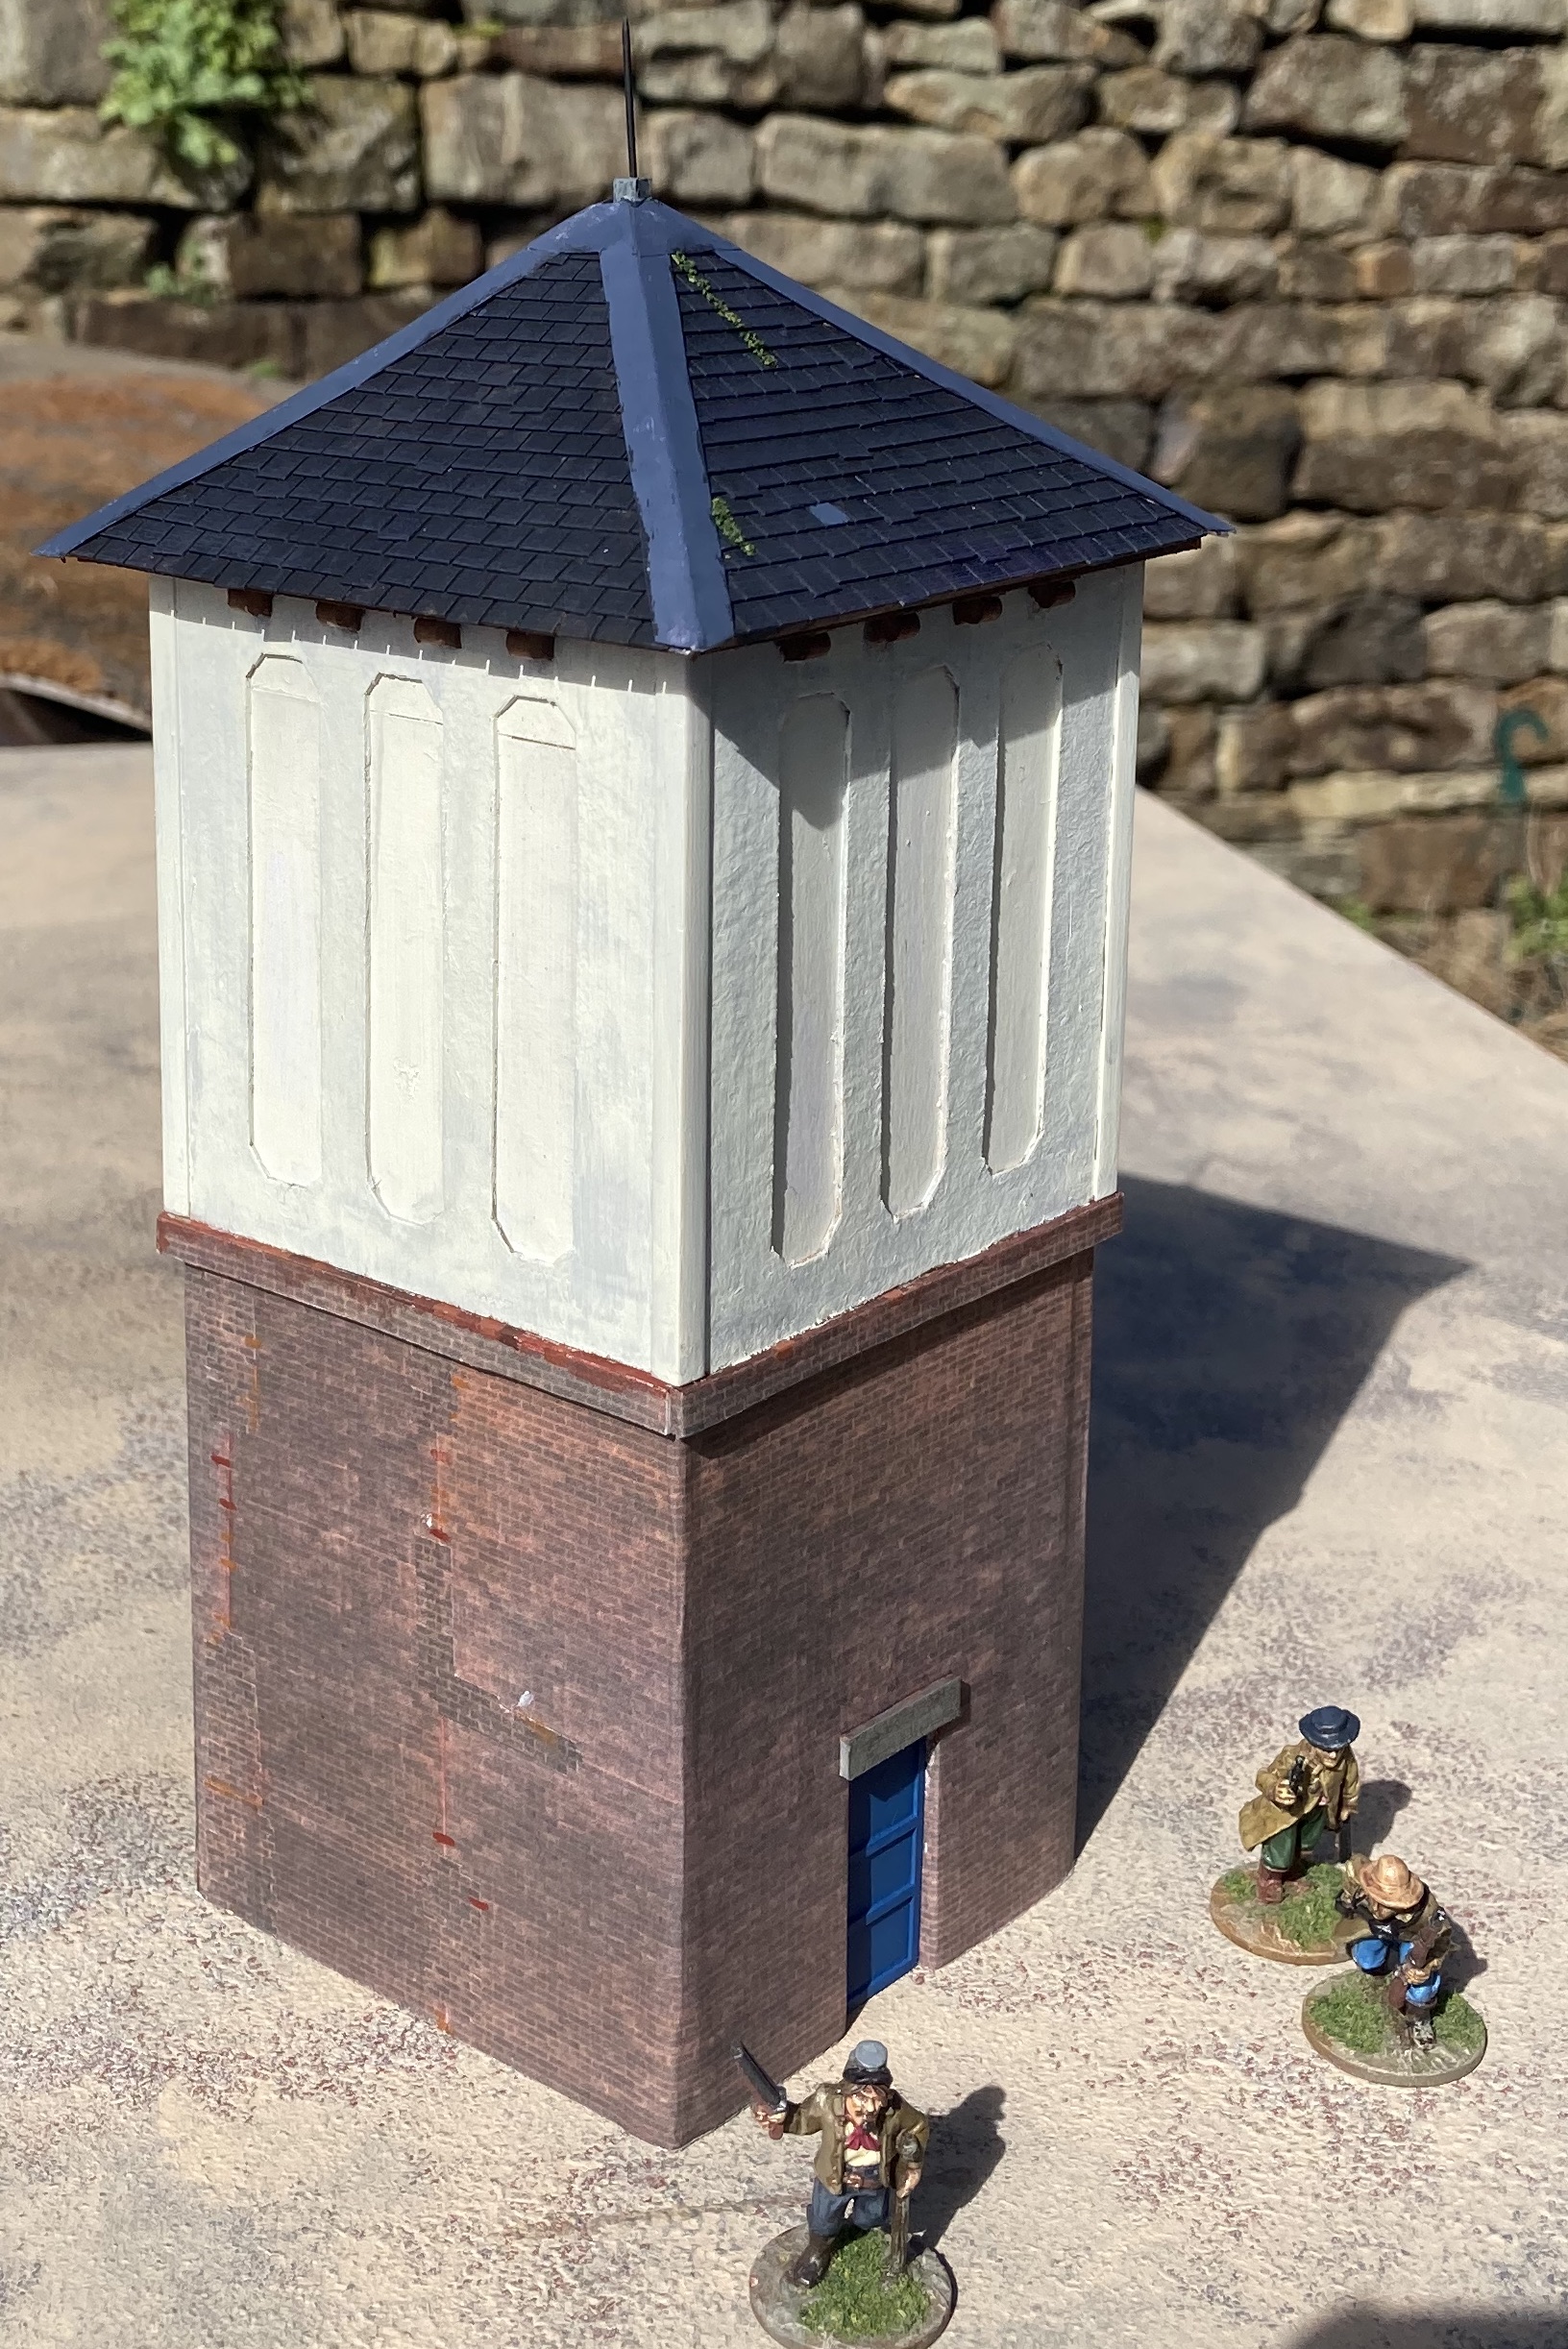
Now I'm on the penultimate building. This is variously described as the "guard house" and the "paymaster's office". I'm assuming that it has both functions.
In the photograph below (taken during the Civil War) it's the building to the right of the arch-windowed engine house. Other pictures give us some idea of the taller section that's off-camera to the right of this photograph.
I've been building the structure in two phases. The lower section on the left was built first followed by the taller and deeper end with, as far as I can determine, the only door.


I've spent most of today tiling the taller half with Warbases laser-cut tiles.

6 comments:
Fantastic work they look great 👍 Looking forward to seeing this table when it's done 👍
Looking back at the fantastic 6mm overhead railway that RP built, the bridge supports were laser cut mdf made by Pendraken. Perhaps if you provided them with a template they could help you out with the railroad trestle?
Cheers Richard. Hopefully you'll see it at Steel Lard if not before.
Thanks Andy.
The "trestle", to use the American term, isn't anything like Richard's Rendsburg High Bridge and actually not like the wooden trestle bridges you'll have seen in western movies. It's actually a wooden rail bed supported on one side by an embankment wall alongside the Potomac River and on the other by cast iron pillars.
The 3D printer will be called into action to provide the pillars.
Fascinating reading. I didn't realise the fort had been moved.
The fort was moved several times, including to Chicago for the World's Fair. The various phases of reconstruction make it really hard to be sure of the original layout.
Post a Comment