Wednesday, February 27, 2019

I've not reported yet on the game of To The Strongest we (Gus, Ron, Leo, Arthur and I) played a couple of weekends ago.

I don't want to share too much here at this stage as it's one of the games I plan to run at Crisis Point.  However, here are a few pictures....


There's a real mix of figures in 25/28mm scale, ranging from very old Lammings to modern plastics from Victrix.


Thursday, February 14, 2019

Shot, Steel & Stone - a playtest

I've been off work with equine flu but fortunately my condition's now stable.  (I'm here til Tuesday, try the veal).  So I took advantage of a day's convalescence to try out Shot, Steel & Stone.

This is the set of horse and musket rules in Henry Hyde's The Wargaming Compendium.  They are advertised as covering the period 1685-1845 so I figured they'd be spot on for my 6mm Great Northern War collection.

The rules use element bases and, at least in theory, individual figure removal. However, it's clear from photographs of games in action that most players have their figures permanently mounted on the element bases and use some means of tracking the loss of strength points.  I used a notebook with stylised depictions of each unit.


I ran a solo game based roughly on the scenario Henry uses to illustrate the rules in the book.  The forces used were bits and bobs of my GNW Russians and Poles transposed respectively into the imagi-nations of Zheltarus and Tszervonsk.

SSS (let's call it that) has varying sized units from extra-small (one base) to extra large (six bases).  This means that my four-base units, built with Maurice in mind, are "Large" in these rules.  This doesn't seem to be a problem though.

Also not a problem, as far as I can see, is the fact that my element bases are square rather then slightly wider-than-deep.

Anyway, on to the game.  Some forces of Tszervonsk were encamped at a bridge near the town of Lubomir (a centre of the Tszervonskian brewing industry).  They are led by the competent general Dragomir Dragomirov.  The camp can be seen to the left of the river in the picture below.


The only troops ready for trouble are two squadrons of the King's Valaks - A class, unarmoured, skirmishing cavalry with lances and bows in SSS terms.  They are patrolling the far side of the river.

Oh and a small patrol of the Lubomir Militia are guarding the bridge...


Approaching was a Zheltarussian detachment led by the hesitant Robert McCrumb.  We know he's hesitant having generated his character previously.  McCrumb has two infantry battalions, a regiment of dragoons, a regiment of cossack, and a couple of guns.

Turns are alternate in SSS.  The Zheltarussians went first and were able to bring on three units.  Hunni's cossacks dashed straight up the road making for the bridge.  The Poliakov Dragoons moved off to menace the right squadron of King's Valaks and Lukin's Regiment marched up the road.

Below we see the position before the first Tszervonskian turn....


Things then got moving quickly.  The right squadron of the Valaks took a reaction test to see if they could charge the Poliakov Dragoons. Being skirmishing cavalry they didn't need ordering to do this being used to operating away from their general's direct influence.  Unfortunately they failed he test so badly that they ended up retreating right off the table!

On the other flank the left squadron were delighted to charge the temptingly exposed flank of Hunni's Cossacks.  The results were spectacular.  Half of the Cossacks were killed in the charge and the Cossack regiment disintegrated.


This, however, left the remaining Valaks rather exposed.  Lukin's Regiment formed line astride the road and let fly a devastating volley.  The remaining Valaks were slaughtered almost to a man.


Combat is straight-forward.  For each base firing, roll a number of six-sided dice determined by the type of unit.  Modify the number needed to score a hit for things like range (three brackets), cover, target formation, and of course that old favourite "first fire".   The target then gets to try a saving throw for each hit.  The save number varies depending on who's hit you - 3+ against pistols but sixes needed if you're shot at by artillery.


I took my time with the game, not hesitating to go away and read the book if I didn't understand how something was meant to work.

When I needed to stop we'd reached the point where both sides had sent cavalry units along the river looking for places where it could be forded.  Both were ultimately successful.


Below we see Dragomirov's Panczerny crossing the river.


I decided that that the position was rather in favour of the Zheltarussians.  They had their two infantry battalions somewhat better positioned to take on the enemy horse whilst the Lubomirsk Regiment was in danger of being pinned against the river by the marauding Zheltarussian dragoons and decimated by the enemy artillery.

I enjoyed these rules and would like to get them to a Saturday Afternoon Wargame soon.

I still have a few queries.  A unit disintegrates when it reaches half-strength.  But is that half-strength in bases or figures/strength points?

With a normal unit being three bases this is a key question.  A three base battalion of close order infantry will have 18 strength points.  Does it fall apart when it's lost nine strength points or when it's lost two bases?

I'm also a bit unclear on reaction tests to charge.  Hopefully an email to Henry will clear things up.


Saturday, February 9, 2019

You'd Have to be a Lunatic - part 3

The first Italian platoon for the Menton 1940 game is finished along with a few support options.

For what began as a way of using up some Airfix Italian infantry I had going spare, this project is, as usual with these things, suddenly involving buying a load of stuff I didn't have.

The Italian Fucilieri platoon has an odd structure.  It's divided into two Squadri, each with two machine-gun teams and an eight man rifle team.  The platoon HQ is just a Tenente.  


Each MG team has a three guys manning a Breda M30 LMG and an extra rifleman and the two teams are led by a single Caporale.


The three-man LMG teams are from Dixon Miniatures.  The spare rifleman at the right end of the line above is an Airfix Japanese infantryman with a transplanted Italian head.  It's not clear in the photo but he's wearing a rather natty black, polo-necked sweater under his jacket.


The second Squadra's MG teams are led by a Caporale whose an Airfix Japanese infantryman simply repainted in Italian colours.  For me these are Vallejo Green Grey for the cloth items and German Fieldgrey WWII for the helmets.  Some of the knapsacks are in Vallejo Khaki.

 
The rifle teams are mostly Airfix Italians with a few helmeted Japanese thrown in.  Bothe uniforms have cloth puttees and the helmets are similar in shape so I think this works OK.

I've done a few support choices for the Italians.

I'm trying these days to make sure I have some wounded figures to show when Leaders are wounded in Chain of Command.  This guy is an Airfix Australian with an Italian officer's head transplanted on and with a little carving to correct the shape of the puttees.


Again demonstrating how a "cheap" army has led to a number of additional purchases, I went and bought the Italeri Alpini box.  Removing the feathers from their steel helmets I end up with a number of useful models, although they are a tad larger than their Airfix brethren.

This muleteer will do service as a medical orderly in Chain of Command games.


Last up we have this flamethrower team.  The flamethrower crewman himself is an Airfix German with yet another head transplant.  I've painted his tall marching boots as puttees. The Airfix Italians box is over-generous with SMG-armed men and I've used two of them here.


All of the men have dark red (Vallejo Burnt Red) collar "flames" as they will be used to represent to troops of the Cosseria Division at Menton.

Thursday, February 7, 2019

Crisis Point 2019 Update - edited 28/2/19

Things are looking good for Crisis Point (30th and 31st March).
Confirmed attendees so far (edited 28/2/19 to include Will McNally, great to have you on board Will)  are:
Richard Crawley
Jamie Crawley
Richard Phillips
Andy Canham
Mark Julian
Ian Shaw
Arthur Woodward
Leo Flewitt
Ron Pierce
Russ Phillips
Kevin Tingle
Mark Kniveton
Harry Maudsley
Neil McCusker
Andy Taylor
Phil Buchanan
Mike Wallace
Will McNally
Mike Whitaker
 
Possibly Stuart Adams - family commitments 

We have five different games on offer, some of them consisting of multiple sessions so it should be very possible for people to swap between games over the weekend:

Game
Description
Organiser(s)
Rules and scale
Menton, 1940

French vs Italians on the Mediterranean coast in June 1940. “You’d have to be a lunatic to want to game that campaign” - Richard Clarke

6x4 table, 3 - 5 players

Could run Italian attack as game 1, French counter-attack as game 2

Richard C

Chain of Command, 20mm (may switch to AoF if need to accommodate more players)
Dertosa, 215BCE
Romans vs Carthaginians using fun, fast play rules.  6x4 table  
Richard C
To The Strongest!, 28mm
Piedmont 1794
Small skirmish during the French Revolutionary War. 3x3 table, 4 players
Jamie C
Song of Drums and Shakos, 28mm
Gallipoli ‘89
1989 WW3 - Turkish v Soviet Naval Infantry/VDV assault on Istanbul. Gallipoli ’89, basically.  6x8 table
Neil Mc & Andy T
Cold War Commander, 6mm
Israelis in Beirut
1989 WW3 - Soviet naval infantry vs Israelis and various local factions. 
Kevin T
Force on Force, 20mm
Malta
German invasion of Malta, WW2 (two-day mini-campaign). 5x8 table
Richard P, Andy C , Mark J
Battlegroup, 20mm


The game slots across the weekend could be as follows:


a.m.
p.m.
Saturday table 1
Malta campaign
Saturday table 2
Menton game 1
Menton game 2
Saturday table 3
France v Austrians game 1
France v Austrians game 2
Sunday table 1
Malta Campaign
Sunday table 2
Gallipoli
Sunday table 3
Dertosa
Finish Dertosa then boardgames?
Sunday table 4
Israelis in Beirut


 If the Beirut and Gallipoli teams (those who are there Saturday) want to at least start setting up Saturday evening after their Saturday games are finished I’m sure we can accommodate that.

Thursday, January 31, 2019

You'd Have to be a Lunatic - part 2

My on-going plan to put on a Franco-Italian 1940 game at Crisis Point in March has me building terrain.  The Menton area is characterised by steep hills rolling down to the azure waters of the Mediterranean.  The "Pearl of France" was then and is now, an affluent area and I fancied building a large villa with a terraced garden and, yeah, let's have a swimming pool too.

I've got some dark blue PVC board acquired as an off-cut from work and it makes great base boards.  On to this I've started to build up the three dimensional shape of the hill using foam-core.  All of the foam-core was attached using a hot glue gun.


The idea is that this hill will stick out from one side of the table, hence the flat edge.  This first bit of two inch high foam-core is to form a retaining wall alongside which a road will run.  Exploring the area with Google Streetview I've found plenty of these.

I'm going to use the old Airfix, now Dapol, semi-detached houses as the basis of my villa.  I have built this kit in the past and that previous model can be seen below for scale.  The new villa will be in brighter, more Mediterranean, colours and will get some modifications to turn it into a single dwelling.


The next job was to build up the structure of the hill.  This is the lower terrace with the depression for the swimming pool in place.


After the picture above, I glued on a series of roughly shaped triangles of foam-core to allow the far side of the hill to slope down to the edge of the baseboard.


Then I covered the triangles with layers of plaster-impregnated bandage.  The small, dark blue area in the centre of the picture below is a staircase connecting the upper and lower terraces of the garden.  It's made from off-cuts of the PVC basing material.


After that I coated the ground surface with my usual "gloop" of tile grout coloured with cheap acrylic paint.


I've also used Milliput to add coping stones to the top of the retaining wall and added a vertical row of stones to disguise the ugly join where the main retaining wall meets the recurving wall that slopes down to ground-level.


After that photo was taken I used some plastic strip to add seams to delineate the concrete panels that form the retaining wall.

At this point I had to build the swimming pool.  I had a plan to paint the underwater sides and floor of the pool in a turquoise blue and then use a sheet of clear plastic as the water surface.  However, I could see it would be difficult to attach the clear plastic to the sides of the pool with sufficient strength and without spoiling the surface of the water.

In the end I cut a piece of clear CD box plastic to make the water surface.  Onto this I glued 1 cm deep strips of thick plastic card to represent the above-water parts of the sides and ends of the pool.  In this case I glued using Bostick clear adhesive as using cyanoacrylate or polystyrene cement risked making the clear plastic go opaque.

I then glued the plastic walls to the inside of the swimming pool depression.  And yes, I did remember to paint the underwater part of the poll first...


After that had all dried, I cut squares of artist's mounting board to make the tiles around the pool (they disguise join between plasticard walls and foam-core pool liner).  I then added a finer tiled apron around the pool using some Wills textured plasticard.

As you can see, I've also added a brown base-coat to the soil parts of the garden.


The next job is to start building the villa.  More when that's under way.


Wednesday, January 23, 2019

Hammer and Anvil

Saturday Afternoon WargamesTM are back and I want to try and keep it that way throughout 2019.

I put out a call for players for a game last Saturday and it looked at first like we'd be quite small in number so I decided on Lion Rampant; something I can't put on if we have a large number of people playing and something we haven't played for a while.  Despite a sudden, last minute rush of interest I managed to stick with the plan but with two 28 point retinues each divided in two.

The table depicted an area in the foothills.  The far end (where new player Harry is sitting in the above photo) was pretty open with just a wheat field (cover only; not rough ground) and a gentle hill.  The near end was dominated by rough going where the road branched either side of an impassible rocky pinnacle.


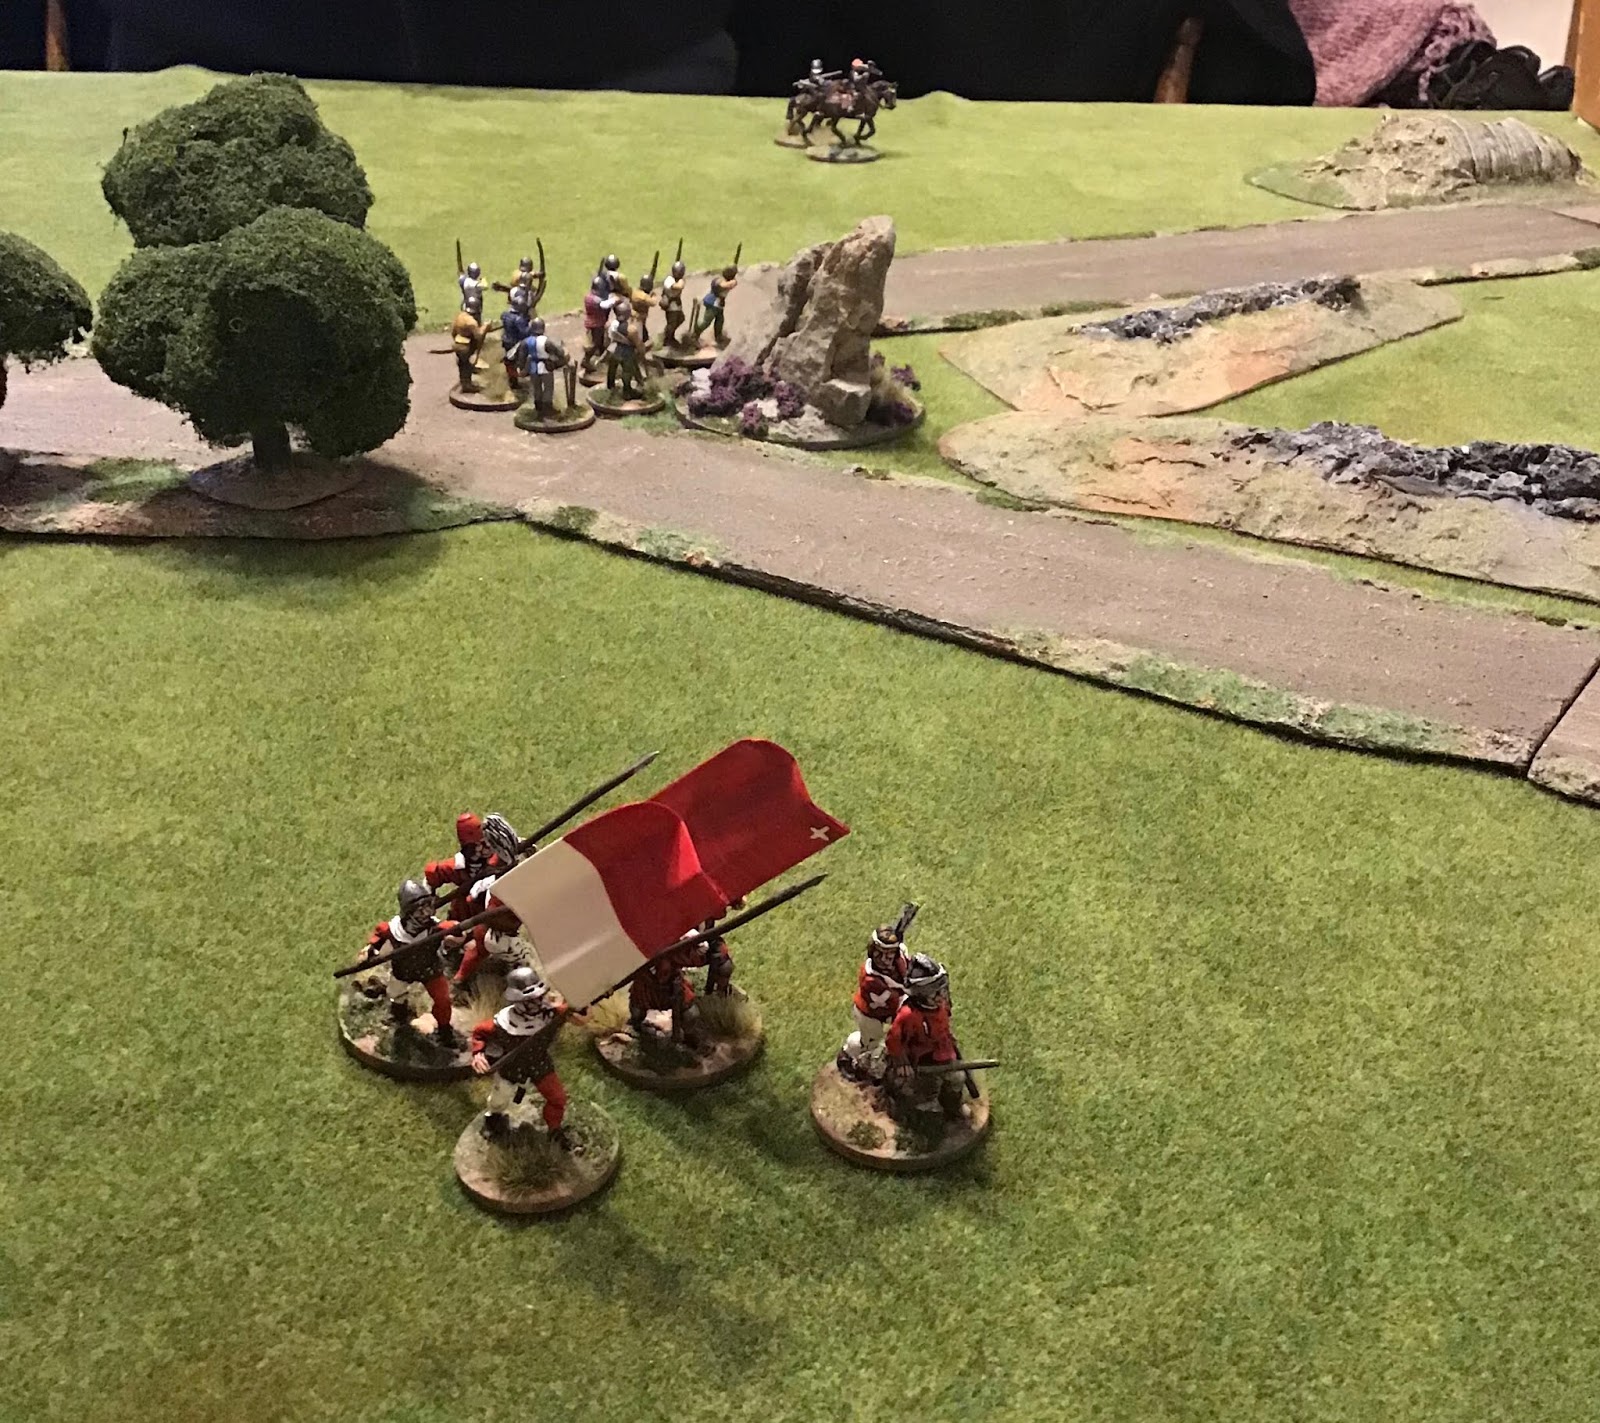
We were using my fifteenth century Swiss and Burgundians and playing the Lion Rampant rulebook scenario "Hammer and Anvil".  This has a returning raiding party (in this case the Swiss) in danger of being caught between two groups of the enemy (the Burgundians).  In the picture above, Jamie's half of the Burgundians would deploy around the road junction, while Andy and Harry's Swiss would enter at the far end, followed a turn later by Leo's half of the Burgundians.


The picture above shows Andy's half of the Swiss beginning their advance.  On the far left of the picture a unit of pikemen are on the road.  On their left at the foot of the hill is a unit of Italian mercenary crossbowmen and to their left in turn there's a mounted crossbow unit.  The two units that have moved forward are one of halberdiers (Fierce Foot in Lion Rampant terms) and one of handgunners (Bidowers).

As required by the scenario, Jamie deployed his Burgundians in two locations.  A unit of Bidowers and a group of Mounted Men At Arms were at the road junction...


...while a unit of ordinance longbowmen (Expert Archers) entered from the road on his right flank.


Both sides then manoeuvred. The Swiss on the left (under Andy's control) made pretty good progress while on the right, Harry's Swiss seemed to find it hard work crossing the wheat-field. It wasn't bad going; he just couldn't make the required activation rolls! 


At the start of game turn 2 Leo could start dicing to bring on his forces immediately behind the Swiss force.  In fact, it emerged, rather too close behind the Swiss force. 

The picture below shows the remains of a unit of Irish kern (Bidowers) they have just fallen back from melee with the Swiss mounted crossbowmen in the hill.  Meanwhile the Burgundian coustilliers, on the left side of the road, is about to be shot at by the Italian mercenary crossbow-men.


Meanwhile the rest of the Swiss were advancing towards the road junction.


Jamie's Burgundian Men At Arms now charged Harry's Swiss halberdiers and routed them. 


Then (although reduced severely in numbers) they charged the left hand of Harry's two pike units.  Two pikemen were killed but the result was catastrophic.  Harry rolled snake-eyes on the Courage Test and pikemen routed!


The field was now looking distinctly empty as units disintegrated all over the place.  Three Swiss units were left with a chance of getting past the Burgundian "anvil"; a unit bidowers and another of pikemen on the right and the remains of the mounted crossbowmen on the left. 
 

Jamie's longbowmen were obviously going to be the key decider of the outcome. 


In what might have been a mistake the longbowmen decided to target the weak-in-numbers but fast-moving mounted crossbows.  Their shots were ineffective and the crossbows became the first Swiss unit to exit the table.


In the next turn, however, they about-turned and launched a wicked volley of arrows at the remaining Swiss pikes.  The resulting Courage Test saw the pikes break and with them went the last chance the Swiss commanders had of winning the scenario.

It was nice to get these figures back on the table and we all enjoyed the fast moving action of Lion Rampant.  In retrospect I think it would have been better for the Burgundians to have waited before bringing on the "Hammer" force.  Allowing the Burgundians to advance and clear some space on the baseline would have given them more flexibility of deployment and time to shoot at on-coming Swiss units.  

We got finished about twenty to four and had a few games of Tsuro afterwards.  A most enjoyable return to Saturday Afternoon Wargames.

Sunday, January 6, 2019

The Mexicans, a further stocktaking

Since the last time I did an overview of my Maximilian Adventure collection I've added a few more figures to both sides.  In this post I'll go through the French:

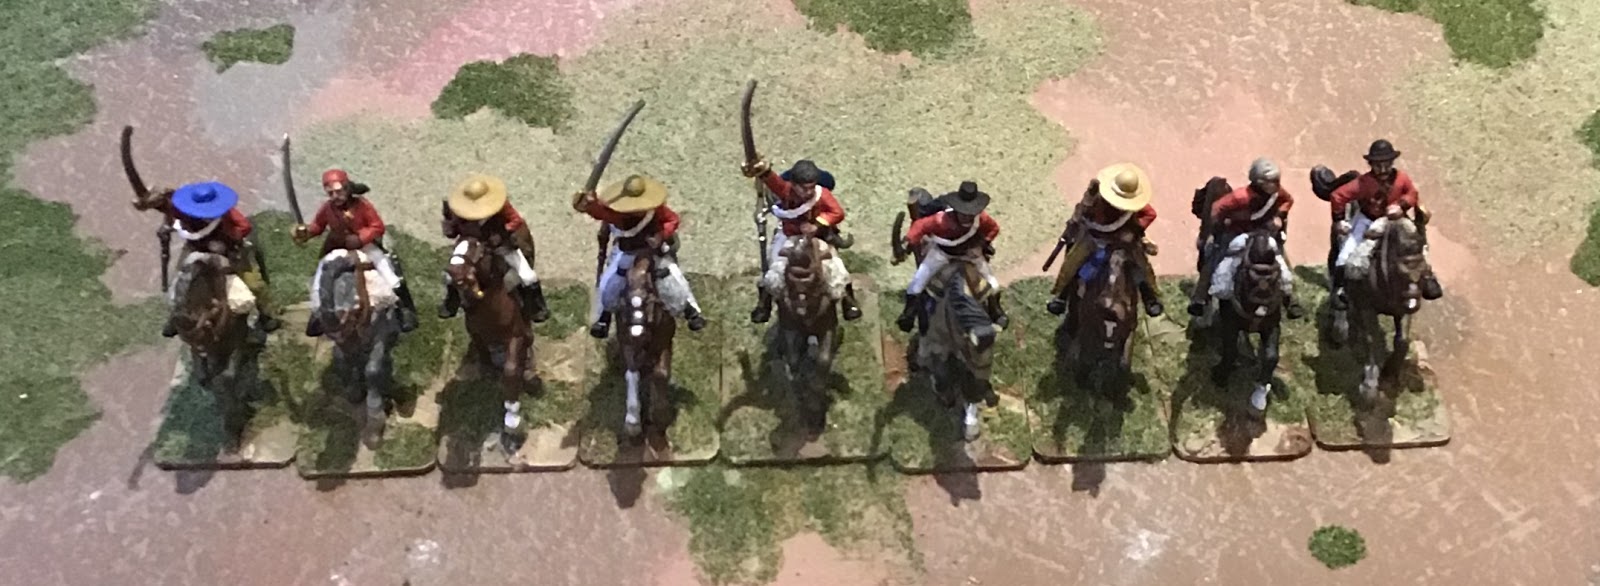
First up, I've added a Group of contra-guerilla cavalry...


These guys are a mix of Perry plastics using models from the ACW Cavalry and French Napoleonic Hussars boxes.


Having built the unit of Republican lancers I had three ACW cavalry left over and decided to buy a box of Perry Hussars to provide the men in frogged jackets the contra-guerillas need.  At this point Chris Barnes stepped in and sold me a box of French hussars for just a tenner; cheers Chris!


The ACW horses I could use as is but I thought the vandyked edging on the sheepskins of the French Hussar horses looked just too Napoleonic so I carved it off and used a hot pin to roughen off the edge of the sheepskin.

The sombrero headgear, so distinctive of soldiers in the Mexican campaign, were made from Green Stuff.  The chap below is typical of the conversions involved in putting the unit together.  The body and legs are from the Perry French Napoleonic Hussars.  I've used the legs with overalls in this case but I've carved off the stripe and buttons down the outside of each leg and added a fringe from Green Stuff.  I also built up the tops of the legs, front and read along a diagonal to give the impression of rawhide chaps worn over trousers.


The right arm is from the Hussars pack but I've replaced the hand with one holding a revolver from one of the Perry ACW infantry boxes.  The sabre in its scabbard is also from the Hussars box but I had to cut away the sabretache and rebuild the straps using Green Stuff.

I sliced the shako from the head of a Perry Hussar and then attached a Green Stuff-sculpted sombrero.  Finally I attached to his sling a repeating carbine from the ACW cavalry box and attached him to an unmodified ACW horse.

Sorry about the poor photos; I try to replace them when the light is better.

The other addition to the French force is this Group of contra-guerilla artillery.  The crew are straightforward paint jobs on Perry (again) ACW artillery crew.  I'm not sure of the correct uniform colours but these will do until more information comes along.  The officer is from Foundry.


The gun is my attempt at modelling the Canon de Montagne de 4 de Bange of which I understand the contra-guerillas had two.  It's a bit of a composite model with the wheels coming from the Airfix Royal Horse Artillery (spot on the right diameter), carriage from the Airfix ACW artillery but with the axle narrowed (the trail may still be a little long) and the barrel is one I found in the spares box.

At present this little gun serves to give the French player a sense of power but when I get round to giving the Republicans one of the full size Perry guns I'm sure this will fade rapidly.