I had a bit of a photography session of Saturday so I could let you see where I'm up to with painting figures the the 18th century Woebetides campaign (which I'm now convinced will use Sharp Practice, not Muskets and Tomahawks).
First up is this unit of Woebetideus tribesmen.
As you can see they are made from Warlord Games Zulus and Natal Native Contingent. Actually, these guys all came from the front cover of Wargames Illustrated and were mostly provided by very kind friends. Since then I've bought a box of Zulus and more Woebetideus will follow.
Next we have a Woebetideus leader.
This guy (he doesn't have a name yet) is a simple conversion of from the Warlord models. His right hand with flintlock pistol and his tricorn hat are from the Wargames Factory (now Warlord) War of the Spanish Succession cavalry box that I picked up cheap at Posh Lard.
I also like to have wounded leader figures. If a Woebetideus leader takes a knocked-out-until-the-end-of-the-Chapter wound, I'll replace him with this...
This is a Zulu casualty from Foundry I think. He was left over from a bunch of figures I bought to use as Praxian casualties in Glorantha.
I think these chaps are also from Warlord but from the American War of Independence plastics range. They were very kindly donated by Geoff Taylor.
I ruled out the chaps in hunting shirts as too obviously American. I've lengthened the waistcoats on a couple of them to give a more early-eighteenth-century look. They will serve in the Woebetides as European civilians serving as skirmishers in defence of their factory.
So far I've spent a large proportion of my time adding less warlike civilians to my Woebetides collection.
That's two Warlord Pike and Shotte range civilians and an ancient Citadel miniature!
These kids with wooden swords also came from a Warlord pack I picked up cheap at Claymore.
I do like the drunkard at the rear. Not sure what role he'll play in the campaign!
Next we have a group of revolting slaves from Trent Miniatures. Lovely figures that I painted in a couple of weeks recently. They will probably serve as native auxiliaries in one of the European forces.
And finally we have a deployment point, perhaps for a Pirate force.
Jim the cabin boy here was yet another find in the bag of assorted white metal I picked up at Gauntlet a few years ago. The barrel, stool and the book on the floor came from my box of assorted-stuff-that'll-come-in-useful-one-day.
As you can see I haven't flocked the bases or added tufts yet. I'll do that in a big batch before these guys first see action.
Tuesday, February 4, 2020
Thursday, January 30, 2020
Raid on Santa Clara
I've decided that throughout 2020 I will try to get in a Saturday Afternoon Wargame every month. Last weekend we played January's game and it turned out to be introducing two new players to Sharp Practice.
Meanwhile on the left, the contre-guerilla infantry caused heavy casualties on the Liberal cavalry who just didn't seem able to get out of their arc of fire.
The State Militia soldiers occupied and off-loaded another of the houses.
Young gamer Sam mostly plays Warhammer but he's also been playing in my historical games since last year's Crisis Point. Dex, meanwhile is an old gaming buddy from the days of the the Berkeley Hordes of the Things tournaments. Dex has just moved to nearby Oughtibridge and is a welcome addition to the Storrs gaming community.
![]() |
| Sam led the guerrillas (with Jamie's help) |
![]() |
| Dex brought a certain pensive je ne sais quoi to the role of contre-guerilla |
The Meeples and Miniatures guys had the idea that a game (or by extension a particular collection of toy soldiers) doesn't represent value-for-money until you've played it often enough that the cost per game is about that of a cinema ticket. We aren't yet there with the Maximilian Adventure collection so another outing to 1860s Mexico seemed like a good idea.
I wanted a game we could get through in an afternoon so I decided on a relatively small action using Liberal guerillas and Imperial contre-guerillas. The Republican regulars and the Turcos stayed in their boxes.
The scenario involved a patrol of contre-guerillas marching to the village of Santa Clara where, intelligence reports suggested, there were three houses belonging to Republican/guerilla sympathisers. These were to be burned to the ground. The only problem was that they only knew the location of one of the houses.
Meanwhile, and unknown to the contre-guerillas, a party of Liberal guerrillas was also bound for Santa Clara with the aim of recovering supplies that had been stashed in those same houses.
Each of the two forces was given the chance to roll before the game on its own Intelligence Table:
Contre-guerilla Intelligence Table:
- Knowledge of one of the guerrilla sympathisers’ houses.
- Gain a Moveable Deployment Point and all Contre-guerrilla forces gain the Moveable Deployment Point ability.
- Steal a march - Contre-Guerillas get an extra turn before the guerrilla cards are added to the deck.
- Place a stray villager wherever you like on the table.
- Add a Legion Etrangere skirmisher unit to your force.
- The lads have found a stash of tequila; add one to your Force Morale.
Guerrilla Intelligence Table:
- Gain a Moveable Deployment Point and Guerrilla skirmishers gain the Moveable Deployment Point ability.
- or 3. Steal a march - Guerrillas get an extra turn before the CG cards are added to the deck.
4. or 5. Pre-loaded supplies - the supplies in one house have been pre-loaded onto a donkey pannier making loading them Task Value 5.
6. The lads have found a stash of tequila; add one to your Force Morale.
Pretty much all of the relevant tasks had predetermined values of 10 (interrogating a villager, firing a house or landing the contents of a house onto the mule train).
The guerrillas found the stash of tequila while their opponents encountered young Consuela Vargas on the road next to their entry point.
The guerrillas started in the middle of Santa Clara and had two groups of skirmishers, two of state militia and one of cavalry.
The contre-guerillas had to march through the woods and across the farmland before they reached the village. I do think the two Groups of cavalry looked good on their first outing together.
Oh, by the way, see those guerrillas on the roof of the square house with the balcony? Any moment now a stray spark from their muskets is going to set the building alight. And guess what? It's the one building the contre-guerillas knew they had to burn down!
The contre-guerilla cavalry advanced on the right of the road to threaten the guerrilla skirmishers around a hill-side barn. They came under accurate rifled musket fire...
...and one of the groups was eventually forced to withdraw.
Meanwhile on the left, the contre-guerilla infantry caused heavy casualties on the Liberal cavalry who just didn't seem able to get out of their arc of fire.
Carbine fire from the remaining contra-guerilla cavalry finally drove off the Liberal skirmishers around the barn but not before they had loaded the mule-train.
The State Militia soldiers occupied and off-loaded another of the houses.
The cavalry thought they might as well fire the now-empty barn. After all who was to know the difference back at headquarters in Vera Cruz?
By the end of the afternoon the rebels had loaded all three houses-worth of supplies onto their mule train and the contre-guerillas had seen two of the target houses burned down. We called it a guerrilla victory!
So Dex is initiated into the mysteries of Saturday Afternoon Wargames and the Mexican collection is a bit closer to passing the movie-ticket test. Lookout for February's game!
Sunday, January 12, 2020
Christmas gaming 2 - Incident at Fearnley Whittingstall
The second of my games over Christmas this year was An Incident at Fearnley Whittingstall.
Richard Phillips has an excellent write up of the game over at his blog.
The renowned British scientist Barnes Mitchell-Whittle was spending the night in the village of that name in advance of a secret weapon test the following day.
A German glider-borne assault aimed to capture Mitchell-Whittle. He was to be extracted by sea, elements of the Brandenburg Regiment having captured the beach and cleared it of mines.
I have two favourite sets of WW2 skirmish rules, Arc of Fire from Tac Publications, and Chain of Command from Too Fat Lardies. CoC is great where each layer has a platoon to command but this game saw players commanding quite variously sized units and I thought AoF was the way to go.
Richard P commanded the Home Guard forces - a standing patrol in clifftop positions, and the platoon's ready reserve at the church hall. Sam had the two scientists and the section of Grenadier Guards assigned to protect them.
Rob and Andy took charge of the Germans. Rob was told he had three gliders with assault squads ordered to capture the scientists. Any had two squads that included some pioneers tasked with clearing and holding the route to the Beach.
Andy also had responsibility for the Brandenburgers and Kriegsmarine forces who would capture the beach and extract the German force.
We did the glider landings by means of the old method of throwing paper aeroplanes at the table and then substituting them with my resin DFS230 models. This went fine except that Andy's first glider landed right on top of the Home Guard position on the cliffs so the alarm was given somewhat early in the proceedings!
I'm afraid I was a little cruel to Rob. When he'd planned to use all three assault squads, I informed him that one of them had failed to arrive. This may or may not have had anything to do with the number of glider models I have!
The action at the clifftop turned into a fierce close-range firefight. The Fallschirmjaeger were thrown back to the hedge lining the clifftop road.
Meanwhile, the troops from Andy's second glider moved out to secure the road between the village centre and the cliffs.
Rob got his two gliders down in a nice tight landing zone and moved out towards the north side of Fearnley Whittingstall.
One of the German squads moved out to surround the village pub...
This proved to be a good move as the scientist (accompanied by Dr VR Smith of British Scientific Intelligence) had sneaked out of Rose Cottage (where the Grenadier Guards thought he was spending the evening).
The action in the village turned into a firefight between the Jaegers around the pub and the Home Guard at the Village Hall.
![]() |
| The Home Guard deploy their Northover Projector next to the Village Hall |
The Brandenburger mine clearing team discovered that the minefield was dummy.
And by the time the Brandenburger reached the path up from the beach their Fallschirmjaeger colleagues had driven off the Home Guard.
In the end the Germans had secured the route between the village and the beach but they were unable to drive off the Home Guard and the remains of the Grenadiers around the Village Hall. When we reached the end of the available time I decided to call it a narrow British victory.
Saturday, January 4, 2020
A large Frenchman
My mother-in-law gave me this 54mm figure at Christmas.
It was painted by an old friend of hers (now deceased) and she thought I would value it. It clearly means a lot to her.
I don't know the manufacturer but I believe he's a French fusilier (grenadier?) from the Republican Wars or possibly from the early Napoleonic period. Interestingly he appears to have a knife and spoon attached to his hat!
Unfortunately the metal is severely oxidised. I'm going to have to look into how best to clean it and repaint it if it's to survive.
It was painted by an old friend of hers (now deceased) and she thought I would value it. It clearly means a lot to her.
I don't know the manufacturer but I believe he's a French fusilier (grenadier?) from the Republican Wars or possibly from the early Napoleonic period. Interestingly he appears to have a knife and spoon attached to his hat!
Unfortunately the metal is severely oxidised. I'm going to have to look into how best to clean it and repaint it if it's to survive.
Saturday, December 28, 2019
Christmas Gaming - (Not) The Death of Gustavus Adolphus
Andy and Ron came over yesterday and we played The Pikeman's Lament with my recently completed Thirty Years War collection.
The battlefield was the extended version of the Lützen battlefield seen here previously. The Swedes will enter from the right and the Catholic League troops from the left. You can see that there are wisps of smoke and fog drifting across the field. These served only to block line of sight.
The unit in the centre of the board is Gustav Adolf, the King of Sweden, with his Life Drabants. That's Gustav, top left, in the picture below...
Ron was His Majesty for the day and also took on the role of Ensign Niels Broden of the Smålands Ryttare. Thus Ron had a one-unit company of Life Drabants, with the King rated as a "Lion of the North" and an "Inspirational Leader" and a five-unit company of Swedish horse (aggressive gallopers in the rules).
Jamie (as Ensign Per Lungmark) had the other Swedish company - six units of Östgöta Ryttare, also aggressive gallopers. This meant that all of the Swedish units had the 'Wild Charge' rule!
Andy, on the Catholic left, played Ensign Salvatore Avallone, hot-headed commander of a company of Piccolomini's Harkebusiers (two units of trotters and three of dragoons).
Finally, I took on the role of Ensign Johannes von Altburg commanding a company of Götzen's Cuirassiers (five units of elite trotters).
The picture below gives an idea of the size of the battlefield. We didn't need the extra leaf in the kitchen table this year!
The game began with the Catholics making no significant progress. As a result the King was able to make an ordered activation and move away from the enemy (I'd rather hoped he'd be sucked into the action from the start but no-one got close enough to activate his Wild Charge rule).
On the Catholic left, Avallone's dragoons advanced towards the rough ground...
...whilst von Altberg's cuirassiers advanced on a broad front to their right.
Thereafter, I think the phrase "confused cavalry melee" is an awfully apposite one. The Swedes, as is their won't, repeatedly threw themselves into headlong charges whilst the Catholics stood off and shot. In the picture below, the a three-man Swedish unit has just charged into the left-flank troop of my cuirassiers emerging from a fog-bank.
Thanks to their heavy armour (Stamina 4 in rules terms) the cuirassiers were remarkable solid performers.
Gustav fought bravely. An early personal challenge had seen him strike down Ensign Avellone and now he fought in melee against von Altberg's own troop. The latter's gold-plated steel armour didn't protect him from an unlucky blow (yes, I rolled snake eyes) and down he went.
By the end of the game, I think we had lost three of the five company commanders involved (Andy's, mine and Ron's). The dead outnumbered the living on this part of the Lützen battlefield.
In the end the victors were the dragoon elements of Piccolomini's Harkebusiers with all three units surviving if not intact then at least able to march off in formation.
Gustav Adolf survived as the last remaining figure of his unit as did Jamie's Per Lungmark.
The Pikeman's Lament includes a table to determine what happens to officers who fall as casualties during the game and I thought it might be interesting to find out.
Ensign Salvatore Avallone of the Catholic harkebusiers died a hero's death in single combat with the Swedish king. He was promoted posthumously to colonel before being buried with honours on the battlefield.
Ensign Niels Broden of the Smålands Ryttare, unhorsed in the fighting on the Swedish right, turned out to be only lightly wounded. He returned to the camp with an impressive scar and a good story to tell.
Johannes von Altburg's personal wealth perhaps played some part in his escape from the field. Although his cuirassiers have previously shown little regard for him, they did on this occasion drag his wounded body from the field and he lives to fight again.
The battlefield was the extended version of the Lützen battlefield seen here previously. The Swedes will enter from the right and the Catholic League troops from the left. You can see that there are wisps of smoke and fog drifting across the field. These served only to block line of sight.
The unit in the centre of the board is Gustav Adolf, the King of Sweden, with his Life Drabants. That's Gustav, top left, in the picture below...
Ron was His Majesty for the day and also took on the role of Ensign Niels Broden of the Smålands Ryttare. Thus Ron had a one-unit company of Life Drabants, with the King rated as a "Lion of the North" and an "Inspirational Leader" and a five-unit company of Swedish horse (aggressive gallopers in the rules).
Jamie (as Ensign Per Lungmark) had the other Swedish company - six units of Östgöta Ryttare, also aggressive gallopers. This meant that all of the Swedish units had the 'Wild Charge' rule!
Andy, on the Catholic left, played Ensign Salvatore Avallone, hot-headed commander of a company of Piccolomini's Harkebusiers (two units of trotters and three of dragoons).
Finally, I took on the role of Ensign Johannes von Altburg commanding a company of Götzen's Cuirassiers (five units of elite trotters).
The picture below gives an idea of the size of the battlefield. We didn't need the extra leaf in the kitchen table this year!
The game began with the Catholics making no significant progress. As a result the King was able to make an ordered activation and move away from the enemy (I'd rather hoped he'd be sucked into the action from the start but no-one got close enough to activate his Wild Charge rule).
On the Catholic left, Avallone's dragoons advanced towards the rough ground...
...whilst von Altberg's cuirassiers advanced on a broad front to their right.
Thereafter, I think the phrase "confused cavalry melee" is an awfully apposite one. The Swedes, as is their won't, repeatedly threw themselves into headlong charges whilst the Catholics stood off and shot. In the picture below, the a three-man Swedish unit has just charged into the left-flank troop of my cuirassiers emerging from a fog-bank.
Thanks to their heavy armour (Stamina 4 in rules terms) the cuirassiers were remarkable solid performers.
Gustav fought bravely. An early personal challenge had seen him strike down Ensign Avellone and now he fought in melee against von Altberg's own troop. The latter's gold-plated steel armour didn't protect him from an unlucky blow (yes, I rolled snake eyes) and down he went.
By the end of the game, I think we had lost three of the five company commanders involved (Andy's, mine and Ron's). The dead outnumbered the living on this part of the Lützen battlefield.
In the end the victors were the dragoon elements of Piccolomini's Harkebusiers with all three units surviving if not intact then at least able to march off in formation.
Gustav Adolf survived as the last remaining figure of his unit as did Jamie's Per Lungmark.
The Pikeman's Lament includes a table to determine what happens to officers who fall as casualties during the game and I thought it might be interesting to find out.
Ensign Salvatore Avallone of the Catholic harkebusiers died a hero's death in single combat with the Swedish king. He was promoted posthumously to colonel before being buried with honours on the battlefield.
Ensign Niels Broden of the Smålands Ryttare, unhorsed in the fighting on the Swedish right, turned out to be only lightly wounded. He returned to the camp with an impressive scar and a good story to tell.
Johannes von Altburg's personal wealth perhaps played some part in his escape from the field. Although his cuirassiers have previously shown little regard for him, they did on this occasion drag his wounded body from the field and he lives to fight again.
Thursday, December 26, 2019
Christmas Goodies 2019
Happy Christmas everyone! What did you get in the way of pressies?
Just a couple of gaming related acquisitions for me this year.
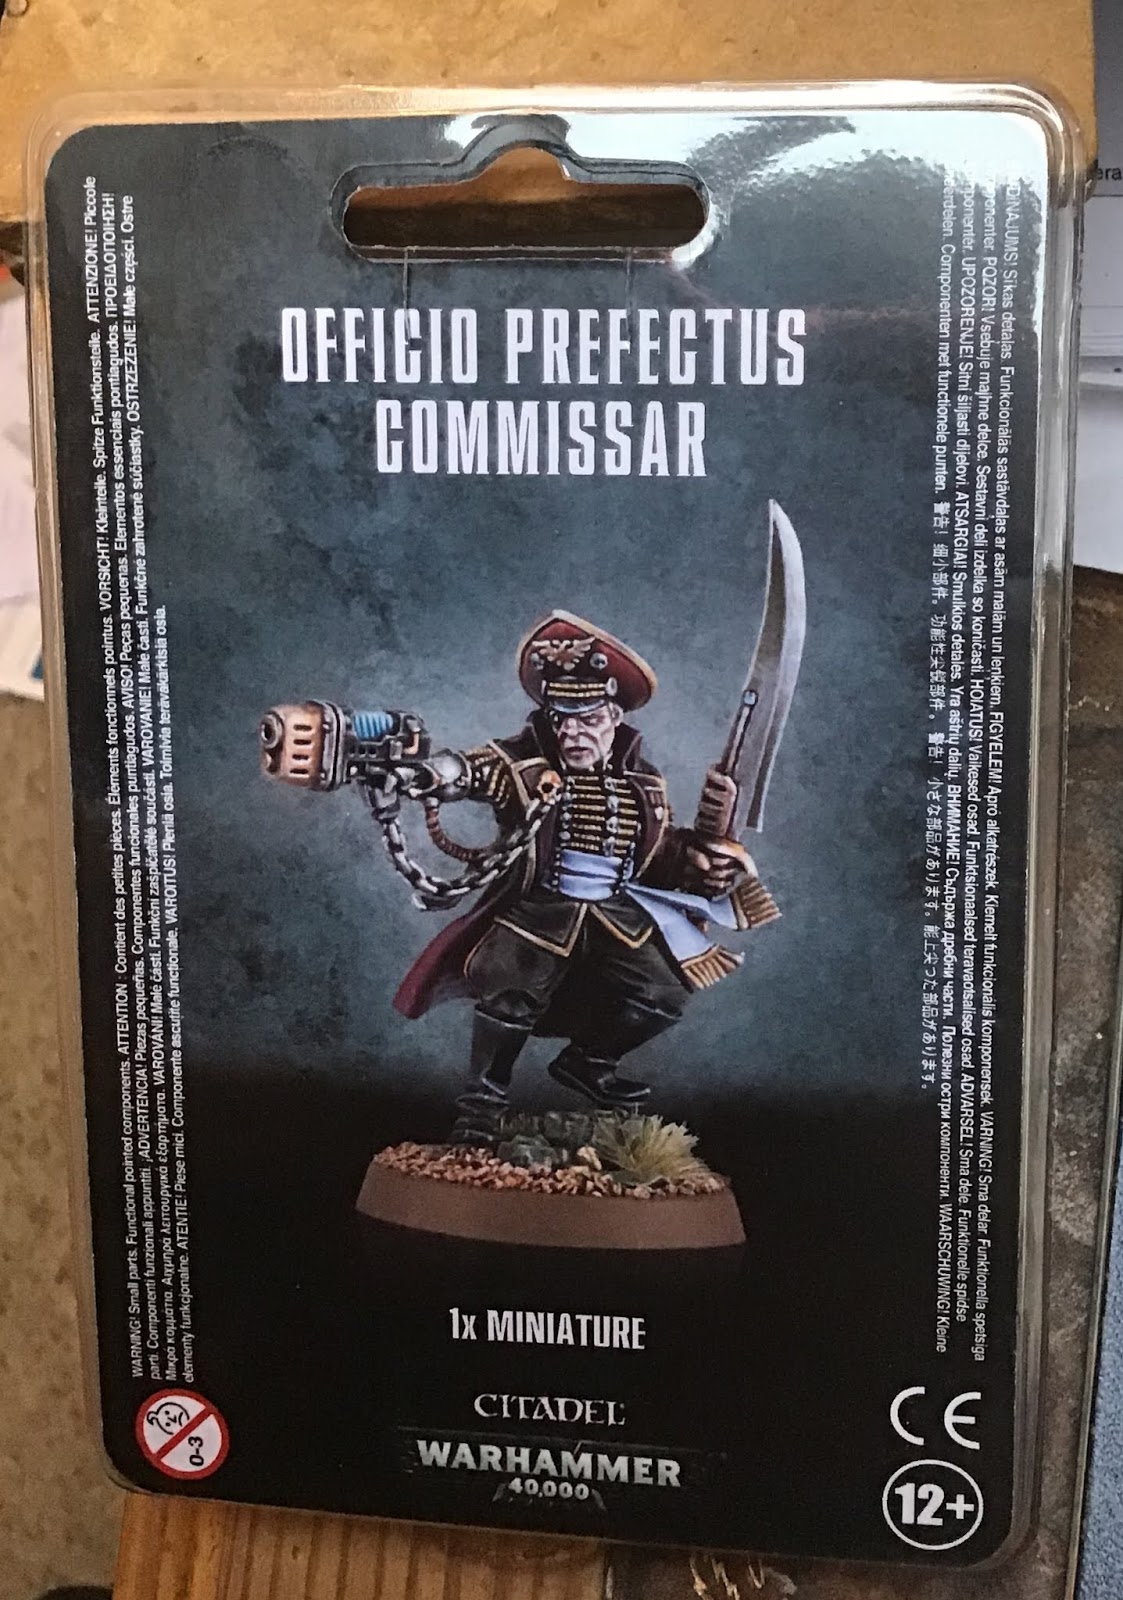
Somewhat out of my ordinary is this...
My Mum, bless her, doesn't really have a clue what kind of wargaming I do but she did pop into the local branch of GW and pick up the above figure. She kept the receipt so I can swap it for something else. I may see what I can trade it in for in the way of paint.
More my cup of mead is this gift from Jamie...
I've been considering Dux Britanniarum for some time as a way of using my Late Roman / Bacaudae figures. A bit of rules reading is called for, possibly followed by some rebasing!
Just a couple of gaming related acquisitions for me this year.
Somewhat out of my ordinary is this...
My Mum, bless her, doesn't really have a clue what kind of wargaming I do but she did pop into the local branch of GW and pick up the above figure. She kept the receipt so I can swap it for something else. I may see what I can trade it in for in the way of paint.
More my cup of mead is this gift from Jamie...
I've been considering Dux Britanniarum for some time as a way of using my Late Roman / Bacaudae figures. A bit of rules reading is called for, possibly followed by some rebasing!
Monday, December 16, 2019
Christmas Games 2019
As usual I've got a couple of games planned for the Christmas period.
First up is a first run-out for my 6mm Death of Gustavus Adolphus game.
This is to be run using The Pikeman's Lament by Dan Mersey and Michael Leck.
If we get too many players for the Gustavus Adolphus game (always tough to judge as people tend to sign up or drop out at the last minute) I'll run a parallel game of The Pikeman's Lament using by recently rebased (and still to be flocked) 15mm Samurai...
And finally, I intend to run a scenario called Incident at Fearnley Whittingstall, a Second World War skirmish using the Arc of Fire rules and set in the small Dorset village of that name. No more details at present to avoid spoiling any surprise but here's one of the village buildings that's currently on the workbench.
First up is a first run-out for my 6mm Death of Gustavus Adolphus game.
This is to be run using The Pikeman's Lament by Dan Mersey and Michael Leck.
If we get too many players for the Gustavus Adolphus game (always tough to judge as people tend to sign up or drop out at the last minute) I'll run a parallel game of The Pikeman's Lament using by recently rebased (and still to be flocked) 15mm Samurai...
And finally, I intend to run a scenario called Incident at Fearnley Whittingstall, a Second World War skirmish using the Arc of Fire rules and set in the small Dorset village of that name. No more details at present to avoid spoiling any surprise but here's one of the village buildings that's currently on the workbench.
Labels:
15mm,
20mm,
6mm,
Arc of Fire,
Pikeman's Lament,
WW2
Subscribe to:
Posts (Atom)


